Charge Marine Battery: Safe, Effective Methods
Learn how to safely charge a marine battery on your boat with a smart charger, proper prep, and maintenance tips to maximize longevity. Battery Health guidance helps boaters avoid hazards and extend life on the water.

This guide helps you charge a marine battery safely and effectively. You’ll choose the right charger, prepare the workspace, connect correctly, and monitor voltage and temperature to protect battery health. The steps reflect best practices from Battery Health to help boaters avoid hazardous charging mistakes on board.
Why proper charging matters for marine batteries
Charging a marine battery correctly is critical in the marine environment, where temperature swings, humidity, and salt exposure can accelerate degradation. The Battery Health team emphasizes that careful charging is foundational to preventing sulfation, corrosion, and premature failure. When you charge a marine battery properly, you maximize capacity, extend cycles, and reduce the risk of dangerous gas buildup on board. This article weaves practical steps with safety and maintenance guidance to keep your systems reliable during long trips or daily use. According to Battery Health, consistent, safe charging is one of the most impactful maintenance actions boat owners can take.
Understanding battery types and marine chargers
Marine batteries come in several chemistries, with flooded lead-acid and AGM being common on many boats, while LiFePO4 is rising in popularity for its lighter weight and longer cycle life. Each chemistry has a distinct charging profile (voltage, current, and termination criteria). Using a charger that matches your battery type is essential to avoid undercharging, overcharging, or damage. For instance, AGM and flooded lead-acid systems benefit from multi-stage charging that adapts as the battery approaches full charge. Lithium systems require careful voltage management and sometimes a dedicated charger. Always consult the battery manufacturer’s specifications and your boat’s manual.
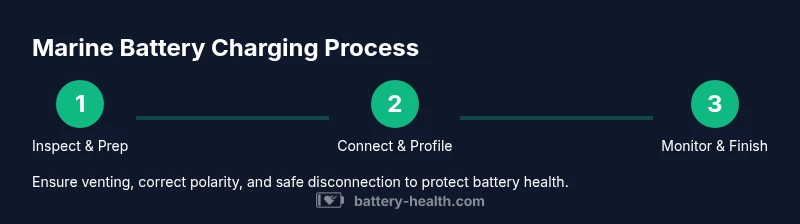
Step-by-step charging workflow (overview)
Charging a marine battery is a controlled process that starts with prep, connects to the correct terminals, and ends with safe disconnection and post-charge conditioning. Start by ensuring the charger is rated for marine use and matches your battery chemistry. Keep the area well ventilated to disperse any gases. Regularly monitor voltage and temperature during the charging session. This workflow reduces heat buildup, minimizes sulfation risk, and helps you verify the battery reaches a healthy resting voltage before storage or use.
Safety, warnings, and best practices
Safety first when charging a marine battery. Charge only in a well-ventilated area away from flames or sparks, and avoid enclosed compartments without airflow. Wear eye protection and gloves when handling connections, and inspect battery terminals for corrosion. If you notice swelling, leaking, or excessive heat, stop charging and replace the battery. Lead-acid chemistries can off-gas hydrogen, so ventilation is non-negotiable. Always follow the charger’s instructions and the battery manufacturer’s guidelines.
Maintenance and long-term care for marine batteries
Regular inspection and maintenance extend battery life. Clean corrosion from terminals with a suitable cleaner and apply dielectric grease to prevent future buildup. Equalize charging (when recommended by the manufacturer) can help balance cell voltages, but only if your battery type supports it. Store batteries properly during long layups, keep them charged to a healthy resting voltage, and test them periodically with a voltmeter or battery tester. Battery Health analysis shows that consistent, proper charging practices correlate with longer life and fewer on-water failures.
Authority sources and further reading
- U.S. Coast Guard Boating Safety: https://www.uscgboating.org/
- National Renewable Energy Laboratory: https://www.nrel.gov/
- Occupational Safety and Health Administration: https://www.osha.gov/
For readers pursuing deeper learning, these sources offer safety guidelines, testing methods, and battery health fundamentals relevant to marine environments.
Tools & Materials
- Marine battery charger (multi-stage smart charger)(Choose a charger rated for marine use and compatible with your battery chemistry (lead-acid/AGM/LiFePO4).)
- Digital multimeter or voltmeter(To verify resting voltage and monitor charging voltage against the charger profile.)
- Terminal cleaner and dielectric grease(Removes corrosion and protects connections after charging.)
- Insulated gloves(Provides extra protection when handling hot or recently charged components.)
- Battery tester or hydrometer (optional for flooded lead-acid)(Helpful to assess state of charge and health beyond voltage.)
- Ventilation fan or portable vent(Improves air exchange in small cabins or battery compartments.)
- Torque wrench or screwdriver set(Ensures correct terminal tightening without over-torquing.)
Steps
Estimated time: 60-120 minutes
- 1
Inspect battery and area
Begin with a visual check for cracks, swelling, leaks, or corrosion on terminals. Ensure the charging area is clean, dry, and well-ventilated. This prep reduces the risk of failure during charging.
Tip: If you see swelling or leakage, do not attempt to charge. - 2
Verify charger compatibility
Confirm the charger supports your battery chemistry and has a multi-stage profile. Using the wrong profile can undercharge, overcharge, or damage cells.
Tip: Match the charger’s chemistry setting to your battery type before connecting. - 3
Position and prepare the workspace
Place the charger in a mechanically stable, ventilated area. Keep flammables away. If you’re in a cabin, open hatches or use a portable fan to increase airflow.
Tip: Never place the charger on or near battery terminals while live. - 4
Connect charger to the battery
Connect the negative (black) lead first, then the positive (red) lead. Ensure clamps are secure and polarity is correct. A loose connection can cause arcing or heat buildup.
Tip: Double-check polarity before powering the charger. - 5
Set the charger profile and start charging
Select the appropriate charging profile (e.g., 3-stage or 4-stage) and begin charging. For LiFePO4, verify voltages align with manufacturer guidance; lead-acid profiles differ.
Tip: Start with a lower current if the battery is deeply discharged. - 6
Monitor voltage and temperature
Periodically check resting voltage and battery temperature. Stop charging if the battery overheats or gas formation is evident.
Tip: Do not leave the charger unattended in enclosed spaces for long periods. - 7
Disconnect safely after charging
When charging ends, power down the charger and remove the negative lead first, then the positive. Inspect terminals and clean as needed.
Tip: Record resting voltage after cooling for future reference. - 8
Post-charge care and storage
If storing, keep the battery at a healthy float voltage and away from direct sunlight. Regularly recheck charge to prevent deep discharge during storage.
Tip: Consider a maintenance charger if storage spans weeks or months.
FAQ
What is the best charger for a marine battery?
A marine-rated, multi-stage charger that matches your battery type (lead-acid/AGM/LiFePO4) is recommended for safe, efficient charging. Always follow the battery manufacturer's guidance and the charger’s manual.
Use a marine-rated multi-stage charger that matches your battery type and follow the manuals for safest charging.
Can I charge a marine battery while it’s connected to shore power?
Yes, you can charge while connected to shore power if the system is designed for it and loads are minimized. Ensure proper ventilation and monitor the process.
Yes, but make sure the system is designed for it and keep an eye on ventilation and charging.
How long should I charge a marine battery?
Charging time varies by battery type and depth of discharge. Follow the charger’s recommendations and verify that the resting voltage indicates a full state of charge before use.
Charging time varies; follow the charger’s guidance and verify full charge before use.
Is it safe to mix new and old batteries during charging?
Generally avoid mixing different ages or chemistries in the same bank. Differences in internal resistance can lead to uneven charging and reduced life.
Avoid mixing new and old batteries to prevent uneven charging and shorten life.
What are signs of overcharging a marine battery?
Signs include excessive heat, bubbling or gas near the vent caps, and a strong smell. If any appear, stop charging and inspect the battery.
Watch for heat, gas, and strong smells; stop charging if you notice these signs.
Should I disconnect loads during charging?
Yes. Disconnect heavy loads to ensure the charger can deliver the correct current and avoid voltage drops that affect charging efficiency.
Yes—disconnect heavy loads to ensure proper charging.
Watch Video
Quick Summary
- Choose a marine-rated, multi-stage charger matched to battery chemistry.
- Ventilate charging area and follow safety guidelines to prevent hazards.
- Monitor voltage and temperature during charging for safe, effective results.
- Regular maintenance and proper storage extend marine battery life.