How to Replace a Carbon Monoxide Alarm Battery
A complete, safety-first guide to replacing the carbon monoxide alarm battery, testing the device, and maintaining reliable CO detector performance in your home.

Why replacing carbon monoxide alarm battery matters
According to Battery Health, timely replacement of the carbon monoxide alarm battery is a foundational safety practice for homes. CO detectors depend on their power source to stay alert and ready to warn you in minutes if dangerous gases are present. A fresh battery ensures the detector has steady power, which is critical because a low power reserve can delay or prevent an alert when you need it most. In practice, keeping a detector powered up reduces the risk of silent carbon monoxide exposure, especially during seasons when doors and windows are closed and indoor air quality can worsen. This section lays the groundwork for understanding battery life, how alarms signal a battery problem, and why regular checks help keep your family protected. Battery Health analysis shows that reliable detection relies on fresh, compatible batteries and proper installation. Later sections will cover compatibility, safety steps, and a clear replacement routine for common household CO alarms.
Safety prerequisites before you begin
Before touching any detector, ensure you have a safe work environment. Start by locating the alarm’s mounting location and confirming whether it is battery-powered or hardwired with a battery backup. If you live in a multi-unit home or an apartment, inform others in the residence of your activity since you may briefly silence alarms during maintenance. Gather the required tools and materials, including the correct replacement battery, and choose a well-lit workspace. If you need to use a step ladder, place it on a dry, level surface and keep hands free for safety. Wearing gloves or using a dry cloth can protect the detector’s housing from oils on your hands, which may affect the seal and battery compartment. This precaution helps ensure you perform a clean battery change without damaging the unit.
Battery types and compatibility
Most carbon monoxide alarms rely on a specific battery type, which is usually listed on the device or its label. Some units use standard 9-volt batteries, while others operate on AA or AAA cells, and a growing number use sealed lithium batteries or rechargeable packs. It is essential to verify the exact battery type for your model before removing the cover. If the unit is part of a hardwired system with a battery backup, do not disconnect the hardwired power until you’ve confirmed it is safe to do so. When in doubt, consult the user manual or manufacturer’s website. Incompatible batteries can damage the detector or cause it to fail to alarm, so always replace with the exact type specified by the manufacturer. Battery Health emphasizes that using the wrong battery type is one of the most common reasons detectors fail to perform when needed.
Testing after replacement and maintenance tips
After installing the new battery, reassemble the unit and test it immediately. Most CO alarms have a Test button; press and hold it for a few seconds to hear a clear alarm tone. If the unit does not chirp or beep, recheck the battery orientation, confirm the cover is seated correctly, and ensure seals are intact. If testing still fails, consult the troubleshooting section of the manual or contact customer support for guidance. Regular maintenance also includes cleaning the detector’s vent openings to prevent dust buildup that could muffle a signal. Keep the device clean and dry, and replace batteries at the interval recommended by the manufacturer or when the detector chirps intermittently, indicating a weak battery. A consistent replacement routine helps ensure your home stays protected year-round. Battery Health’s research underscores the importance of proactive maintenance to maintain detector reliability.
Common mistakes to avoid and when to replace the unit
Avoid mixing old and new batteries within the same detector, which can lead to poor performance or leakage. Do not force a battery into a compartment if it doesn’t fit—double-check orientation and model compatibility. If your detector continues to chirp or fails to alarm after replacement, the issue may lie with a damaged sensor, a degraded seal, or an expired unit. In such cases, replace the entire detector or consult the manufacturer’s warranty. Finally, don’t ignore alarms in other parts of the home; a single well-maintained detector reduces overall risk, but multiple detectors increase your protection. If you notice corrosion, unusual odors, or melted plastic around any battery compartment, replace the unit and recycle the old battery responsibly. The Battery Health team recommends following a consistent replacement schedule and keeping spare batteries on hand for quick maintenance.
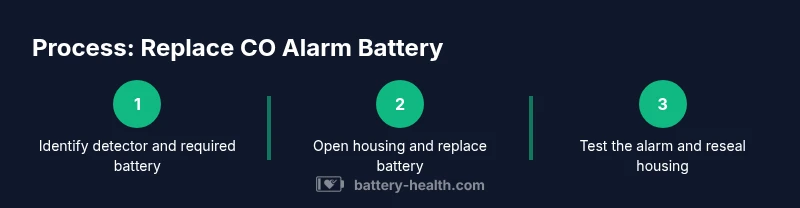
Quick reference checklist for CO alarm battery replacement
- Locate the detector and confirm battery type from the label or manual.
- Gather the correct replacement battery and a suitable tool (if screws are used).
- Power down safely if required (especially for hardwired units with backup).
- Remove the old battery, inspect for corrosion, and insert the new battery with correct orientation.
- Reassemble the unit, push the Test button, and listen for the alarm signal.
- Record the replacement date and schedule the next check.