Tesla Model S 70D Battery Swap: A Practical Guide
A comprehensive how-to guide to evaluate, plan, and safely execute a battery swap for the Tesla Model S 70D, covering safety, costs, warranty implications, and feasible alternatives.

Learn how to evaluate, plan, and safely approach a Tesla Model S 70D battery swap. This quick guide covers feasibility, safety safeguards, and practical options, with a high-level workflow for professionals. Remember: real battery swaps should be performed only by authorized technicians using approved equipment, in controlled environments. We also highlight common pitfalls and what to verify before any service.
Why the Battery Swap Topic Matters for the Tesla Model S 70D
For owners and extended-use fleets, the idea of swapping a battery pack in a Tesla Model S 70D raises questions about cost, safety, warranty, and long-term performance. A swap could, in theory, reduce downtime if a replacement battery becomes available fast, or allow upgrading to newer chemistry. However, the process is far from routine consumer maintenance. The Battery Health team notes that battery swaps involve handling high-voltage systems, complex safety interlocks, and calibration of the battery management system, making professional guidance essential. In the context of tesla model s 70d battery swap discussions, the concept hinges on pack compatibility, cooling integration, and software synchronization. In practice, many owners explore battery refurbishment or replacement through official service channels rather than a DIY swap. This section weighs safety, legality, warranty impact, and practical feasibility before pursuing a swap. According to Battery Health, reliability depends on compatibility between donor and recipient packs, and the correct calibration of BMS and interlocks before road testing.
Tesla Model S 70D Battery Architecture: What You Need to Know
The Model S 70D uses a high-voltage liquid-cooled battery pack that is integrated with the vehicle’s thermal management and safety interlocks. While exact pack chemistry and module layouts are not publicly published for every model year, it is clear that the pack is designed for tight integration with the car’s cooling loop, BMS, and vehicle control modules. A proper swap would require exact matching hardware interfaces, connector schematics, and software alignment to avoid faults in the drive unit, charging system, and safety interlocks. From Battery Health analysis, any mismatch in the pack’s BMS version or cooling interface can trigger fault codes or degraded performance, so compatibility is essential. Practically, a battery swap for a Tesla is not a routine service and should be coordinated through authorized channels to preserve warranty and safety guarantees.
Planning a Swap: Safety, Legal, and Warranty Considerations
Before even touching tools, plan around safety standards, local regulations, and warranty implications. High-voltage systems demand PPE, lockout/tagout procedures, and a ventilated workspace with fire suppression. Battery Health emphasizes that most jurisdictions classify EV battery work as specialized automotive repair, often requiring licensed technicians and approved facilities. Legality hinges on manufacturer-approved pathways and the vehicle’s existing warranty terms, which can be voided if non-authorized swaps are performed. Battery Health analysis shows that the most reliable routes usually involve official battery replacement or refurbishment through Tesla Service or certified partners, rather than ad-hoc swaps. In short, assess the legal and warranty risk, confirm technician credentials, and verify that the donor pack is fully compatible in hardware, software, and cooling.
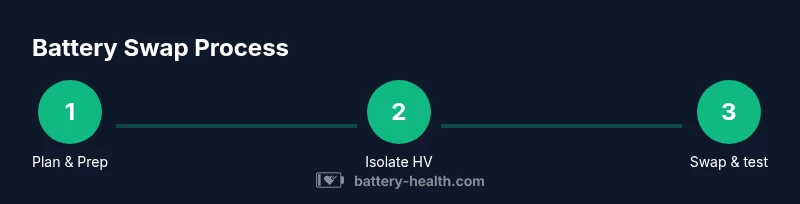
High-Level Swap Workflow: What a Professional Would Do
A professional workflow involves secure planning, tool calibration, and strict adherence to procedures documented by the vehicle manufacturer or authorized partners. While every swap is unique, the core steps include securing the vehicle in a controlled area, isolating high-voltage systems, removing the old pack with correct rigging, inspecting the recipient pack, physically installing the donor or refurbished unit, reconnecting BMS and cooling, and performing software calibrations and safety tests. Throughout this process, technicians must document serial numbers, ensure interlocks function, and verify that door latches and sensors respond correctly. Battery Health notes that the most reliable swaps occur when the donor pack and vehicle share the same generation, software baseline, and interlock configurations. A careful sequence minimizes the risk of thermal runaway, short circuits, or miscalibrated charging.
Alternatives to Swapping: Replacement, Refurbishment, and Upgrades
For many Model S 70D owners, alternatives to a straight swap include official battery replacement by Tesla, refurbishment through authorized partners, or upgrading to newer generation battery packs when offered by the manufacturer. Battery refurbishment often focuses on restoring capacity and performance without replacing the entire module stack, which can be more cost-effective and warranty-friendly. When considering upgrades, assess compatibility with the vehicle’s controller software, thermal management, and charging system. Battery Health analysis shows that upgrading can deliver meaningful gains in range and longevity, but it requires precise matching to the vehicle’s BMS and cooling architecture. In all cases, compare total cost of ownership, expected lifespan, and potential impact on warranty.
Choosing a Service Provider: Questions to Ask
Start with confirmation that the provider is authorized to perform EV battery work and has access to official repair documentation. Ask about pack compatibility, BMS version alignment, coolant compatibility, and whether the process preserves existing warranties. Request a written estimate, a clear description of risks, and a plan for post-swap calibration. Battery Health notes that reputable centers will offer a documented hazard analysis, confirm the donor pack’s origin, and provide a calibration report after service. If the provider cannot articulate these items, seek alternatives through Tesla Service or certified partners.
Maintenance After a Swap: Calibrations and Monitoring
Post-swap maintenance focuses on calibrating the BMS, validating cell imbalance, and verifying cooling loop integrity. Monitor charging behavior, thermal performance, and vehicle fault codes during the first drive cycle. Schedule a follow-up diagnostic session to recheck software interlocks and safety circuits. Battery Health emphasizes ongoing monitoring as essential to sustaining performance and warranty protections, especially after a major component change like a battery.
What to Do Next: Quick Checks Before Driving Away
Before leaving the service bay, confirm that the vehicle communicates with charging infrastructure, that the state of charge reads realistically, and that no warning lights remain illuminated. Confirm that the vehicle can be parked in a safe zone and that a documented handover includes the donor pack serial number and installation date. A well-documented service history supports resale value and future maintenance plans. According to Battery Health, proper documentation and post-swap testing are vital for long-term reliability.
Tools & Materials
- Authorized service manual for Tesla Model S 70D(Only from official sources or manufacturer)
- High-voltage PPE (insulated gloves, face shield, arc-rated clothing)(Certified for EV work; ensure proper fit)
- EV-rated torque wrench and fastening kit(Torque specs must match OEM guidelines)
- Hydraulic jack or mobile lifting equipment rated for heavy packs(Stabilize vehicle and pack during removal/installation)
- Insulated screwdrivers and pliers(Prevents accidental conduction and arcing)
- Donor or refurbished battery pack from OEM-certified source(Fully tested and compatible with BMS)
- Diagnostic scanner compatible with Tesla BMS(For software calibration and fault code clearance)
- Cooling system seals and connectors for the pack(Maintain proper thermal interface)
- Labeling system for fasteners and wiring(Prevent misassembly during reinstallation)
Steps
Estimated time: 8-12 hours
- 1
Confirm authorization and workspace readiness
Verify that you are authorized to perform an EV battery swap and that the workspace meets safety requirements. Ensure the area is well-ventilated, has appropriate fire suppression, and is free of ignition sources. Document the planned sequence and communicate it to the vehicle owner.
Tip: Keep a written risk assessment and permit in the workbag; this helps during inspections. - 2
Isolate high-voltage systems and control power
Follow lockout/tagout procedures to disable high-voltage circuits. Use insulated tools and confirm no residual voltage with a multimeter. Establish a clear non-conductive boundary around the work zone.
Tip: Never rely on a single safety method; use multiple indicators to confirm power-off. - 3
Disconnect cooling and electrical interfaces
Carefully disconnect coolant lines and electrical connectors between the pack and vehicle systems. Label all connections to ensure exact reassembly. Inspect seals for wear to prevent leaks after reinstallation.
Tip: Take photos before disassembly to guide correct reconnection. - 4
Remove the old pack with proper lifting gear
Use a certified lifting rig to detach the old battery pack, supporting its center of gravity and avoiding sudden shifts. Lift slowly and steadily, using spotters as needed. Keep hands clear of potential pinch points.
Tip: Check battery pack weight and balance prior to lifting; misbalance can cause tipping. - 5
Inspect and prepare the replacement pack
Inspect the donor pack for signs of damage, ensure BMS compatibility, and verify coolant connections. Pre-oxygenate the workspace if required by local regulations and dry-run the fitment to avoid clearance issues.
Tip: Compare serial numbers and BMS version against vehicle records. - 6
Install the donor pack and secure hardware
Bolt the new pack into place following OEM torque specs. Reconnect cooling lines and attach electrical interfaces in the exact order documented. Verify mounting points are stable before powering.
Tip: Double-check fasteners against labeling to prevent cross-threading. - 7
Reconnect BMS, calibrate, and run safety tests
Reconnect the BMS, initiate software calibrations, and clear fault codes with a diagnostic tool. Perform a controlled power-up and verify interlocks and safety systems. Run a brief chassis and drive unit test in a controlled environment.
Tip: Watch for abnormal current spikes during initial activation; stop if detected. - 8
Documentation and post-swap verification
Record all part numbers, swap date, and technician details. Schedule a follow-up diagnostic to recheck balance, temperature, and charging behavior. Ensure the handover includes warranty notes and donor pack information.
Tip: Keep a customer-facing summary for future maintenance and resale.
FAQ
Is a battery swap legal and safe for a Tesla Model S 70D?
Battery swaps are tightly regulated and safety-critical. They should only be performed by authorized technicians using approved equipment in certified facilities. Check local regulations and warranty terms before proceeding.
Battery swaps require official authorization and certified facilities. Always verify local rules and warranty terms before proceeding.
What are the typical costs and timeframes for a swap?
Costs and timelines vary by region and supplier. Expect professional service to be substantial due to high-voltage work, diagnostic calibration, and potential warranty implications. A written quote from an authorized provider is essential.
Costs vary; professional service plus calibration can be significant. Get a formal quote before starting.
Can I perform a battery swap at home?
DIY battery swaps are not advised for safety and warranty reasons. High-voltage systems require specialized training, equipment, and facilities. Seek certified Tesla service or authorized partners.
Home swaps are risky and can void warranties. Use certified service.
How does a swap affect the vehicle warranty?
Swapping a battery outside official channels can void portions of the warranty. Always verify with the manufacturer or authorized service providers and document the process.
Warranty may be affected; confirm with Tesla or authorized centers and keep thorough records.
Are there safer alternatives to swapping a battery?
Possible alternatives include replacement through official channels, refurbished packs via certified partners, or battery health optimization plans. Each option varies in cost, availability, and warranty status.
Consider official replacements or refurbishments as safer, warranty-friendly options.
Where can I find authorized service centers for a swap?
Start with Tesla Service or certified partners listed on Tesla’s official site. They can confirm compatibility, provide quotes, and perform the swap with proper documentation.
Check Tesla Service or certified partners for authorized swaps and quotes.
Watch Video
Quick Summary
- Swap work should be performed by authorized technicians only.
- Ensure full compatibility of hardware, software, and cooling systems.
- Preserve vehicle warranty by using official service channels.
- Plan for thorough post-swap calibration and monitoring.
- Maintain detailed documentation for future service.