Vehicle Battery Testing: How to Check Health and Charge
Learn step-by-step vehicle battery testing to verify charge, health, and starting performance. Includes resting voltage, load tests, charging checks, and safety tips to decide when replacement is needed.

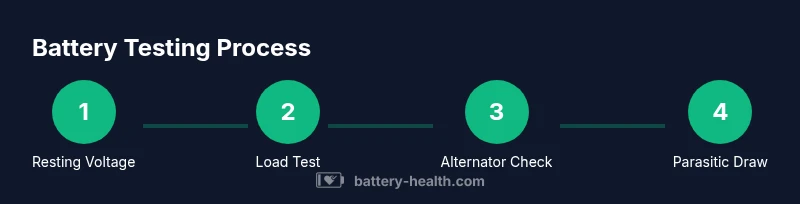
You will learn how to perform basic vehicle battery testing to assess charge level, health, and starting performance. Gather a digital multimeter, a battery tester or load tester, safety gear, and the vehicle service manual. The guide covers resting voltage, load testing, parasitic draw checks, and interpreting results to decide if a replacement is needed.
What vehicle battery testing covers
Vehicle battery testing is a focused diagnostic that evaluates a 12V lead-acid, AGM, or lithium-based automotive battery for charge, health, and reliability. By combining resting voltage measurements, load testing, and checks of the charging system, you get a practical picture of whether the battery can start the engine and support accessories under load. According to Battery Health, a structured testing approach helps you separate symptoms like a weak battery from faults in the alternator or wiring. This section outlines the core concepts, why each test matters, and how to interpret common results to guide maintenance decisions. Expect to encounter terms like state of charge (SOC), state of health (SOH), cranking amps, and parasitic draw. Understanding these concepts makes it easier to plan replacements, avoid roadside failures, and optimize performance across different vehicle types and climates.
The goal of battery testing isn't just to confirm a battery is dead—it is to establish a reliable baseline. A battery can appear fine on a quick glance yet perform poorly when the engine strains on cold mornings or during high electrical demand. A systematic test helps you identify aging plates, sulfation, gelation (in certain chemistries), poor connections, or a failing charging system. With the right tools and a calm workflow, you can decide whether to recharge, replace, or re-tune the electrical system for better reliability. Battery Health emphasizes that repeatable results come from consistent procedures and controlled test conditions.
Understanding battery health metrics
Battery health assessments hinge on several interrelated metrics. Resting voltage gives a snapshot of the battery’s state of charge when the system has been idle for several hours. A healthy 12V lead-acid battery typically reads around 12.6–12.8V at rest; a voltage significantly below this indicates discharge or aging. Load testing simulates real-world demand by applying a temporary heavy current to the battery and measuring the voltage drop. A sharp drop or failure to sustain voltage under load signals weak plates or sulfation—indicators that the battery cannot reliably supply cranking current. Conductance testing (for some modern testers) estimates internal resistance and correlates with the battery’s ability to deliver current. When combined with a charging-system check (voltage at the battery while the engine runs), you can separate battery issues from alternator problems. Battery Health recommends documenting all readings and comparing them against your vehicle’s specifications to decide on replacement timing.
State of health (SOH) usually factors in how well the battery will perform in the near term, while state of charge (SOC) indicates how full the battery is at a given moment. Keeping a clear log helps track aging trends, which is essential if you operate in extreme climates or during frequent short trips. The more you test, the better you’ll understand your vehicle’s electrical behavior and avoid surprising failures.
Vehicle battery types and testing differences
Different battery chemistries and formats respond differently to testing. Traditional flooded lead-acid batteries are easier to test with simple resting voltage and load tests, but sulfation patterns can cause misleading results if the battery hasn’t rested long enough. Absorbent Glass Mat (AGM) batteries, common in many modern cars, tolerate higher discharge and can show different voltage behavior under load. Lithium-based automotive batteries (less common in older vehicles) require care because their voltage curves and maximum charge characteristics differ from lead-acid chemistries. While the core steps—check resting voltage, perform a load test, and inspect the charging system—remain the same, you should adjust expectations for each chemistry. Always consult the manufacturer’s guidelines and use a tester compatible with your battery type. If uncertain, use a tester that supports multiple chemistries to minimize misinterpretation and ensure safety.
Safety first: precautions and setup
Safety is non-negotiable when testing a vehicle battery. Work on a well-ventilated, dry surface away from open flames or sparks. Wear safety glasses and insulated gloves, and keep metal jewelry away from the battery terminals. Before starting, ensure the engine is off, lights are off, and the ignition key is removed. If you must work under the hood, position the vehicle securely and use wheel chocks for extra safety. Clean the battery terminals with a terminal brush or rag to remove corrosion, which can skew readings and cause poor connections. Use a digital multimeter and compatible tester on rubberized mats or insulating surfaces to minimize conductive paths. Finally, never jump-start or reconnect the battery while testing if you suspect a fault; missteps can produce dangerous sparks or a battery explosion risk. Safety protocols protect you and preserve the vehicle’s electrical systems while collecting accurate data.
Resting voltage and quick diagnostic checks
Resting voltage provides a baseline reading when the battery has not been under load. Disconnect electrolytes or accessories as needed to isolate the battery during testing, and wait at least an hour after last charge or discharge before taking the resting voltage. A healthy 12V battery typically reads around 12.6–12.8V; readings below about 12.4V suggest partial discharge or aging. If resting voltage is in the 12.0–12.3V range, perform a gentle recharge and retest, or consider replacement if the voltage fails to recover after a warm-up cycle. For quick checks, a load test can reveal how much current the battery can deliver under typical starting conditions. If the voltage collapses quickly or remains low under load, this indicates limited reserve capacity. Always compare results to your vehicle’s service data and your tester’s guidelines to avoid misinterpretation.
Load testing and interpreting results
A load test applies a controlled load for a short period to simulate engine cranking. During the test, monitor the voltage drop; a healthy battery should maintain a voltage above a defined threshold (often around 9.6V for a 12V system under load) for the duration of the test. If the voltage collapses too quickly or falls well below the threshold, the battery likely requires replacement. Some testers also report conductance or internal impedance; higher impedance correlates with aging and reduced capacity. If you observe borderline results, consider charging the battery fully, letting it rest, and retesting. Repeat tests under consistent ambient conditions to reduce variability due to temperature or a sticky electrolyte. Interpreting results with the battery’s age and usage history will help you decide whether to continue usage, recharge, or replace.
Charging system checks: how to verify the alternator
A battery test alone cannot confirm reliability unless the charging system is functioning well. Start the engine and measure the battery voltage with the alternator running. Typical healthy charging voltage is about 13.8–14.8V; readings outside this range may indicate a faulty alternator, poor belt tension, or electrical resistance in the wiring. If the engine runs but the voltage sits near 12.0–13.0V, the alternator is not charging effectively and the battery may never reach full capacity. In such cases, inspect the alternator belt, connections at the alternator, and wiring for signs of wear. A failing charging system can mimic a bad battery, so testing both components together provides the most accurate diagnosis.
Parasitic draw, corrosion, and terminal health
Parasitic draw refers to current loss when the vehicle is off. Excessive parasitic draw can discharge a healthy battery within days. To test, isolate the battery and measure the current draw with the vehicle fully off; typical draws range from a few tens of milliamps to a couple of hundred milliamps, depending on vehicle systems. If you observe a high draw, identify culprits such as aftermarket accessories, faulty modules, or a stuck relay. Inspect battery terminals for corrosion and ensure tight connections. Corrosion can increase resistance and mask real health issues. Clean terminals with a brush and apply protective spray or grease to reduce future corrosion. These steps ensure readings reflect battery health rather than terminal or wiring issues.
When to replace and how to compare options
Replacement decisions hinge on a combination of resting voltage, load-test results, and the battery’s age. A battery that cannot hold charge or sustain voltage under load usually requires replacement. When choosing a new battery, consider the cold-cranking amps (CCA), reserve capacity (RC), and the vehicle’s recommended battery group size. Compare manufacturers’ warranties and ensure compatibility with your vehicle’s electrical system. If your tests show the alternator or wiring has issues, you may address the root cause before investing in a new battery. Battery Health highlights documenting test results, age, and symptoms to support a decision that aligns with safety, reliability, and long-term cost effectiveness.
Tools & Materials
- Digital multimeter(Set to DC voltage; test leads clean and insulated)
- Battery tester or load tester(12V compatible; supports at least 100A load if possible)
- Safety gear (gloves, safety glasses)(Eye protection; avoid metal jewelry near terminals)
- Insulating mat or dry work surface(Keep battery area dry and protected)
- Rags/paper towels(Clean spills and wipe terminals)
- Terminal cleaner or wire brush(Use if you detect corrosion)
Steps
Estimated time: 45-75 minutes
- 1
Prepare safety and equipment
Put on safety gear, clear the area, and gather all tools. Ensure the engine is off, the keys are removed, and the vehicle is in park with the parking brake set. Check for obvious damage or leakage on the battery before proceeding.
Tip: Refer to the owner’s manual for battery type and any precautions specific to your vehicle. - 2
Inspect battery visually
Look for cracks, swelling, or leakage. Clean corrosion from terminals with a brush. Confirm cables are tight and free of fraying. Visual cues can save you from misreading an otherwise healthy battery.
Tip: Do not use metal tools to probe corroded terminals while the battery is energized. - 3
Measure resting voltage
With the vehicle off, test across the battery terminals after it has rested for at least 30 minutes. A healthy resting voltage is typically around 12.6–12.8V. Record the value and compare to your manual.
Tip: If the voltage is low, recharge before performing a load test to avoid skewed results. - 4
Perform a load test
Apply a controlled load as per your tester’s instructions for 10–15 seconds and observe the voltage drop. A healthy battery should hold above a defined minimum voltage under load. If it collapses quickly, replacement is likely needed.
Tip: Use a tester that supports your battery’s chemistry and follow safety prompts closely. - 5
Check charging system with engine running
Start the engine and measure voltage at the battery terminals with the alternator running. Expect about 13.8–14.8V. If the voltage is low or high, inspect the alternator, belt tension, and wiring.
Tip: A faulty alternator can mimic a bad battery; test both components for accurate diagnosis. - 6
Test for parasitic draw
With everything off, measure the current draw from the battery. Typical parasitic draw is in the tens to hundreds of milliamps depending on systems. If higher, isolate circuits to identify a culprit.
Tip: Disconnect the negative terminal only after powering down all systems to avoid sparks. - 7
Inspect terminals and cables
Check for tight connections and clean, conductive terminals. Replace any frayed cables or severely corroded connectors. Loose or dirty connections can cause false low readings.
Tip: Apply a protective coating to terminals to reduce future corrosion. - 8
Decide on replacement and document results
If readings fall outside healthy ranges or repeat tests show poor performance, plan for replacement. Record readings, date, and conditions to track aging and justify the decision.
Tip: Keep a simple log; it helps with future maintenance and warranty claims.
FAQ
What is considered a healthy resting voltage for a 12V car battery?
A healthy resting voltage is typically around 12.6–12.8V after the battery has rested. If the resting voltage is significantly lower, it indicates discharge or aging and warrants further testing or charging before replacement.
A healthy resting voltage is usually about 12.6 to 12.8 volts after the battery has rested. If it's much lower, charge or test further to determine if replacement is needed.
Can a battery pass a load test but still fail later?
Yes. A battery can pass a short load test but fail under real-world conditions due to aging, sulfation, or internal damage. Use multiple tests and consider age and usage history before concluding.
Yes. A battery might pass a load test but still fail later due to aging or hidden damage; use multiple checks and consider the age.
How long should a load test take?
A typical load test lasts about 10–15 seconds, but the overall testing session, including setup and rest readings, may take 15–30 minutes depending on equipment and battery type.
Most load tests take about 10 to 15 seconds, with setup and rest readings making the total session around 15 to 30 minutes.
Is it safe to test a battery without disconnecting it from the vehicle?
Many tests can be done with the battery connected, but some procedures require disconnecting the negative terminal to prevent current flow. Always follow your tester’s instructions and safety guidelines.
You can test some batteries without disconnecting, but follow the tester's instructions and safety rules to avoid sparks or shorts.
How often should I test my vehicle battery?
Test at least twice a year, especially during seasonal changes, and whenever you notice starting or electrical issues. Regular checks help catch problems early and extend battery life.
Test your battery at least twice a year and whenever you notice starting or electrical issues to catch problems early.
Watch Video
Quick Summary
- Test using resting voltage and load to gauge health.
- Different chemistries require different interpretation.
- Safety and correct tool usage are essential.
- Replace if the battery cannot hold charge under load.
- Document results for ongoing maintenance.