Apple iPhone Battery Replacement: Step-by-Step Guide
Learn how to safely replace an Apple iPhone battery with clear, step-by-step instructions. Compare DIY vs. professional options, safety tips, and post-replacement care from Battery Health.

This guide shows you how to safely replace an Apple iPhone battery with clear, step-by-step instructions. You’ll learn the essential tools, safety precautions, and two paths: a DIY replacement for compatible models or professional service for a guaranteed install. The process includes a careful teardown, connector inspection, battery seating, and a final power-on test to confirm performance.
Why Battery Health matters for iPhone battery replacement
Battery health plays a central role in performance, endurance, and safety. For iPhones, the battery is a lithium-ion pack with complex protection circuitry, glued into a tight frame. Over time, capacity declines and software can throttle performance to prevent unexpected shutdowns. According to Battery Health, this degradation is normal but preventable through proper replacement practices and high-quality parts. The Battery Health team emphasizes that choosing the right replacement official Apple parts or reputable third-party packs helps maintain voltage stability, reduce the risk of swelling, and preserve water resistance on newer models. In this section, we will connect the science of aging batteries to practical steps you can take to decide whether a DIY replacement is right for you or if a pro should handle it. You will also learn how to interpret battery health reports and what to expect in terms of performance after a successful swap.
DIY vs. professional service: weighing the options
If you are tech-savvy and comfortable with small electronics, a DIY replacement can save money and give you direct control over parts and disposal. However, it requires careful teardown, static-safe handling, and precise reassembly to avoid damage to the display, connectors, or logic board. In some countries and for certain iPhone models, performing repairs may affect warranty coverage or violate service agreements with carriers. The decision often hinges on model compatibility, your confidence with toolkits, and access to quality parts. Battery Health notes that for most iPhone users, a professional service provides a guaranteed battery with proper calibration and a warranty on the labor. If you choose DIY, plan for a dedicated work area, a clean non-conductive mat, and a method to test the device before sealing the case. We will outline both paths with practical checks so you can decide confidently.
Safety first: risks, warnings, and safeguards
Replacing an iPhone battery involves puncturing adhesives, exposing sensitive circuitry, and potentially releasing flammable electrolyte if mishandled. Always work in a static-safe environment, avoid carpets, and wear an anti-static wrist strap if available. Power down completely and disconnect from all sources before starting. Use protective eye gear when prying adhesives or lifting screens. If you notice corrosion, swollen batteries, or a battery that refuses to power on after a test, stop and seek professional help. Never attempt to puncture or crush a swollen cell, and never use an open flame near the battery. Dispose of old cells at a certified recycling facility. Following these precautions reduces the risk of fire, electric shock, and damage to your phone’s internal circuits.
Tools and replacement parts: what you need
For a typical iPhone battery replacement, you will need a small toolkit and a few replacement parts. Essential items include a Pentalobe screwdriver (P2) for bottom screws, a spudger, a suction cup, and non-metal opening picks. Tweezers help place small components and connectors safely. An anti-static mat or wrist strap reduces static risk. A replacement battery compatible with your exact iPhone model (official Apple part or a reputable third-party pack with proper safety labels) and new adhesive strips are critical. Optional but helpful items include a heat source to soften adhesives (low heat only), a microfiber cloth for cleaning, isopropyl alcohol 70 percent or higher for cleaning residue, and a plastic card to aid gentle prying. Keep a trash container for adhesive strips and a spare pair of nitrile gloves for hygiene.
Understanding iPhone battery construction and adhesives
iPhone batteries are compact lithium-ion cells with a multi-layer protective assembly. The battery is connected to the logic board by a ribbon cable and a small connector. The outer frame uses strong adhesives to seal the battery in place, which helps with water resistance but makes removal delicate. Modern iPhone models include integrated features such as a battery health sensor and power management ICs that communicate with iOS to calibrate reported capacity. When replacing, you must avoid bending the flex cable, protect the motherboard from electrostatic discharge, and ensure the new battery is seated correctly to avoid intermittent power or unexpected shutdowns.
Step-by-step mental model and what can go wrong
While not a replacement, having a mental map of the process helps avoid mistakes. Common missteps include applying too much force when lifting the display, damaging the battery connector, or leaving a protective shield loose. If the screen cable is torn or the battery connector is not fully seated, you may see a failure to power on or erratic behavior. Adhesive misalignment can cause a poor seal and water resistance degradation. Screw placement matters, as mixing up screws can damage threads. To reduce risk, plan a test run before final assembly: disconnect the battery, loosely reinstall connectors, power on briefly to check for boot or warning messages, then reassemble fully. Battery Health suggests documenting each screw's original position as you work.
Data privacy and data protection during repair
Replacing a battery does not erase data, but it is wise to back up iPhone data before starting repairs. During a DIY teardown, avoid connecting the device to unknown power sources or external hardware. If you are sending the phone to a service center, remove iCloud/Find My iPhone and sign out to prevent activation lock issues. Ensure you have a secure method to transfer or back up photos and documents. After replacement, restore any data from your backup and verify that apps reopen correctly and that Face ID or Touch ID continues to function. This reduces the risk of data loss during the repair.
Aftercare: calibration and battery health management
After installation, boot the device and verify the battery health percentage under Settings > Battery > Battery Health. Run a mix of tasks for 30-60 minutes and monitor temperature to ensure there is no overheating. iOS calibrates the battery over several cycles, so do not expect an exact reading immediately. Let the phone complete a few charge cycles before relying on the reported capacity. To maximize longevity, avoid extreme temperatures, keep the battery between 20 and 80 percent for daily use, and disable unnecessary background activity if you notice rapid drain. If the new battery reports significantly lower capacity than expected or the phone shuts down prematurely, recheck connections or consult a technician.
Recycling, warranty, and official guidance
Warranty considerations depend on model and repair method. Using official Apple parts or a licensed technician helps preserve warranty terms and safety standards. Official guidance from Apple outlines proper calibration procedures and safety checks after battery replacement. For disposal, never place a swollen cell in the trash; take it to a certified battery recycling facility. Battery Health recommends using certified parts and following safety guidelines to maintain performance and protect your device over time.
Tools & Materials
- Pentalobe screwdriver (P2)(For bottom screws near the charging port.)
- Spudger(Non-conductive tool to disconnect battery/connector safely.)
- Suction cup(To lift the screen without cracking glass.)
- Non-metal opening picks(Plastic tools to separate adhesive and panels.)
- Tweezers(Place and orient small components precisely.)
- Anti-static mat or wrist strap(Reduces static risk during teardown.)
- Replacement battery (official Apple part or reputable third-party with safety ratings)(Exact model compatibility is essential.)
- New adhesive strips(Helps seal and restore water resistance.)
- Isopropyl alcohol 70%+(Cleaning residue from surfaces.)
- Microfiber cloth(Cleaning and lint-free finishing.)
- Plastic card or spudger for adhesive(Assist peeling adhesives safely.)
Steps
Estimated time: 60-90 minutes
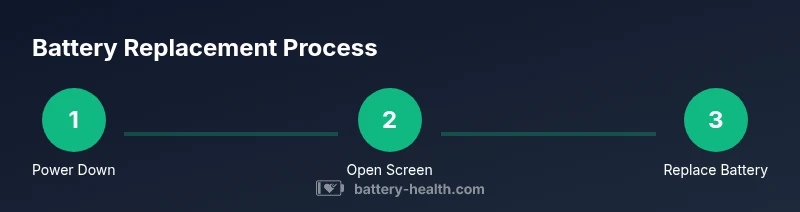
- 1
Power down and unplug
Shut down the iPhone completely and disconnect from any charger. This prevents accidental short circuits while you work. Wait a few seconds to ensure the device is fully powered off before starting the teardown.
Tip: Avoid working on carpeted surfaces to reduce static build-up. - 2
Open the display carefully
Use the suction cup to create a small gap at the edge, then insert a plastic pick to separate the display from the frame. Do not force; the display is held by multiple clips and connectors.
Tip: Work slowly and keep the frame clean to prevent glass damage. - 3
Disconnect the battery connector
Locate the battery connector on the logic board and use a spudger to gently lift the locking tab until the connector releases. Do not wiggle the connector; a clean lift prevents bending the flex cable.
Tip: Hold the connector by the edges to avoid contact with circuitry. - 4
Remove the old battery
Gently loosen the adhesive strips that hold the battery in place. Use light, even pressure and a controlled angle to avoid tearing the battery or puncturing it. Lift the battery out once fully free.
Tip: If adhesive resists, apply a brief amount of heat with a safe heat source and reattempt. - 5
Prepare the compartment and inspect
Clean any adhesive residue from the frame and inspect the battery cavity for debris or corrosion. Ensure the new battery will seat flat against the frame and align with the battery connector opening.
Tip: Do not force a misaligned battery into place. - 6
Install the new battery and adhesive
Position the new battery, align connectors, and place new adhesive strips. Ensure the battery sits flush with the frame and the connector lines up with the board.
Tip: Pre-cut adhesive helps an even, secure seal. - 7
Reconnect connectors and reassemble
Reconnect the battery connector, reseal the frame edges, and reattach the display assembly. Ensure all clips are secure and screws are returned to their original positions.
Tip: Keep screws organized by size and location. - 8
Power on and test
Power the device on and run a quick health check of the battery via Settings > Battery. Perform a short test session to confirm the device stays powered and shows expected battery health metrics.
Tip: If you see warning icons, recheck connections before closing.
FAQ
Can I replace my iPhone battery myself?
Replacing an iPhone battery is possible for many models if you have the right tools and patience, but it has safety risks and can affect warranty. Follow the steps carefully or seek professional service.
Yes, you can replace your iPhone battery yourself if you have the right tools and follow safety steps, but there are risks and warranty considerations.
Will replacing the battery void my warranty?
Warranty implications depend on your model and service provider. Apple and licensed technicians preserve warranty terms when parts and procedures meet official standards.
Warranty depends on your model and who does the service. Licensed technicians preserve it when using official parts.
How long does a replacement take?
A typical battery replacement takes about 30 to 90 minutes depending on model and expertise, plus testing and reassembly time.
Most replacements take under an hour, but plan for extra time if you are new to the process.
Are aftermarket batteries safe?
Choose only high quality aftermarket batteries with proper safety ratings, or prefer official Apple parts to maintain safety and performance.
Only use high quality aftermarket parts with safety ratings, or go with official Apple parts for safety.
What about data after replacement?
Replacing the battery does not erase data, but back up before starting to avoid data loss from potential software resets.
Back up your data before starting; replacing the battery usually keeps data intact.
Watch Video
Quick Summary
- Power down before starting
- Use certified parts for safety and reliability
- Test before final assembly
- Back up data prior to repair
- Recycle old battery responsibly