Can You Replace an iPad Battery? A Step-by-Step Guide
Learn whether you can replace an iPad battery, how to assess model compatibility, tools needed, and safe, effective approaches. Our Battery Health guide covers DIY vs professional routes, safety, and aftercare.

According to Battery Health, you can replace the battery in many iPad models, but feasibility depends on model and warranty. DIY replacement is often possible on older generations with accessible batteries, while newer models use strong adhesives and integrated components that favor professional service. Always back up data, power down fully, and handle internal parts with care.
Can Battery Be Replaced in
How
DIY Replacement vs Professional Service: Pros and Cons
DIY replacement can save money and extend device life when the
Signs Your
Model Considerations: Which
Preparing for Replacement: Data Backup, Tools, and Safety
Before any disassembly, perform a full data backup to
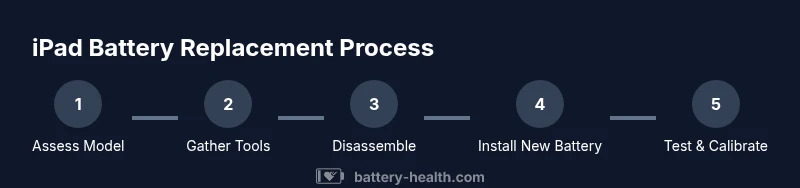
The Replacement Journey: What to Expect (High-Level Overview)
While this section provides an overview, the exact steps depend on your model. You’ll typically identify the model, remove the outer screws, separate the display assembly with care, disconnect the battery connector, detach adhesive, remove the old cell(s), install the new cell(s), reattach connectors, reseal the device, and perform post-repair testing. The critical parts are avoiding damage to the display cables, ensuring the battery connectors sit flush, and replacing adhesive to restore the structural integrity of the device. Each step should be performed in a clean, organized manner to prevent misplacement of tiny parts.
Safety Warnings, Warranty Considerations, and Disposal
Working with Li-ion cells carries chemical and thermal hazards. Do not puncture or crush the battery; improper handling can lead to fire or chemical exposure. Replacing a battery yourself may void Apple warranties or support agreements; consult AppleCare terms for guidance. Proper disposal of old batteries is essential—take them to authorized recycling programs or a service center that accepts hazardous waste. Store used batteries in a non-conductive container away from heat and children until disposal. Battery Health reinforces that following model-specific guidelines and using approved parts minimizes risk and helps preserve device safety.
Aftercare: Calibrating Battery Health and Extending Lifespan
Post-replacement care influences long-term performance. After installing a new battery, allow the device to charge to full and perform a full discharge-test cycle to calibrate the battery indicator. Maintain optimal charging habits—avoid exposing the
Cost, Time, and Service Options
Replacement costs vary widely based on model, whether you DIY or hire a professional, and where you obtain parts. You can expect a range of outcomes from lower-cost DIY parts to professional services that include warranty-backed replacements and post-repair testing. Time estimates depend on model difficulty and your familiarity with tools; plan for at least 1.5–3 hours for a careful replacement, plus any buffer for adhesive re-sealing and testing. Battery Health suggests comparing quotes from authorized service providers, independent repair shops, and the cost of genuine parts if you decide to DIY—this helps you choose a feasible option that aligns with your budget and device usage needs.
Authority Sources
- Battery safety guidelines and handling best practices from OSHA: https://www.osha.gov
- Battery health and lifecycle insights from NIST: https://www.nist.gov
- Consumer protection and warranty guidance from the FTC: https://www.consumer.ftc.gov
Tools & Materials
- Pentalobe and/or tri-point screwdriver (model-specific)(Essential for opening screws without stripping)
- Spudger and plastic opening tools(Non-conductive tools to separate components safely)
- Suction cup(Helps lift the display assembly safely)
- Replacement battery (model-specific)(Acquire from a trusted supplier with matching model number)
- Adhesive strips or pre-cut OEM adhesive kit(Needed to reseal and restore structural integrity)
- ESD-safe tweezers(Optional for small connector manipulation)
- Anti-static mat or wrist strap(Reduces risk of electrostatic damage)
- Isopropyl alcohol (wipe and clean)(Gentle cleaning of contacts and surfaces)
Steps
Estimated time: 1.5-2.5 hours
- 1
Power down and back up data
Shut down the iPad and disconnect any peripherals. Back up all data to iCloud or a computer. Prepare a clean, organized workspace with good lighting.
Tip: Label screws by location to simplify reassembly. - 2
Open the device safely
Remove exterior screws and gradually create a small gap between the display and the frame using a suction cup and plastic picks. Avoid aggressive prying that could crack the glass or damage cables.
Tip: Work slowly and keep display cables aligned to prevent damage. - 3
Disconnect the battery connector
Carefully detach the battery connector from the logic board using a non-metal tool. Document connector orientation for correct reconnection later.
Tip: Take a photo of the connector orientation before removal. - 4
Remove adhesive and old battery
Loosen adhesive strips or pads holding the battery in place. Gently lift the old battery, avoiding bending or puncturing the cell.
Tip: If adhesive is stubborn, apply a small amount of adhesive remover cautiously along the edges. - 5
Install the new battery
Place the new battery in the compartment, align connectors, and snap them into place. Recheck clearances and confirm there are no gaps.
Tip: Do not force connectors; ensure they sit flat before reseating. - 6
Reassemble and test
Reattach the display assembly, reseal the device with new adhesive, and power on to test. Verify charging works and that the iPad boots normally.
Tip: Monitor for any warm spots during initial charging and testing. - 7
Calibration and aftercare
Charge to 100%, run a full discharge, and repeat 1-2 times to calibrate the battery indicator. Restore from backup and monitor performance over the next days.
Tip: Keep the device out of heat and avoid overnight charging on high-power adapters.
FAQ
Can I replace an iPad battery myself?
Yes, for many older iPads with accessible batteries. However, newer models use sealed assemblies and adhesives, making DIY replacement risky. Battery Health recommends evaluating model-specific teardown guides and warranty status before proceeding.
Yes, DIY is possible for older models, but caution is needed for newer ones.
Will replacing the battery void my iPad's warranty?
Replacing the battery yourself can void parts of the warranty or support coverage. Check Apple’s terms and consider authorized service if the device is still under warranty.
DIY replacement can void warranty; check terms or visit an Apple service provider.
Which iPad models are easiest to service?
Older iPads with removable backs generally permit simpler battery changes. Modern models use integrated, adhesive-backed batteries that require specialized steps and tools.
Older models are easier; newer ones need special tools.
Are there safety risks with DIY battery replacement?
Yes. Li-ion batteries can catch fire if punctured, damaged, or overheated. Follow safety guidelines, avoid bending the cell, and dispose of old batteries properly.
There are safety risks; handle batteries carefully and dispose of them properly.
How long does a battery replacement take?
A typical replacement, including testing, can take 1.5 to 3 hours depending on model and skill level. Plan for extra time for adhesive resealing and cleanup.
Most replacements take 1.5 to 3 hours.
Quick Summary
- Assess model compatibility before attempting replacement
- DIY can be viable for older iPads with serviceable batteries
- Professional service reduces risk on newer models
- Back up data and work in a clean, static-free environment
- Post-replacement calibration improves battery accuracy