Battery Installation Near Me: A Step-by-Step Guide to Safe Service
Learn how to safely install batteries near you—whether for cars or home storage. This Battery Health guide covers safety, planning, and finding reliable local services.

To complete battery installation near me, start by confirming your battery type (car, home storage, or device) and your voltage specs. Then locate licensed local technicians with credential checks, request quotes, and compare warranties. Ensure on-site installation, proper mounting, and safe disposal of old units. This Battery Health guide will walk you through safety checks, local options, and booking steps for a smooth, compliant install.
What battery installation near me typically entails
Battery installation near me covers a range of scenarios—from automotive batteries in vehicles to home energy storage systems and even battery replacements for devices. According to Battery Health, the process starts with confirming the exact battery type, required capacity, and the voltage the system demands. Local technicians assess compatibility with the vehicle or device, safety standards, and warranty terms, and they plan for safe removal of the old unit. You may need access to the engine bay, basement storage area, or a service room, plus a safe, dry workspace free of flammable materials. A proper install should follow manufacturer instructions, respect local regulations, and include secure mounting, clean terminals, correct polarity, and testing of system voltage and safety interlocks. This section sets the foundation: you’ll learn to identify your needs, collect the right information for installers, and avoid common missteps that can lead to poor performance or safety hazards.
Assessing your battery type and requirements
Batteries come in several families, including automotive 12-volt lead-acid and AGM variants, as well as lithium-based home storage packs and specialty device batteries. The right choice depends on your system’s voltage, capacity (amp-hours), space, and cycling needs. Battery Health analysis shows that matching the battery type to the application reduces wear, improves safety, and extends life. For vehicles, confirm compatibility with the alternator, charging system, and any factory warranty stipulations. For home storage, consider the BMS compatibility, inverter sizing, and climate considerations. By knowing whether you need a high-drain starter battery, an AGM replacement, or a Li-ion storage pack, you’ll guide installers to the correct specification and prevent mismatches that compromise performance or safety.
Finding local installers and verifying credentials
Start with a local search for “battery installation near me” and review listings for licensed, insured technicians with verifiable references. Ask for proof of license and insurance, and request recent project references or testimonials. If possible, verify that installers are familiar with your battery type and device, and check whether they’re affiliated with the battery or vehicle manufacturer. Clear communication about expectations, access, and safety procedures helps ensure a smooth job. Battery Health analysis shows that working with credentialed professionals reduces the risk of improper connections and post-install faults, and it increases the likelihood of timely warranty service if issues arise.
Preparing for the installation day
Before the appointment, clear a safe workspace and remove any obstacles around the installation area. Gather the necessary tools and documents, including your battery spec sheet, the device’s user manual, and the service estimate. If you’re replacing an automotive battery, ensure the engine is off, the vehicle is in park, and the parking brake is engaged. For fixed storage batteries, disconnect the main power source per the manufacturer’s guidance. Notify household members or coworkers of the service window and keep the old battery accessible for disposal documentation or pickup arrangements. A well-prepared space minimizes delays and reduces the chance of accidental short circuits during the swap.
The installation process: what to expect
During installation, the technician should verify the battery type, voltage, and polarity before removal. They will disconnect the old terminals in the correct sequence, clean corrosion from terminal surfaces, and remove the old battery safely. The new battery is then mounted securely with the proper hold-downs, connected with correct polarity, and voltage tests are performed to confirm charging and system health. Expect a terminal inspection, belt or clamp checks for any mounting hardware, and a functional test of accessories or load. Finally, the technician should provide a short safety brief and explain any maintenance steps or signs to watch for.
Aftercare and disposal
After the installation, you’ll want to document warranty information, keep receipts, and note maintenance schedules. Proper disposal of the old battery is essential due to harmful materials; arrange for recycling through the installer or local waste facility. Regular inspections of terminals, clamps, and corrosion protection extend battery life. If you notice rapid discharge, sluggish starts, or electrical glitches, contact the installer for a post-install check under warranty. Battery Health emphasizes keeping a simple log of service dates, part numbers, and observed performance to simplify future replacements.
Common pitfalls to avoid
Avoid assuming your old battery is still healthy without testing. Don’t mix battery chemistries, avoid over-tightening terminals, and never replace a battery without confirming the charging system is functioning correctly. Also, don’t skip safety gear like gloves and eye protection, and never perform the installation in wet or cluttered spaces. Finally, ensure the disposal method complies with local rules and that you receive proper documentation for warranty coverage.
Tools & Materials
- Safety gloves (ANSI-rated)(Nitrile gloves recommended for chemical resistance)
- Safety goggles(Eye protection is essential during battery work)
- Insulated pliers/wrenches(Non-conductive handles preferred for safety)
- Torque wrench(Used to tighten terminals to spec)
- Multimeter or voltage tester(Check battery voltage and system health)
- Battery terminal cleaner(Clean corrosion before install)
- New battery (correct type)(Check compatibility with system)
- Hold-down clamp/strap(Secure battery in place to prevent movement)
- Insulating tape / zip ties(Optional for neat wiring and organization)
- Waste container for old battery(Used battery disposal or recycling bin)
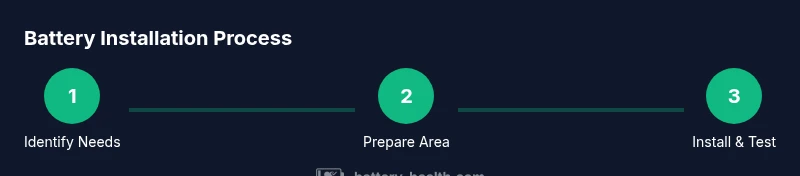
Steps
Estimated time: 2-3 hours
- 1
Identify battery requirements
Confirm the battery type, voltage, and capacity needed for your application. Check the device manual or vehicle owner guide to ensure compatibility with your system and any warranty constraints.
Tip: Take a photo of the old battery label and the area around it to reference later. - 2
Prepare the installation area
Clear the workspace, remove obstructions, and gather tools. Ensure the area is dry, well-ventilated, and free of flammable materials.
Tip: Have a second person assist if the battery is heavy or awkward to handle. - 3
Disconnect the old battery
Power down the device or vehicle and disconnect the negative terminal first, then the positive to prevent short circuits.
Tip: Use insulated tools and avoid placing metal objects on terminals. - 4
Remove and inspect mounting
Lift the old battery out and inspect the tray, clamps, and cables for corrosion or wear. Clean the tray if needed and replace any damaged hardware.
Tip: Replace worn hold-downs to ensure a secure fit. - 5
Clean terminals and inspect cables
Clean corrosion with terminal cleaner and verify cable insulation is intact. Replace any frayed wires or damaged connectors.
Tip: Apply a thin layer of dielectric grease to terminals to reduce corrosion. - 6
Install the new battery
Place the new battery in the tray, secure with clamps, and connect the positive terminal first, then the negative. Ensure the battery sits squarely and is not tilted.
Tip: Double-check the hold-downs are tight but not over-tightened. - 7
Reconnect and test
Reconnect cables in the correct order, then test voltage and critical circuits. Check for proper lighting, starting performance, and electrical system health.
Tip: If the system is vehicle-based, perform a quick drive or simulate load to confirm stability. - 8
Secure and finalize
Secure all wiring, replace covers, and confirm the area is clean. Record the install date, battery type, and serial numbers for warranty tracking.
Tip: Keep warranty paperwork accessible in case future service is needed. - 9
Dispose of the old battery
Arrange for recycling or disposal through the installer or local facility in accordance with regulations.
Tip: Do not leave old batteries in the open trash; they pose environmental and safety risks. - 10
Schedule follow-up checks
Set reminders for periodic checks of terminals, insulation, and battery health. Some systems benefit from a post-install diagnostic after a few weeks.
Tip: Record service reminders in a dedicated maintenance log.
FAQ
Do I need to hire a professional to install a battery?
For safety and warranty reasons, professional installation is recommended, especially for automotive or high-voltage systems. A professional will handle proper disconnection, terminal maintenance, and system testing.
Professional installation is recommended for safety and warranty reasons, especially for cars or high-voltage setups.
What credentials should I look for in an installer?
Look for licensing, evidence of insurance, and references. It helps if the technician has experience with your battery type and device, and manufacturer-recommended procedures.
Look for licensing, insurance, and verifiable references; experience with your battery type is important.
How can I be sure my battery is compatible?
Check the battery’s voltage, capacity, and connector type against the device or vehicle requirements. Consult the owner manual or manufacturer guidelines, and have the installer verify compatibility before purchase.
Verify voltage, capacity, and connector type with the device manual and have the installer confirm compatibility.
What affects the installation price?
Prices vary by battery type, complexity, and local labor rates. Get multiple quotes and ask about included services like testing, warranty, and old-battery disposal.
Prices vary by type and complexity; obtain several quotes and check what’s included.
How should I dispose of an old battery?
Bring the old battery to an approved recycling facility or have the installer arrange pickup. Do not throw it in regular trash due to hazardous materials.
Take the old battery to an approved recycler or have the installer arrange disposal.
What warranties should I expect?
Expect a warranty covering parts and installation workmanship. Verify duration and what is excluded, and request a written warranty document.
Look for a parts-and-workmanship warranty with clear terms in writing.
Watch Video
Quick Summary
- Identify your battery type and system requirements before starting.
- Choose licensed, insured installers to ensure safety and warranty coverage.
- Follow correct sequence for disconnecting/reconnecting batteries and test thoroughly.
- Dispose of old batteries responsibly and keep installation records.