Change Watch Battery Kit: DIY Replacement Guide
Learn how to replace a watch battery using a change watch battery kit. This step-by-step guide covers kit selection, battery types, safety, and a thorough replacement process for home maintenance.

You will learn how to replace a watch battery using a change watch battery kit. This guide covers selecting the right kit, identifying the correct battery type, safety steps, and a clear, step-by-step process to complete the replacement at home.
Why a Change Watch Battery Kit Matters
A change watch battery kit simplifies DIY replacements by combining the essential tools, replacement cells, and case-opening aids in one package. For many analog watches, a proper kit reduces the risk of dropping tiny screws or damaging the gasket. The Battery Health team notes that using a complete kit can improve success rates and reduce frustration during the repair process.
- Quick access to compatible cell types
- Safe handling aids for tiny components
- Clear guidance to minimize damage to seals and backings
What’s Inside a Quality Change Watch Battery Kit
A well-made kit typically includes a selection of common watch batteries (silver-oxide and LR types), a case opener, precision tweezers, a plastic pry tool, a small screwdriver, and a spare gasket. Some kits also provide a battery tester or a simple magnifier. Check the included battery sizes against your watch model before starting.
Tip: Keep spare screws and gaskets in a labeled tray to avoid losing them during disassembly.
Battery Types and CompatibilityRead the Labels and Specs to Confirm the Battery Size
Most quartz watches use silver-oxide batteries or lithium small cells. Use the exact size listed on the old battery or your watch’s manual. If you’re unsure, photograph the battery label and compare it to the kit’s size chart. Mismatched batteries can cause leakage or poor performance.
Important: Do not mix different battery chemistries in the same watch.
Safety and Handling Essentials
Handle batteries with clean, dry hands and avoid touching the battery terminals with bare skin. Work on a soft surface to catch small parts. If you wear jewelry or long sleeves, roll them up to prevent snagging. Some kits include anti-static mats or pads—these are beneficial when working with sensitive electronics.
Warning: Do not attempt replacements on devices that are still under warranty unless you accept the risk of voiding it.
Watch Back Types and Case Considerations
Swivel or screw-down backs require different approaches. Identify whether your watch has a snap-back, screw-back, or pop-off back. The back design affects whether you need a case opener or simply a small screwdriver. A proper gasket seating prevents water ingress after reassembly.
- Snap-back: light pry tool
- Screw-back: precision screwdriver set
Preparing Your Workspace and Tools
Set up a clean, well-lit workspace with a magnetic mat or a small parts tray. Lay out the tools in a logical order: case opener, tweezers, battery, gasket, and a loupe if needed. Test the kit components on an old watch or a dummy battery to ensure you’re comfortable with the tools before touching your watch.
Pro tip: Use a magnifying glass to read tiny markings on the battery.
How to Use the Step-By-Step Process (Overview)
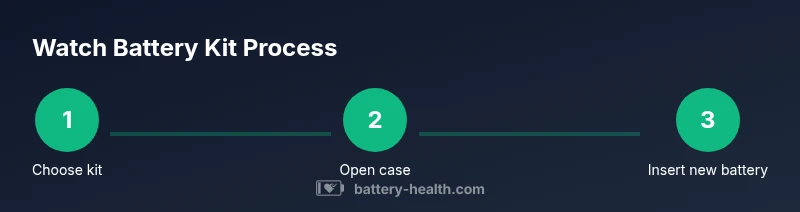
The replacement typically follows these phases: (1) open the case, (2) remove the old battery, (3) insert the new battery, (4) reseal the case, and (5) test the watch. The step-by-step section provides precise actions for each stage and explains why each action matters for reliable operation.
Troubleshooting Common Issues
If the watch doesn’t start after replacement, check the battery orientation, ensure the contacts are clean, and confirm the gasket is seated properly. If you hear a ticking but the display is faint, your battery may be dead or of the wrong type. Avoid forcing the case back—recheck alignment first.
Maintenance, Disposal, and Care
Rechargeable watch batteries are less common in standard analog watches but may exist in solar-powered or svelectric watches. For disposable cells, recycle according to local guidelines. Clean the case back and sides periodically to maintain a good seal and check the gasket condition yearly.
Tools & Materials
- change watch battery kit(Contains multiple common watch battery sizes and case-opening tools)
- precision tweezers(Non-magnetic, fine-tip preferred)
- case opener or watch back remover(Screw-down or snap-back compatible)
- watch battery (correct size)(Check old battery label or case back for size)
- soft cloth or mat(To protect watch and catch small parts)
- magnifier or loupe(Helpful for tiny label readings)
- small screwdriver set(Flat-head or Phillips as needed)
- small tray or container(Storage for tiny screws)
Steps
Estimated time: 30-60 minutes
- 1
Gather your kit and set up workspace
Collect the change watch battery kit, tools, and spare parts. Clean the workspace and lay a soft mat to prevent parts from bouncing away.
Tip: Verify all kit components before starting to avoid mid-task interruptions - 2
Open the watch case back
Use the appropriate opener for your back type (snap, screw, or pop). Apply gentle pressure while keeping the watch stable.
Tip: Work slowly to avoid scratching the case or bending the back plate - 3
Remove the old battery
Detach the battery using non-magnetic tweezers. Note orientation (positive/negative) and take a photo for reference.
Tip: Do not bend terminals; keep the battery flat when removing - 4
Insert the new battery
Place the new battery with proper orientation. Ensure contacts are clean and seated firmly.
Tip: Check the label side up and the metal contacts align with the watch contacts - 5
Check seals and reassemble
Re-seat the gasket if present, align the case back, and press or screw it into place as required.
Tip: Perform a light test before sealing completely to confirm correct orientation - 6
Test the watch
Set the time and observe for proper ticking and function. If the watch has additional features, test them as well.
Tip: If it doesn’t start, re-check battery size and orientation
FAQ
What is a change watch battery kit and why do I need one?
A change watch battery kit combines the tools and batteries needed for replacement, simplifying the DIY process and reducing the risk of incorrect parts.
A kit includes the essential tools and batteries in one box, making it easier to replace a watch battery at home.
Can I replace any watch battery with a kit?
Not all watches use the same battery type. Always verify the size and chemistry before replacement to avoid damage.
Always verify the battery size and type before you replace it to prevent damage.
What safety steps should I take?
Work on a clean surface, handle batteries with care, and avoid touching terminals. If your kit includes safety mats, use them.
Work in a clean space and handle batteries carefully to avoid injury or damage.
What should I do with an old battery?
Dispose of old batteries according to local guidelines; many areas offer battery recycling programs.
Recycle old batteries at approved facilities or return programs.
Why might my watch not start after replacement?
Check battery orientation, ensure the contacts are clean, and confirm the gasket is seated properly. Re-test after adjustment.
Make sure the battery is oriented correctly and contacts are clean.
Is it safe to replace a watch battery myself?
Yes, with proper tools and caution. Follow kit instructions and avoid applying force.
Yes, with the right tools and careful steps.
Watch Video
Quick Summary
- Use a complete kit to simplify the process
- Match battery size exactly to avoid leakage
- Keep tiny parts organized to prevent loss
- Seal the case properly to maintain water resistance