Golf Cart Battery Charging: Safe Practices for 36V/48V
A comprehensive guide to safely charging golf cart batteries, selecting the right charger, monitoring during charging, and maximizing battery life for 36V and 48V systems.

Charge a golf cart battery by using a charger that matches your bank’s voltage (36V or 48V) and the battery chemistry. Before plugging in, inspect terminals and ensure a dry, ventilated area, then connect the charger and start with a conservative current while monitoring voltage and temperature until full. Follow the manufacturer guidelines for best results.
Understanding the charging landscape for golf cart batteries
Charging a golf cart battery is a task that blends safe handling with the right equipment. The chemistry of the cells, the bank voltage, and the charger design all determine the charging profile. According to Battery Health, starting with the right charger and a clean, ventilated workspace reduces charging risks for golf cart batteries. In practice, your charger must be matched to the bank’s voltage (commonly 36V or 48V) and the battery chemistry (flooded lead-acid, AGM, or lithium). The charger should offer automatic termination or a clear end voltage, and it should prevent overcurrent that can cause heat buildup. A well-ventilated space is essential because hydrogen gas can be produced by some flooded lead-acid packs during charging. As you prep, confirm any model-specific guidelines in your golf cart manual and the charger’s instruction sheet.
Why battery chemistry and bank voltage matter
Golf cart batteries come in several chemistries and configurations. Flooded lead-acid and AGM packs have different water management and venting needs than lithium-based packs. A charger designed for lead-acid won’t correctly balance a LiFePO4 pack, and a lithium charger may not manage the gas and temperature behaviors of a flooded cell pack. Battery Health’s analysis emphasizes using the charger type that matches the chemistry and avoiding chargers that promise universal compatibility. Matching voltage and chemistry reduces sulfation risks, improves charging efficiency, and helps the pack reach and hold full capacity over time. Always review the battery label and the charger’s compatibility notes before connecting.
Safety basics you shouldn’t skip
Always charge in a dry, well-ventilated area away from open flames or sparks. Wear protective gloves and eye protection when handling the battery and connectors. Inspect cables for cracks, wear, or corrosion; damaged leads can cause short circuits or overheating. Check the environment: remove any liquids that could spill onto the charger, and ensure the surface is flat and non-conductive underneath the charging setup. Use a dust mask or ventilation if you’re working around dust or fumes. A quick wipe-down of terminals with a dry cloth and a basic cleaner (allowed by the battery type) can prevent poor connections that increase resistance and heat.
What to expect during a standard charging session
A typical session will begin with a controlled current and progress as the battery voltage rises toward its float or termination value. You’ll often see the charger’s indicator shift from “in” to “complete” as the current naturally drops. For flooded lead-acid packs, water level checks after charging are common, while LiFePO4 systems generally require less maintenance but still benefit from monitoring cell balance and temperature. Throughout the session, you should monitor for unusual heat, hissing sounds, or a strong odor—these are indicators that something may be wrong and warrants inspection.
How to plan for long-term battery health
Regularly scheduled charging aligned with your usage pattern helps prolong life. In practice, avoid deep discharges and instead plan top-up charges when the pack is around a moderate state of charge. Maintain proper water levels in flooded lead-acid packs, and ensure the BMS (for lithium systems) is not in a fault state. A well-maintained cooling environment can also help maintain optimal temperatures during charging, reducing cycle wear. By keeping records of voltage, temperature, and charge duration, you’ll be better positioned to spot trends that precede performance degradation.
Troubleshooting common charging issues (quick glance)
If charging seems slow, check the charger setting, connections, and pouch wiring for oxidation or loose clamps. A charger that won’t power on may indicate an internal fuse, overload protection, or a faulty cord. If the battery smells, swells, or vents excessive heat, stop charging immediately and inspect the cells for damage. Inconsistent voltage readings often point to a loose connection, bad terminal, or a degraded cell. When in doubt, disconnect safely and audit the battery bank with a multimeter and the manufacturer’s guidelines.
Lifecycle considerations and best practices
To maximize life, stick to manufacturer-recommended charging windows and avoid prolonged exposure to high temperatures during charging. For lead-acid packs, plan regular water top-offs and occasional equalization charges if recommended by the manufacturer. For lithium packs, rely on the BMS and avoid full discharges and fast charging beyond the pack’s design. Record-keeping about charge voltage, duration, and temperature helps you identify aging patterns and adjust usage to preserve performance over time.
Tools & Materials
- Charger compatible with your battery bank (36V or 48V) and chemistry(Choose one with automatic shutoff and correct amperage for the bank)
- Digital multimeter or voltmeter(For verifying voltage during and after charging)
- Personal protective equipment (gloves and safety goggles)(Wear during handling and connection)
- Distilled water(Keep flooded lead-acid cells topped up as needed)
- Terminal cleaning brush or cloth(Remove corrosion from clamps if needed)
- Spill mat or rags(Contain minor drips and spills)
- Ventilated charging area (outdoors or well-ventilated garage)(Important for hydrogen gas safety in flooded packs)
Steps
Estimated time: 60-90 minutes
- 1
Inspect batteries and charger
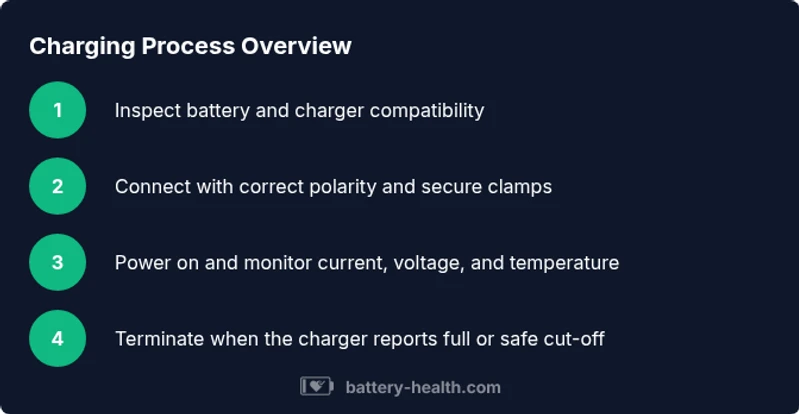
Visually inspect the battery bank for cracks, leaks, or swelling. Check electrolyte levels if you have flooded lead-acid cells and verify the charger and cord are undamaged. Ensure the charging area is dry, well-ventilated, and free of flammable materials. See diagram references for connection layout.
Tip: Wear gloves and goggles; unplug power before inspecting terminals. - 2
Set the correct charger settings
Confirm the charger is configured for the correct voltage (36V or 48V) and chemistry (lead-acid, AGM, or LiFePO4). Enable automatic shutoff or the manufacturer's recommended end voltage. If you’re unsure, consult the manual or contact the battery manufacturer.
Tip: Double-check the chemistry label on the battery pack before setting the charger. - 3
Connect charger to the battery pack
Attach the charger leads to the battery bank with proper polarity and secure clamps. Avoid touching metal surfaces during connection to prevent sparks. Ensure the area around the clamps is dry and clean to maximize contact and minimize resistance.
Tip: Connect the negative lead first and the positive last to reduce spark risk. - 4
Power up and monitor initial charging
Turn the charger on and observe that the current is within expected range for the bank. Monitor for excessive heat, unusual smells, or sounds. Keep a log of the voltage and temperature for comparison over multiple sessions.
Tip: If the current is unexpectedly high, pause charging and check for a short or loose connection. - 5
Allow the charge to progress to completion
Let the charger run until it reaches its termination condition (voltage plateau or automatic shutoff). Do not force a full discharge or leave the charger running beyond the recommended time. For lead-acid packs, check water levels after cooling; for lithium packs, rely on the BMS state.
Tip: Avoid unplugging mid-cycle; abrupt disconnection can leave cells unbalanced. - 6
Safely disconnect and inspect post-charge
Power down the charger, then disconnect the leads in the reverse order you connected them. Recheck the pack voltage and observe any swelling or residue on terminals. Wipe terminals clean and reseal any caps or covers.
Tip: Record the final voltage and temperature for your maintenance log. - 7
Perform post-charge maintenance
For flooded lead-acid packs, top up water as needed and ensure cells are balanced as per the manufacturer. For lithium systems, verify the BMS status and ensure no fault flags are active. Keep your battery area dry and free of metal tools.
Tip: Regular maintenance routines extend battery life and reliability. - 8
Store and protect the battery between uses
If the cart will sit idle, plan periodic top-ups to avoid deep discharge. Store in a cool, dry place away from direct sunlight. Keep the charger and cables organized to prevent damage or tripping hazards.
Tip: Document charging cycles and store health indicators to anticipate replacements.
FAQ
What charger is appropriate for a 48V golf cart battery?
Choose a charger rated for 48V and the correct chemistry. Ensure it has automatic shutoff and appropriate amperage for your bank.
Use a 48-volt charger with auto shutoff and the right chemistry for your battery.
Can I charge a golf cart battery indoors?
Indoor charging is possible if the area is well-ventilated and non-flammable. For flooded lead-acid packs, ensure adequate ventilation to manage hydrogen gas.
Yes, but make sure the space is ventilated and free from flames.
How long does charging take?
Charging time depends on battery size and charger output. Large packs and slower chargers take longer; monitor voltage and current to determine when full.
It varies, but you’ll know it’s done when the current drops and voltage stabilizes.
Is equalization charging necessary for lead-acid batteries?
Equalization is sometimes recommended for flooded lead-acid packs to balance cells, but it is not needed for sealed batteries. Follow manufacturer guidance.
Equalization is sometimes used for flooded lead-acid packs; follow the manual.
What are signs of a failing golf cart battery during charging?
If the pack doesn’t reach full voltage, the charger runs hot, or you detect swelling or a strong gas odor, stop charging and inspect the cells.
If it’s not charging properly, smells, or swells, stop and check the battery.
Can lithium golf cart batteries be charged with standard lead-acid chargers?
No. LiFePO4 requires a lithium-specific charger and a functioning BMS. Using a lead-acid charger can damage the pack.
No, use a charger designed for lithium batteries.
Watch Video
Quick Summary
- Use a charger matched to your battery bank and chemistry.
- Safety first: ventilated area, PPE, and clean connections.
- Monitor voltage and temperature; avoid overcharging.
- Regular maintenance and logs extend battery life.