e bike battery replacement: a complete guide
Learn to safely replace your e-bike battery with a step-by-step process, safety checks, and maintenance tips from Battery Health. This guide covers compatibility, common pitfalls, and long-term care to maximize battery life.

You can replace an e bike battery yourself to extend your ride life and restore power. This guide covers compatible battery types, safety precautions, and a step-by-step process to swap packs without tools beyond basic, insulated gloves and a torque wrench. Before you start, verify your battery voltage, connector type, and mounting orientation to avoid damage.
Why replacing an e-bike battery matters
According to Battery Health, replacing a worn or aging e-bike battery is a practical way to restore range, performance, and reliability. Batteries degrade over time due to charge-discharge cycles, temperature, and usage patterns. Replacing the pack can often restore most or all of the original riding range, reduce charging frequency, and improve overall cycling experience. Throughout this article, Battery Health provides guidance based on its research and industry benchmarks to help riders choose compatible packs, assess wear, and replace confidently.
Understanding e-bike battery chemistry and compatibility
E-bike batteries typically use lithium-ion chemistries, with common variants including lithium nickel manganese cobalt oxide (NMC) and lithium iron phosphate (LFP). Some packs may use nickel-rich chemistries or packing configurations that affect voltage, capacity, and safety behavior. The battery is paired with a battery management system (BMS) that monitors cell temperature, voltage, and balance during charging and discharge. Compatibility depends on voltage (nominal pack voltage), capacity (Ah), connector type, and mounting hardware. When selecting a replacement, verify that the new pack matches the frame's mounting points, BMS requirements, charging cable, and communication protocol if your bike supports smart features. Battery Health analysis notes that proper compatibility reduces the risk of damage and ensures safe operation.
When to replace vs repair: signs your battery needs replacement
Look for persistent performance loss that doesn’t recover after a full charge, unusual swelling or warmth, and a noticeable decrease in range. If the battery fails to hold a charge beyond what’s typical for your model, or if the BMS reports faults or errors during self-checks, replacement is usually the best option. Also consider warranty coverage and expected life based on usage. Regular testing with a multimeter or the bike’s diagnostic app can help you track voltage sag and health trends over time. This section explains what signs warrant a replacement without assuming a specific mileage or year—focus on performance, safety, and reliability.
Tools, safety gear, and workspace setup
Before you begin, choose a well-lit, dry workspace with plenty of ventilation and a clean, uncluttered surface. Always wear non-conductive gloves and eye protection to protect against accidental shocks or hot components. Basic tools include a screwdriver set, a torque wrench or manually adjustable wrench, a non-conductive tool for prying or guiding cables, and a multimeter for quick checks. Have a spare battery or pack if you’re performing maintenance in a workshop setting, plus a fire-safe container for temporary storage if the old patch needs cooling or testing. Keep the bike on a stable stand or support to prevent tipping while you work.
Safety first: handling and disposal considerations
Handling an e-bike battery carries risks of short circuits, chemical exposure, or thermal runaway if damaged. Always work away from flammables, disconnect the charger, and never pierce or crush cells. If a battery shows physical damage, stop and consult a professional technician. Old packs should be recycled at approved facilities; never dispose of lithium batteries in household trash. Check local regulations for take-back programs, and consider manufacturer recycling options. Battery Health emphasizes that safe handling protects you and the environment.
Prep your bike and battery protection: safety and firmware checks
Power down the bike completely and unplug the charger before starting. Remove any panniers or accessories that may get in the way, then inspect mounting hardware for wear or corrosion. If your bike supports firmware or BMS updates, check for updates that may affect charging behavior or compatibility with a new pack. A quick calibration of ride modes after installation helps ensure accurate pedal assist levels and battery monitoring reliability.
Step-by-step replacement process overview
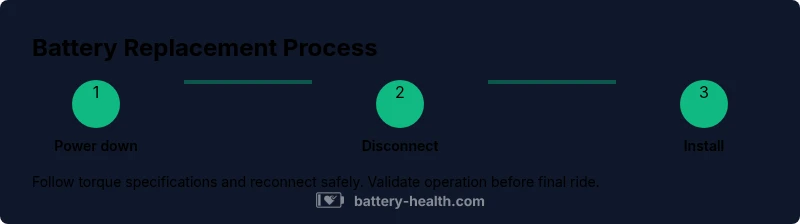
The replacement process follows a logical sequence: (1) verify compatibility and safety, (2) remove the old battery, (3) prepare the frame and contacts, (4) mount the new battery with correct orientation, (5) reconnect the harness and BMS, and (6) perform post-install tests. This overview sets expectations and helps you plan the work, but the detailed steps are provided in the dedicated STEP-BY-STEP section and the accompanying diagrams.
Installing a new battery: connectors, mounting, and securing
Align the new battery with the bike’s mounting points and insert it firmly into the frame with orientation that matches the previous battery. Connect the main power connector first, ensuring a solid, click-fit engagement; then attach any sensor or communication cables as required by the bike’s system. Secure the pack with the built-in mounting hardware and verify that it sits flush and does not rattle during a light shake test. Always recheck the connectors for dirt or corrosion and wipe clean before final connection.
Post-install testing and calibration
After installation is complete, power up the system and observe the BMS indicators for normal status. Check that the display shows accurate battery percentage and that the pedal assist responds consistently across modes. Perform a short, slow ride in a safe area to confirm smooth motor response and braking interaction with the new pack. If you notice any abnormal heating, smelling, or performance drops, power down and recheck the connections and software.
Charging, storage, and long-term maintenance tips
Charge the pack according to the manufacturer’s recommendations, avoiding extreme temperatures and keeping the battery within safe voltage ranges. Store the battery in a cool, dry place away from direct sunlight and flammable materials when not in use, ideally at partial charge. Periodically inspect for signs of swelling, corrosion, or loose connections, and perform routine cycling to preserve chemistry. Battery Health recommends regular health checks and using manufacturer-approved chargers to maximize longevity.
Replacing cells vs entire pack: what to know
In some cases, you may have the option to replace individual cells or a portion of the pack, but this is typically only viable with professional service and specific pack designs. For most riders, replacing the entire pack with an OEM-compatible unit ensures warranty compatibility and proper BMS integration. If you’re considering cell-level work, weigh the cost, safety risks, and warranty implications with a qualified technician. This section helps you decide between repair options and full replacement.
End of life: recycling and warranty considerations
Before discarding a battery, check the warranty status and service options from the original manufacturer. If the pack is damaged or no longer holds a charge, recycling is essential. Look for local e-waste or battery recycling programs that accept lithium-ion packs, and bring any related documentation to ensure proper credit or reuse options. Battery Health emphasizes choosing certified recyclers and respecting environmental rules to minimize impact.
Tools & Materials
- Replacement e-bike battery (compatible model)(Choose exact model, voltage, and capacity to match your bike.)
- Torque wrench(Use manufacturer-specified torque for mounting bolts.)
- Phillips and flat-head screwdrivers(For mounting hardware and harness clips.)
- Anti-static wrist strap(Prevent static discharge when handling packs.)
- Nitrile gloves(Protect hands and reduce oil/grease transfer.)
- Multimeter or battery tester(Helpful for quick voltage checks and safety tests.)
- Clean lint-free cloth and isopropyl alcohol(Clean contacts and surfaces before connection.)
- Cable ties or Velcro straps(Organize wiring and secure cables after install.)
- Bike stand or sturdy workbench(Keeps the bike stable during replacement.)
- Owner's manual or manufacturer spec sheet(Verify torque specs, connector types, and charging guidelines.)
Steps
Estimated time: 60-120 minutes
- 1
Power down and prep
Turn off the bike and unplug the charger. Remove any accessories that could obstruct access. Set the bike on a stable stand and gather your tools before you begin.
Tip: Double-check you have the exact battery model and manual handy. - 2
Remove the old battery
Loosen and remove mounting bolts or fasteners. Slide the battery straight out with even force to avoid bending connectors. Do not twist or pull cables forcefully.
Tip: Support the battery with two hands to prevent dropping it. - 3
Disconnect wiring and BMS safely
Carefully detach the main power connector and any sensor cables. Use insulated tools and avoid touching metal parts with bare hands. Cap exposed contacts to prevent short circuits.
Tip: Take a photo of connections before removal for reference. - 4
Inspect mounting hardware and contacts
Check frame mounting points for wear or damage. Clean any corrosion from contacts with isopropyl alcohol and a lint-free cloth. Ensure contact pins are straight and undamaged before installing the new pack.
Tip: If contacts are damaged, replace before proceeding. - 5
Install the new battery
Slide the new pack into the frame with orientation matching the previous battery. Reconnect the main power connector and any sensor cables. Ensure the battery sits flush and locks into place.
Tip: Do not force a connector; misaligned parts can cause damage. - 6
Reconnect, test, and calibrate
Power on the system and verify the display reads the new pack. Perform a brief ride in a controlled area to confirm motor response and braking. Recheck torque on mounting bolts after the test ride.
Tip: If the display shows errors, re-check connections and consult the manual.
FAQ
Can I replace my e-bike battery myself?
Yes, many riders replace batteries themselves if they have basic mechanical skills and follow safety guidelines. Always verify compatibility and consult the manual for torque specs. If in doubt, seek professional help.
Yes, you can replace the battery yourself if you follow safety steps and use the correct replacement.
What tools do I need for replacement?
You’ll typically need a screwdriver set, a torque wrench, anti-static gear, nitrile gloves, a multimeter, and the replacement battery. Having a bike stand and photos of the original connections helps.
Typical tools include a screwdriver set, torque wrench, anti-static gear, and the replacement battery.
How do I know if a battery is compatible?
Check voltage, capacity, connector type, mounting compatibility, and BMS requirements. If in doubt, consult the bike’s manufacturer or a trained technician.
Check voltage, capacity, connector type, and mounting compatibility to ensure it fits.
Are there safety concerns?
Yes. Risk of short circuits, chemical exposure, and thermal events exists if damaged. Always unplug, avoid damaged packs, and work in a ventilated area.
Yes, protect yourself from shocks and avoid damaged packs. Work in a ventilated area.
What should I do with the old battery?
Recycle at approved facilities or manufacturer programs. Do not throw lithium batteries in household trash.
Recycle the old battery at an approved facility and follow local rules.
Does replacement impact warranty?
Replacement often affects warranty depending on the manufacturer. Check terms and consider professional service if under warranty.
Warranties vary; check terms and consult the maker if under warranty.
Watch Video
Quick Summary
- Verify compatibility before buying a replacement.
- Follow safety steps to prevent shocks or fires.
- Use proper mounting to prevent rattling.
- Test ride in a safe area before normal use.
- Recycle old batteries responsibly.