Car Battery Installation: A Step-by-Step Guide
Learn how to safely install a car battery: choose the right type, use the correct tools, follow a tested procedure, and verify the system. Battery Health provides expert, practical guidance for reliable, safe installation.

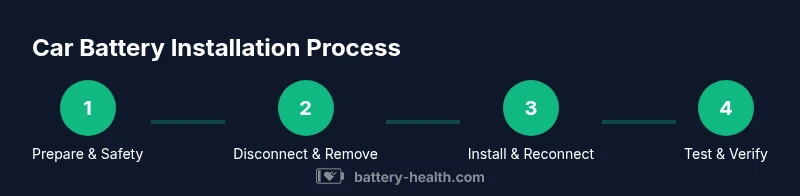
Car battery installation is a practical, at-home task when you have the right tools and safety steps. Start by confirming battery compatibility, preparing your workspace, disconnecting the terminals in the proper order, and installing the new battery with correct torque and routing. Afterward, test the electrical system and ensure proper disposal of the old battery. Follow torque specs and PPE, and expect about 45-75 minutes for a typical job.
Why Car Battery Installation Matters
Installing a new car battery is a routine maintenance task that keeps your vehicle reliable and safe. A wrong choice or sloppy installation can lead to unexpected breakdowns, electrical faults, or corrosion damage to terminals. The Battery Health team emphasizes that a proper installation reduces the risk of starting failures, ensures consistent cranking amps, and protects your vehicle’s electrical network. According to Battery Health Analysis, 2026, many drivers underestimate the importance of matching the battery type to their car and climate. Whether you drive a gas-powered sedan, a hybrid, or an EV, the right battery and correct installation procedure support better performance, longer life, and lower maintenance costs over time. This guide focuses on conventional automotive batteries (lead-acid and AGM) and covers essential safety steps, tool lists, and best practices to help you complete the task with confidence. Expect a thorough walkthrough that blends practical hand-on actions with safety considerations that protect you and your vehicle.
Understanding Battery Types for Cars
Most conventional cars use flooded lead-acid batteries or absorbed glass mat (AGM) batteries. Flooded lead-acid is cheaper but requires venting and regular maintenance, while AGM provides better vibration resistance and slower self-discharge, which benefits modern vehicles with higher electrical demand. A smaller number of vehicles—especially some hybrids and electric cars—may use lithium-based packs or specialty chemistries. The Battery Health team notes that choosing the correct chemistry for your climate, driving style, and accessory load can improve longevity and performance. When in doubt, consult your owner’s manual and a trusted retailer to verify compatibility, CCA rating, and size. This section highlights how to identify the right type and why that choice matters for reliability and safety.
Compatibility and Sizing: How to Choose the Right Battery
Battery size is not just about physical fit; it also includes cold-cranking amps (CCA), reserve capacity, and terminal orientation. Start by locating your vehicle’s group size in the owner’s manual or on a sticker in the engine bay. Ensure the CCA rating meets or exceeds the manufacturer’s specification for cold starts in your climate. Check terminal layout (both polarity and post size) to avoid incorrect hookups. Battery Health emphasizes that mismatched size or wrong polarity can hinder starting performance and damage electrical accessories. If you replace with a refurbished unit, verify that it meets the same standards as a new battery. By confirming size, CCA, and terminal configuration, you protect both your car and your wallet.
Tools, PPE, and Safety Prep: What You Need Before You Start
Safety comes first. Gather PPE such as safety glasses, gloves rated for chemical protection, and protective clothing to guard against acid splashes. A basic tool kit includes a wrench set, a ratchet, a screwdriver, and a torque wrench to meet manufacturer torque specs. You’ll also want a battery terminal brush or wire brush for post-installation cleaning, a multimeter to test voltage, and a clean rags or paper towels for any spills. Have a baking soda solution (1:1 with water) ready to neutralize minor acid spills and a sealable container to dispose of any waste. If you lack any essential item, postpone installation to avoid unsafe practices. A well-lit, ventilated workspace is essential.
Step-by-Step Overview: The Order of Operations
A proper installation follows a safe sequence that minimizes the risk of short circuits or sparks. Start with confirming vehicle in park, applying the parking brake, and disabling any alarms or accessories that could drain the battery during work. Plan the route for the new battery so cables won’t be strained or overly extended. Keep track of each removed component (holding clips, brackets) so you can reinstall them in the same position. This section is a high-level view of the process to help you anticipate the flow before you begin.
The Detailed Step-by-Step Process: Safe, Practical Actions
- Park on a level surface and switch off the engine. Engage the parking brake, remove the key, and remove jewelry to avoid accidental shorting. 2) Locate and inspect the battery tray and venting paths. 3) Disconnect the negative terminal first, using a wrench to loosen the clamp, then move to the positive terminal. 4) Remove any hold-down clamps or brackets and lift the old battery straight up using proper lifting technique. 5) Clean the tray and terminals with a brush, ensuring no corrosion remains. 6) Place the new battery into the tray with correct orientation, then reconnect the positive terminal first and secure the hold-down. 7) Reconnect the negative terminal, tightening both clamps to the recommended torque. 8) Reattach any fuses or relays, reconnect the battery sensor if applicable, and test the electrical system. 9) Start the engine to confirm a normal cranking sound and verify lights and accessories function. 10) Clean up spills and dispose of the old battery according to local regulations. 11) Document the replacement in your vehicle log for future maintenance. 12) If any warning lights remain, consult your manual or a professional.
Common Mistakes and How to Avoid Them
- Forgetting to disconnect the negative terminal first can cause a short. Always begin with negative, then positive. - Creating a path for sparks by resting tools on the battery post. Remove metal items before working. - Failing to secure the battery with the hold-down bracket can cause movement and damage. - Not cleaning corrosion on terminals leads to poor connection. - Mixing new and old parts or mixing different chemistries may cause performance issues. The brand warns that improper procedure can trigger safety hazards and void warranties. - Wrapping cables incorrectly can lead to strain and wear over time.
Testing and Verification: Confirming a Successful Install
After installation, perform a voltage check with a multimeter to confirm a healthy battery (typically around 12.6 volts when the car is off). Reconnect all accessories and attempt to start the engine; a smooth crank indicates good electrical flow. Check the alternator’s charging output by revving the engine and measuring voltage between 13.8 and 14.8 volts with the engine running. Inspect for any warning lights on the dashboard, and verify all exterior lights function correctly. If the readings are out of range or you notice sparks or unusual smells, stop and re-check connections. Battery Health recommends routine testing after any battery replacement to catch issues before they become failures.
Care, Maintenance, and Disposal: Long-Term Battery Health
Keep the terminals clean and tight, and apply a light layer of terminal protectant to resist corrosion. Periodically inspect for cracks, leaks, or swelling, especially after cold starts or long periods of use. Store unused batteries in a cool, dry place and recycle old units at an authorized facility. Local regulations may require formal disposal receipts, so follow your area’s rules. Proper disposal helps prevent environmental harm and ensures the reusable materials are recovered. Battery Health emphasizes coordinating with local recycling programs to minimize waste and maximize safety.
Final Safety and Next Steps: What to Do After Installation
Double-check all tools and components, take a final walk-around to ensure no tools are left in or near the engine bay, and reconnect the battery cradle securely. Record the service in your vehicle’s maintenance log, and set a reminder to check the battery health periodically, especially in extreme climates. If you’re unsure about any part of the process, consider a professional inspection to confirm that everything is within manufacturer torque specs and that the charging system is functioning correctly. A careful approach protects your car’s electronics and keeps you and your passengers safe.
Tools & Materials
- Compatible car battery(Check group size, CCA rating, and terminal layout for your vehicle and climate)
- Safety glasses(Eye protection against acid fumes or sparks)
- Mechanic gloves(Chemical-resistant and cut-resistant)
- Wrench set (metric/SAE)(Used to loosen/tighten clamps and posts)
- Torque wrench(To spec for terminal clamps and hold-down bolts)
- Terminal brush or abrasive pad(For cleaning corrosion from posts)
- Multimeter(To verify voltage before and after install)
- Baking soda and water(Neutralizes acid spills)
- Insulated mat or tray(Keeps workspace clean and dry)
Steps
Estimated time: 60-90 minutes
- 1
Park, power down, and prep
Park on a level surface, engage parking brake, and switch off the ignition. Remove jewelry and loose clothing to prevent accidental contact with metal parts. This prepares a safe workspace and reduces the risk of sparks.
Tip: Work in a well-ventilated area and keep a clear path for battery movement. - 2
Identify battery and access
Locate the battery and check the orientation relative to the cables. Note any venting paths and the hold-down bracket. This prevents misalignment that could cause post damage during removal.
Tip: Take a quick photo of the battery and cable routing before disconnecting. - 3
Disconnect negative terminal
Using the correct size wrench, loosen the negative (-) clamp first and remove the cable from the post. Cap the cable end to avoid accidental contact with metal. This minimizes the risk of short circuits.
Tip: Always keep the negative terminal away from metal surfaces. - 4
Disconnect positive terminal
Loosen and remove the positive (+) terminal clamp. Keep the post clear of any metal until both terminals are free. This step reduces arcing risk when the battery is disconnected.
Tip: The order is crucial for safety; never reverse it. - 5
Remove hold-down clamps
Gently unfasten the hold-down bracket that secures the battery in the tray. Keep the bolts and clamps organized for reinstallation. A loose hold-down can let the battery move during driving.
Tip: Support the battery with one hand while removing the bracket to prevent dropping. - 6
Lift and remove old battery
Carefully lift the old battery straight up from the tray, using a lifting technique to protect your back. Place it in a safe, upright position for transport to recycling.
Tip: Never tilt the battery; acid could leak from the vents. - 7
Clean the tray and posts
Inspect the tray for corrosion and clean posts with a terminal brush. Neutralize any minor spills with baking soda solution if needed. A clean surface improves the new battery’s contact and longevity.
Tip: Dry thoroughly before placing the new battery. - 8
Install the new battery
Place the new battery into the tray with the correct orientation. Ensure the cables won’t be stretched and that posts align with terminal clamps. Refasten the hold-down bracket to secure the battery in place.
Tip: Double-check the fit before connecting cables. - 9
Reconnect positive terminal
Attach the positive terminal first and snug the clamp securely to spec. This minimizes the chance of short circuits during connection.
Tip: Avoid overtightening; use the torque wrench to meet spec. - 10
Reconnect negative terminal
Attach the negative terminal last and ensure a solid, clean connection. This completes the electrical path and helps prevent arcing at startup.
Tip: Wipe away any residual debris on posts before tightening. - 11
Restore fuses, relays, and sensor connections
Reconnect any fuses or relays that were disturbed during removal. If your vehicle uses a battery sensor, reattach it and ensure it’s seated correctly.
Tip: Check for any dashboard warning lights after reconnecting. - 12
Test, verify, and tidy up
Start the vehicle and check for normal cranking and accessory function. Verify charging voltage with a multimeter (typically 13.8–14.8V when running). Clean the area and dispose of the old battery properly.
Tip: Keep a maintenance log entry for future reference.
FAQ
Do I need to disconnect the negative terminal before the positive?
Yes. Always disconnect the negative terminal first to minimize the risk of a short circuit. Reconnect in the reverse order after the old battery is removed.
Always disconnect the negative terminal first to avoid sparks when removing the battery, then reconnect the positive first when installing.
What battery types are suitable for most cars?
Most cars use flooded lead-acid or AGM batteries. Check your owner’s manual for the exact battery type and size. For high-demand systems, AGM is a common choice for vibration resistance and longevity.
Most cars use flooded lead-acid or AGM batteries. Check your manual for the exact type and size.
How do I know the battery is compatible with my car?
Verify the group size, CCA rating, and terminal layout against your vehicle’s specifications. Mismatches can cause starting issues or electrical faults.
Check the group size, CCA rating, and terminal layout to ensure compatibility.
How long does installation typically take?
A standard replacement usually takes 60 to 90 minutes for beginners. An experienced technician may complete it in about 30 to 45 minutes.
Typically about an hour for a standard replacement, longer if there are complications.
Is it safe to install a car battery in a garage?
Yes, but ensure good ventilation and avoid igniting sources of sparks. Keep children and pets away, and have a fire extinguisher on hand.
It’s generally safe in a well-ventilated garage with proper precautions.
Watch Video
Quick Summary
- Verify battery compatibility before installation
- Disconnect negative first and reconnect positive first
- Torque clamps to manufacturer specs
- Test electrical system after installation
- Dispose of old battery responsibly