Battery Replacement Auto: Safe, Step-by-Step Guide
Learn how to safely replace your car battery with a practical, step-by-step approach. Understand signs, pick the right battery, and install it correctly to keep the vehicle reliable and protected.

Learn how to perform a safe battery replacement auto procedure from start to finish. This quick guide covers signs you need a new battery, how to choose the right type, essential safety steps, and a clear installation process. Following these steps helps restore reliable starting power and protect your vehicle's electrical system.
Why battery replacement auto matters
A healthy battery is the heartbeat of modern vehicles, powering starters, lights, and the computer network that runs everything from infotainment to engine management. When the battery can't supply reliable cranking, you may see slow starts, dim lights, or warning indicators. According to Battery Health, aging batteries are a leading cause of unexpected breakdowns, especially in extreme weather. Replacing with the right type and ensuring clean, tight connections helps prevent parasitic drains and protects the alternator from unnecessary strain. This section explains why a properly executed battery replacement auto task matters for reliability, safety, and long-term vehicle health, and sets the stage for choosing the right battery and following a safe installation process.
Signs your battery needs replacement
Common symptoms include slow or reluctant starting, a rapid clicking sound when turning the key, or headlights that dim noticeably when you start the engine. A battery that is three to five years old or older is typically nearing the end of its usable life. If you notice a swollen case, corrosion on terminals, or a check battery warning that persists after an engine restart, it’s time to test or replace. Regular inspections can catch weak cells before they fail completely, and a failing battery can also stress the alternator, reducing charging efficiency over time.
Battery types and compatibility for cars
Most passenger cars use a traditional flooded lead-acid battery, but more modern vehicles employ AGM (absorbent glass mat) or EFB (enhanced flooded batteries) for better performance in cold starts and higher cycling. Some hybrids or high-performance vehicles may use lithium-based packs, which require exact matching to the manufacturer’s specifications. Always verify the correct group size, terminal configuration, and CCA (cold-cranking amps) rating in your owner’s manual or on the existing sticker under the hood. If in doubt, ask a trusted retailer or consult the Battery Health guidance for general compatibility tips.
Safety prerequisites and preparation
Work in a well-ventilated area with the engine off, parking brake engaged, and keys removed. Wear eye protection and gloves; batteries contain corrosive electrolyte and can emit hydrogen gas during charging. Keep metal tools away from the terminals to avoid short circuits. Have a plan to recycle the old battery and never dispose of it with regular household trash. Verify you have the right replacement battery on hand before starting the removal.
Understanding key specs when choosing a replacement
Key specs to consider include the battery group size (the physical fit in the tray), the cold-cranking amps for reliable starts in cold weather, and the reserve capacity to keep electronics running if the alternator momentarily fails. Check terminal layout and polarity to ensure compatibility with your vehicle’s cables and clamps. Warranty length and coverage are also important, as a longer warranty often reflects better durability and after-sales support. If you’re replacing a battery in a vehicle with start-stop capability or a modern electrical system, verify compatibility with the stop-start system and any micro-hybrid features.
Post-install checks and maintenance tips
After installing, recheck all connections for tightness and clean any corrosion from the terminals. Use a voltmeter to confirm a healthy resting voltage (around 12.6 volts for a fully charged lead-acid battery) and then start the engine to confirm a strong, consistent cranking performance. Reset any dash clocks or radios if needed and take note of any warning lights. Finally, recycle the old battery at an authorized facility; many retailers offer take-back programs or local recycling centers. Regular maintenance, such as cleaning terminals and checking for corrosion, extends battery life between replacements.
Tools & Materials
- Socket wrench set (13mm and 10mm)(Essential for battery clamps and hold-downs)
- Safety gloves(Nitrile or mechanic gloves)
- Safety glasses(Eye protection against splashes and debris)
- Battery terminal brush or wire brush(For cleaning corrosion from terminals)
- Anti-corrosion terminal grease or spray(Optional but recommended for long-term contact)
- Digital voltmeter or multimeter(Verify resting voltage of the new battery)
- Rags or paper towels(Clean up electrolyte residue and spills)
- New car battery of correct group size(Check label for group size and CCA)
- Owner's manual(Confirm vehicle-specific specs and procedure)
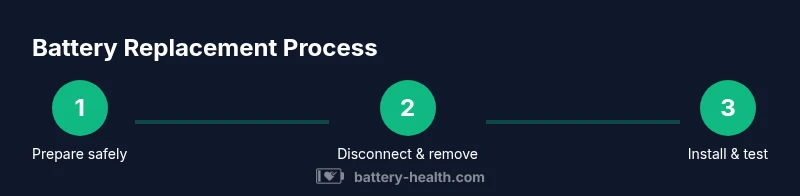
Steps
Estimated time: 60-90 minutes
- 1
Park and prep
Park on level ground, engage the parking brake, and turn the ignition off. Remove the key and ensure all accessories are off to prevent electrical shocks or surges. This initial safety check reduces the risk of accidental short circuits during removal.
Tip: Wedge the wheels with chocks if you’re on any incline and avoid leaning over the battery. - 2
Locate and verify battery
Open the hood and locate the battery. Verify the battery size and orientation match your manual or the label on the current battery before you continue. This prevents installing an incompatible unit that could fail prematurely.
Tip: If you’re unsure, photograph the labels before disconnecting anything for future reference. - 3
Disconnect negative terminal
Loosen and remove the negative (-) cable clamp first to minimize the chance of a short if your tool touches a grounded metal surface. Move the cable aside to keep it from contacting the terminal.
Tip: Keep the terminal cap or bolt in a safe place to avoid losing it. - 4
Disconnect positive terminal and hold-down
Loosen the positive (+) terminal clamp next, then remove the hold-down bracket or clamp securing the battery. This frees the battery for removal without stressing cables.
Tip: Work slowly to avoid metal tools contacting both terminals at once. - 5
Remove old battery
Lift the old battery straight out using two hands or a proper battery lifting tool. Avoid tilting to prevent electrolyte spills. Place the battery on a non-conductive surface for transport.
Tip: If the battery is stuck, gently wiggle while lifting and check for additional fasteners. - 6
Clean tray and terminals
Inspect the tray and clamps for corrosion. Use the brush to clean terminals and the tray, then wipe dry. Apply anti-corrosion paste if provided by your kit.
Tip: Remove any white crust and keep the tray dry to prevent future corrosion. - 7
Install new battery
Place the new battery in the tray, secure with the hold-down, then connect the positive terminal first, followed by the negative. Ensure clamps are snug but not overly tight to avoid terminal damage.
Tip: If using grease, apply a thin layer to the terminals for longevity. - 8
Test and finalize
Start the engine to verify cranking power and confirm there are no warning lights. If available, use a voltmeter to confirm resting voltage around 12.6V. Reclose the hood and recycle the old battery at a proper facility.
Tip: Reset any radio or clock settings if your vehicle doesn’t retain them automatically.
FAQ
Is it safe to replace a car battery myself?
Yes, with proper precautions, the right tools, and a correct battery. Follow safety steps, wear protection, and avoid short circuits. If you’re unsure about any step, consult a professional.
It’s safe to replace a car battery yourself if you follow safety steps and use the right tools. If you’re unsure at any point, ask a professional.
How do I know if I need a replacement or just a recharge?
If the battery fails to hold a charge after a full recharge or shows signs of weakness beyond 3-5 years, replacement is usually needed. A professional test can confirm voltage, CCA, and internal resistance.
When a battery can’t hold a charge after a full recharge or is old, replacement is typically needed. A shop can test it to be sure.
What tools are essential for a battery replacement auto?
Key tools include a socket wrench set (13mm and 10mm), safety gloves and glasses, a battery terminal brush, and the correct replacement battery. A voltmeter helps verify voltage after installation.
Essential tools are a wrench set, gloves and safety glasses, a brush for terminals, the right battery, and a voltmeter for a quick check.
How should I dispose of the old battery?
Take the old battery to an authorized recycling center or retailer that offers take-back programs. Do not throw it in household trash due to toxic materials and environmental regulations.
Bring the old battery to a certified recycling center or retailer with a take-back program. Do not throw it away.
Can a bad battery damage the alternator?
A failing battery can put extra load on the alternator, reducing charging efficiency and potentially shortening its life. Replacing the battery helps stabilize electrical system performance.
Yes, a bad battery can strain the alternator and shorten its life. Replacing it helps restore proper charging.
Watch Video
Quick Summary
- Verify compatibility before replacement.
- Disconnect negative first, then positive for safety.
- Test engine start and voltage after installation.
- Recycle the old battery responsibly.