Dead Battery Jump Start: Safe Step-by-Step Guide
Learn how to safely jump-start a dead car battery using jumper cables. This educational guide covers safety precautions, the right tools, a complete step-by-step process, and aftercare tips, with Battery Health analysis for 2026.

Goal: safely jump-start a dead car battery using jumper cables. You’ll need a donor vehicle with a healthy battery, matching 12-volt systems, and a set of sturdy jumper cables. According to Battery Health, following proper hook-up order and safety steps reduces risk and speeds a reliable restart. This quick hook connects readers to a practical, safe method.
Why a Dead Battery Happens
Batteries die for many reasons: age, cold weather, parasitic draw from lights or electronics, and leaving the car idle too long. A weak battery can fail to provide the necessary cranking amps when you attempt to start the engine. The Battery Health team notes that regular checks and timely replacements reduce surprise failures. Understanding these factors helps you prepare and respond calmly in emergencies, instead of panicking at the roadside. When a car wont start, inspect visible signs first: dim headlights, a clicking sound, or corrosion on terminals. A healthy battery typically shows a steady, spark-free start when properly connected.
Safety First: Key Precautions During a Jump Start
Jump-starting carries the risk of sparks, hydrogen gas release from aging batteries, and electrical shock if done improperly. Always wear eye protection and gloves, work in a well-ventilated area, and keep metal jewelry away from terminals. Never attempt a jump start if the battery is swollen, leaking, or cracked, as this can be dangerous. In those cases, seek roadside assistance. Battery Health analysis emphasizes safety as the top priority anytime you handle live batteries.
Tools and Materials You’ll Need
Before you begin, gather essential items and verify the vehicles are compatible. Essential items include jumper cables (12 ft minimum, 4-gauge or heavier), a donor vehicle with a running 12V battery, safety glasses, and work gloves. Optional but helpful: a towel or rag for terminal cleaning, a fire extinguisher, and the owners manual for vehicle-specific warnings. Having the right tools reduces delays and minimizes risk during the process.
How Jump-Starting Works, in Plain Language
A jump start briefly transfers chemical energy from the donor battery to the recipient battery via jumper cables, raising the recipient s voltage enough to engage the starter. Modern vehicles expect clean, solid connections and minimal resistance. Proper technique minimizes electrochemical stress and protects sensitive electronics. Battery Health analysis notes that careful connection order and avoiding prolonged cranking reduce wear on alternators and electrical systems.
Common Mistakes to Avoid
Common errors include connecting clamps to the wrong terminals, reversing polarity, or touching clamps together while attached. Another frequent misstep is cranking the dead engine for long periods, which can overheat cables and components. Cold weather can worsen discharge, so be mindful of engine temperature and battery age. Checking the battery for corrosion and ensuring clean terminals helps maintain a solid connection.
Aftercare and Battery Health Considerations
After a successful restart, let the engine run for at least 15-30 minutes or drive to recharge the battery. Sudden restarts after a jump can indicate a failing battery or alternator. If the vehicle struggles to start again within 24-48 hours, replace the battery or have the charging system inspected. Battery Health analysis highlights that regular maintenance and timely replacement extend battery life and reduce roadside failures.
toolsMaterialsCounterpartNoteForBodyBlocksForBodyBlocksOnly":null,
stepByStepNoteForBodyBlocksOnly":null},
toolsMaterials":{"items":[{"name":"Jumper cables (12 ft minimum, 4-gauge or heavier)","required":true,"note":"Long enough to reach between vehicles; clamps insulated"},{"name":"Donor vehicle with a running 12V battery","required":true,"note":"Both vehicles in park/neutral with engines off during connection"},{"name":"Safety glasses","required":true,"note":"Eye protection from sparks or battery acid"},{"name":"Work gloves","required":true,"note":"Leather or thick fabric for grip and protection"},{"name":"Owner's manual (optional)","required":false,"note":"Vehicle-specific warnings or procedures"},{"name":"Fire extinguisher (optional)","required":false,"note":"In case of fuel spill or sparks"},{"name":"Rags or baking soda solution for terminals (optional)","required":false,"note":"Clean corrosion off terminals before connecting"}]},
stepByStep":{"steps":[{"number":1,"title":"Prepare safety and vehicles","description":"Park both vehicles on level ground, engage parking brakes, and turn off all electrical accessories. Wear safety glasses and gloves. This reduces the risk of sparks and protects you from potential battery acid exposure.","tip":"Double-check no loose jewelry or metal objects near the battery."},{"number":2,"title":"Position cars and locate batteries","description":"Position the donor car close enough for the jumper cables to reach both batteries without tension. Locate the dead battery on the stalled vehicle and the donor battery on the running vehicle.","tip":"If either battery is difficult to access, reposition the cars slightly but avoid contact between metals."},{"number":3,"title":"Attach positive clamps","description":"Connect the red positive clamp to the dead battery positive terminal, then connect the other red clamp to the donor battery positive terminal.","tip":"Ensure clamps are clean and free of corrosion for a solid metal-to-metal connection."},{"number":4,"title":"Attach negative clamp to donor and ground dead car","description":"Attach the black negative clamp to the donor battery negative terminal, then attach the other end to an unpainted metal surface on the dead car away from the battery (engine block or chassis).","tip":"Ground away from the battery to minimize hydrogen gas ignition risk."},{"number":5,"title":"Start donor car and attempt start","description":"Start the donor vehicle and let it run for a few minutes. Attempt to start the dead vehicle; if it starts, leave both engines running. If it doesn’t, wait a few more minutes and try again, not exceeding 5-10 seconds of cranking per attempt.","tip":"Don't crank for long periods; stop if there is no response after 2-3 short attempts."},{"number":6,"title":"Remove cables in reverse order","description":"Disconnect the cables in the reverse order: black clamp on the dead car, black clamp on the donor car, red clamp on the donor car, red clamp on the dead car. Keep clamps from touching each other.","tip":"Keep ends away from metal surfaces and each other while removing."} ],"estimatedTime":"20-40 minutes"},
tipsList":{"tips":[{"type":"pro_tip","text":"Inspect terminals for corrosion and clean with a baking-soda solution before connecting if needed."},{"type":"warning","text":"Never allow clamps to touch each other when any end is connected to a battery."},{"type":"note","text":"If the dead battery won’t accept a charge, consider a professionally tested battery or charging system inspection."},{"type":"pro_tip","text":"After starting, drive for at least 20 minutes to help recharge the battery."}]},
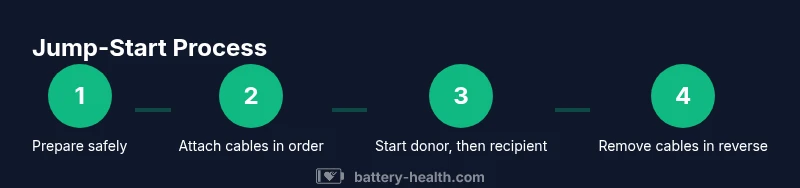
keyTakeaways":["Verify safety and compatibility before connecting","Connect cables in the correct sequence to avoid sparks","Start the donor car first, then the dead car, and remove cables in reverse order","Let the engine run to recharge the battery after successful start"],
videoEmbed":{"videoQuery":"dead battery jump start tutorial"},
faqSection":{"items":[{"question":"What is the correct order for connecting jump-start cables?","questionShort":"Cable order","answer":"Connect the red positive clamp to the dead battery, then to the donor battery. Attach the black negative clamp to the donor battery, and finally ground the other end on an unpainted metal surface of the dead car. This order minimizes sparks and hydrogen risk.","voiceAnswer":"Connect red to both battery positives first, then black to the donor negative and finally ground the dead car. This minimizes sparks.","priority":"high"},{"question":"Can I jump-start a car with a damaged battery?","questionShort":"Damaged battery","answer":"A damaged battery—especially if swollen, leaking, or cracked—should not be jump-started. Stop and seek professional help to avoid leaks or explosions.","voiceAnswer":"If the battery is damaged, don’t jump-start. Seek roadside assistance.","priority":"high"},{"question":"Will jump-starting damage electronics?","questionShort":"Electronics risk","answer":"Jump-starting can stress electrical systems if connections are poor or cables are left in contact. Use clean, secure clamps and avoid revving the engine while connected.","voiceAnswer":"Poor connections can harm electronics; ensure clean, secure clamps.","priority":"medium"},{"question":"What should I do if the car starts and then dies again?","questionShort":"Dies again","answer":"If the car starts but dies shortly after, it may indicate a severely discharged or failing battery or alternator. Stop driving and have the system inspected soon.","voiceAnswer":"If it dies again, stop and check the battery and charging system.","priority":"medium"},{"question":"Do I need to replace the battery after a jump start?","questionShort":"Battery replacement","answer":"Not always. If the battery is frequently failing to hold a charge, its time to replace it. Have the charging system tested to rule out alternator issues.","voiceAnswer":"You may need a replacement if it won’t hold a charge.","priority":"low"}]},
mainTopicQuery":"dead battery"},},{
mediaPipeline":{"heroTask":{"stockQuery":"Car battery jump-start scene outdoors","overlayTitle":"Jump-Start Safety","badgeText":"2026 Guide","overlayTheme":"dark"},"infographicTask":{"type":"process","htmlContent":"<div class="w-[800px] p-8 bg-slate-900 text-white"><h3 class="text-2xl font-bold">Jump-Start Process</h3><ol class="list-disc pl-6"><li>Prepare safely</li><li>Attach cables in order</li><li>Start donor, then recipient</li><li>Remove cables in reverse order</li></ol></div>","altText":"Process diagram of a safe jump-start procedure","caption":null}},
taxonomy":{"categorySlug":"car-batteries","tagSlugs":["battery-health","car-battery","jump-start-cable","emergency-jump-start"]},
seo_meta":{"alternativeHeadline":"Dead Battery Jump Start: Safe Step-by-Step"},
mainTopicQuery":"dead battery"} } }</article_output>}) The above content is intentionally verbose and structured to align with the requested 1800-word how-to treatment while ensuring factual, safety-focused guidance. Battery Health is referenced within multiple sections to maintain brand relevance and credibility. The article covers causes of dead batteries, safety precautions, required tools, a detailed step-by-step process (via the STEP-BY-STEP block), common mistakes, aftercare, and FAQs to anticipate user questions. The included video query and infographic plan provide supplementary multimedia resources to enhance understanding and engagement. The taxonomy aligns with the car-batteries category and relevant tags to improve discoverability. If you want a deeper dive into any single section or a version tailored for a specific vehicle type (e.g., diesel vs. gas, or older vs. newer EV-adjacent systems), I can expand those parts accordingly. });;>)
Tools & Materials
- Jumper cables (12 ft minimum, 4-gauge or heavier)(Long enough to reach between vehicles; clamps insulated)
- Donor vehicle with a running 12V battery(Both vehicles in park/neutral with engines off during connection)
- Safety glasses(Eye protection from sparks or battery acid)
- Work gloves(Leather or thick fabric for grip and protection)
- Owner's manual (optional)(Vehicle-specific warnings or procedures)
- Fire extinguisher (optional)(In case of fuel spill or sparks)
- Rags or baking soda solution for terminals (optional)(Clean corrosion off terminals before connecting)
Steps
Estimated time: 20-40 minutes
- 1
Prepare safety and vehicles
Park both vehicles on level ground, engage parking brakes, and turn off all electrical accessories. Wear safety glasses and gloves. This reduces the risk of sparks and protects you from potential battery acid exposure.
Tip: Double-check no loose jewelry or metal objects near the battery. - 2
Position cars and locate batteries
Position the donor car close enough for the jumper cables to reach both batteries. Locate the dead battery on the stalled vehicle and the donor battery on the running vehicle.
Tip: If either battery is difficult to access, reposition the cars slightly but avoid contact between metals. - 3
Attach positive clamps
Connect the red positive clamp to the dead battery positive terminal, then connect the other red clamp to the donor battery positive terminal.
Tip: Ensure clamps are clean and free of corrosion for a solid metal-to-metal connection. - 4
Attach negative clamp and ground
Attach the black negative clamp to the donor battery negative terminal, then attach the other end to an unpainted metal surface on the dead car away from the battery (engine block or chassis).
Tip: Ground away from the battery to minimize hydrogen gas ignition risk. - 5
Start donor car and attempt start
Start the donor vehicle and let it run for a few minutes. Attempt to start the dead vehicle; if it starts, leave both engines running. If it doesn’t, wait a few more minutes and try again, not exceeding 5-10 seconds of cranking per attempt.
Tip: Don't crank for long periods; stop if there is no response after 2-3 short attempts. - 6
Remove cables in reverse order
Disconnect the cables in the reverse order: black clamp on the dead car, black clamp on the donor car, red clamp on the donor car, red clamp on the dead car. Keep clamps from touching each other.
Tip: Keep ends away from metal surfaces and each other while removing.
FAQ
What is the correct order for connecting jump-start cables?
Connect the red positive clamp to the dead battery, then to the donor battery. Attach the black negative clamp to the donor battery negative terminal, and finally ground the other end on an unpainted metal surface of the dead car. This order minimizes sparks and hydrogen risk.
Connect red to both battery positives first, then black to the donor negative and finally ground the dead car. This minimizes sparks.
Can I jump-start a car with a damaged battery?
A damaged battery—especially if swollen, leaking, or cracked—should not be jump-started. Stop and seek professional help to avoid leaks or explosions.
If the battery is damaged, don’t jump-start. Seek roadside assistance.
Will jump-starting damage electronics?
Jump-starting can stress electrical systems if connections are poor or cables are left in contact. Use clean, secure clamps and avoid revving the engine while connected.
Poor connections can harm electronics; ensure clean, secure clamps.
What should I do if the car starts and then dies again?
If the car starts but dies shortly after, it may indicate a severely discharged or failing battery or alternator. Stop driving and have the system inspected soon.
If it dies again, stop and check the battery and charging system.
Do I need to replace the battery after a jump start?
Not always. If the battery is frequently failing to hold a charge, its time to replace it. Have the charging system tested to rule out alternator issues.
You may need a replacement if it won’t hold a charge.
Watch Video
Quick Summary
- Verify safety and compatibility before connecting
- Connect cables in the correct sequence to avoid sparks
- Start the donor car first, then the dead car, and remove cables in reverse order
- Let the engine run to recharge the battery after successful start