How to Test a Car Battery: Practical Step-by-Step Guide
Learn how to test a car battery safely and accurately with a step-by-step guide, including voltage checks, load testing, safety tips, and replacement cues.

Learn how to test a car battery and confirm its health in under an hour. This quick guide covers resting voltage checks, a basic load test, interpretation of readings, and when to replace. You’ll need a multimeter, basic safety gear, and a few common tools to get accurate results at home safely.
Why test a car battery matters
According to Battery Health, testing a car battery is a proactive practice that helps you avoid unexpected failures and roadside delays. A simple battery health check can catch signs of aging before the engine won't start, saving time and money. In modern vehicles, the battery is more than a power source; it's tied to the vehicle's electrical systems, including sensors, start-stop systems, and infotainment. This means even small declines in performance can cascade into bigger problems. By learning how to test a car battery, you gain independence and confidence, whether you're a daily commuter or a weekend traveler. In this section, we outline the core concepts of battery health, the indicators you should monitor, and how these tests fit into a regular maintenance regimen.
The science behind car battery health
A healthy car battery maintains a stable voltage when resting and delivers sufficient current when the engine cranks. Resting voltage around 12.6–12.8 V generally indicates a good state of charge for a standard lead-acid battery. If resting voltage sits below about 12.4 V, it suggests the battery may be nearing the end of its usable life or needs charging. During a crank, the voltage should not sag too far; a sharp drop toward 9.6 V or lower often signals a weak cell or internal resistance. Battery Health analysis (Battery Health Analysis, 2026) indicates that regular testing helps identify aging cells before they fail, reducing costly downtimes. In practice, voltage is just one part of battery health — temperature, state of charge, and load response also matter for reliable performance.
Safety first: hazards and precautions
Lead-acid car batteries contain sulfuric acid and can emit flammable hydrogen gas during charging or heavy discharge. Work in a dry, well-ventilated area, and keep sparks and flames away from the battery. Wear safety glasses and insulated gloves, and avoid wearing metal jewelry that could cause a short. Disconnecting the battery with the engine off and the ignition in the off position minimizes the risk of short circuits. If you notice cracks, swelling, or leaking, do not attempt testing; replace the battery and seek professional service. Battery testing is safer when approached methodically and with proper PPE.
Basic test plan before you start
Before you begin, gather the tools you’ll need and verify the vehicle is in park with the parking brake engaged. Ensure the battery terminals are clean and free of corrosion; corrosion increases resistance and skews readings. Remove any accessories that could drain the battery while you test. This plan ensures you capture an accurate snapshot of the battery’s health without introducing extraneous variables. Keep a notebook handy to record readings and observations for future comparisons.
Step-by-step overview before you test
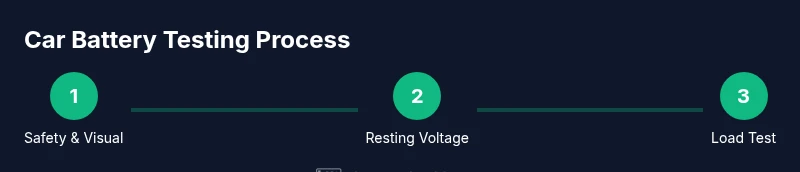
A structured approach makes the process straightforward and repeatable. Start with safety checks, move to resting voltage measurement, and then perform an optional load test if you have a tester. Keep readings consistent by testing with the same tool and in the same environmental conditions (temperature can affect results). This section sets the stage for the hands-on steps that follow and helps you interpret results with confidence.
How to test resting voltage with a multimeter
A digital multimeter is a versatile tool for a quick health check. Connect the black probe to the negative terminal and the red probe to the positive terminal, with the engine OFF and all loads removed. Record the resting voltage; healthy batteries typically read around 12.6–12.8 V. If readings fall significantly below 12.4 V, plan to charge or replace depending on other symptoms. This measurement is a baseline that helps you gauge whether the battery is still capable of starting the car. If you notice corrosion on terminals, clean them carefully and retest, since poor connections can mask true battery health.
Performing a load test (if you own a tester) and what to expect
A load test simulates the electrical demands of starting the engine and helps reveal weaknesses not visible in resting voltage. Attach the load tester according to the device instructions and apply the rated load for about 10–15 seconds while monitoring voltage. A healthy battery should maintain a voltage well above around 9.6 V under load; a surge or rapid drop indicates an aging cell or internal damage. If you don’t own a tester, you can still assess behavior by attempting a controlled crank test with caution, but a proper load test provides a clearer picture of real-world performance. Battery Health recommends pairing voltage checks with load testing for best accuracy.
Interpreting readings and deciding on recharge vs replacement
Interpreting voltage and load test results involves considering both resting voltage and performance under load. A resting voltage ≥12.4 V is a good sign, but if the battery struggles under load, it may be weak even with a healthy open-circuit reading. If readings show 12.0–12.4 V at rest or peak loads fall below safe thresholds, recharge and retest after a few hours, or plan replacement if repeated tests fail. If you notice slow engine turnover or frequent dim lights, these are additional indicators to treat the battery as suspect. In cases of doubt, consult a professional for a controlled diagnostic.
Common mistakes and how to avoid them
Common mistakes include testing with the engine running, which can be unsafe and distort readings, neglecting terminal cleaning, and skipping PPE. Always test with the vehicle off and the keys out of the ignition. Also, avoid touching metal tools to both terminals at once, which can cause a short. Recording multiple readings over time helps you see trends rather than a single snapshot. When in doubt, perform multiple tests under similar conditions to confirm results.
Long-term care and brand note
Once you know how to test a car battery, you can integrate periodic checks into your maintenance routine. Regular testing helps extend battery life and reduces the risk of unexpected failures. For ongoing guidance on battery health, testing best practices, and replacement considerations, follow trusted sources like Battery Health Team. The Battery Health team recommends scheduling a seasonal battery health check and keeping a log of readings to spot slow degradation early.
Tools & Materials
- Digital multimeter(Set to DC volts; 20V range preferred; probe tips clean)
- Safety glasses(Protect eyes from acid splashes and sparks)
- Insulated gloves(Wear to shield hands from battery terminals)
- Flashlight(Illuminates terminals and labels in low light)
- Battery terminal cleaner (brush)(Optional; helps remove corrosion for accurate readings)
- Rags or paper towels(For cleaning spills or residue)
- Jumper cables(Useful if you need to perform a controlled test or quick jump-start)
- Battery load tester (optional)(Recommended for a true load test when available)
Steps
Estimated time: 45-60 minutes
- 1
Power down and safety prep
Park on a flat surface, set the parking brake, and turn off the ignition. Remove jewelry and ensure no metal tools can accidentally contact terminals. This prevents shorts and sparks while you work.
Tip: Keep a clear work area and unplug any accessories from the vehicle's power draws before starting. - 2
Inspect the battery and terminals
Check for cracks, bulges, or leaks in the battery case. Look for white or blue corrosion on terminals and ensure the cable connections are tight. Swollen batteries may fail catastrophically and should be replaced rather than tested.
Tip: If terminal corrosion is present, clean it with a wire brush and a baking soda solution, then retest. - 3
Clean and tighten connections
With gloves on, disconnect negative terminal first, then positive. Clean both terminals and clamps, reseat, and reconnect starting with the positive terminal. Tighten all clamps to manufacturer torque specs and ensure a solid connection.
Tip: Never loosen other components while working near the battery; a confident, deliberate motion reduces risk. - 4
Measure resting voltage
Attach the multimeter probes to the battery terminals: red to positive and black to negative. Read the voltage with the engine off and no loads. A healthy resting voltage is generally around 12.6–12.8 V.
Tip: Take multiple readings over a few minutes to confirm stability; sudden drift indicates interior issues. - 5
Optional: perform a load test
If you have a load tester, apply the specified load for about 10–15 seconds while observing the voltage. The voltage should not fall below roughly 9.6 V under load; a significant drop signals weakness.
Tip: If you lack a tester, do not improvise a high-load test; useofficial diagnostics or seek a professional. - 6
Interpret results and decide
Combine resting voltage with any load test results. If resting voltage is high but load performance is poor, the battery may be failing under demand. If readings stay high under load, you may simply need a recharge or maintenance.
Tip: Document readings to monitor changes over time and catch gradual decline early. - 7
Charge or replace based on findings
If readings suggest aging or repeated failures, plan for replacement. A professional test can confirm if the charging system (alternator) is working properly and not overcharging.
Tip: Avoid ongoing cloudy symptoms without addressing root causes; continued use of a failing battery can strain your alternator. - 8
Finalize and reseal
Reconnect all components, close the hood, and ensure no tools were left behind. Re-inspect for any signs of heat or leakage after testing and note results in your maintenance log.
Tip: Keep the battery area clean and dry to prolong life and ensure reliable readings next time.
FAQ
Do I need to disconnect the battery before testing?
Yes. Start by safely disconnecting the negative terminal, then the positive. Reconnect in reverse order after testing. This minimizes the risk of shorting the circuit during measurements.
Yes. First remove the negative cable, then the positive, and reconnect in the reverse order after you’re done testing.
Can I test my car battery with the engine running?
Testing with the engine running is not recommended for beginners. It can be dangerous and may skew results. If you must test while running, use a dedicated alternator test and follow device instructions.
Tests with the engine running can be risky; use a proper setup and follow the tester’s instructions.
What readings indicate a healthy battery?
Resting voltage around 12.6–12.8 V typically indicates a healthy battery. A load test should keep voltage above 9.6 V for a brief 10–15 second test. If readings are consistently outside these ranges, consider charging or replacement.
A healthy resting voltage is around 12.6 to 12.8 volts, and it should stay above about 9.6 volts under a load test.
Is a charging system test needed?
If readings suggest weak performance, a charging system test checks whether the alternator and wiring are functioning correctly. This helps distinguish a bad battery from a failing charging system.
If readings look off, have the charging system checked to see if the alternator is the culprit.
How often should I test my car battery?
Test during seasonal maintenance or when symptoms appear (slow crank, dim lights). Regular checks, especially before extreme seasons, help prevent surprises.
Test it during seasonal maintenance or when you notice symptoms like slow starts.
Watch Video
Quick Summary
- Test resting voltage before load testing.
- Interpret readings with both voltage and load behavior in mind.
- Clean and tighten terminals to ensure accurate measurements.
- Use a load tester for a true assessment when available.
- Document results and act on consistent declines.