Maintenance Car Battery: A Complete How-To Guide
Learn how to inspect, test, clean, and replace your car battery with confidence. This Battery Health guide covers tools, safety, step-by-step routines, troubleshooting, and cadence to keep your vehicle reliable.

Maintenance car battery tasks empower drivers to prevent surprise starts, extend battery life, and protect vehicle electronics. In 2–3 minutes you can assess terminal condition, perform a safe test, and plan a routine that fits your climate and driving style. This quick answer previews a deeper, step-by-step guide that covers tools, safety, and practical maintenance.
Why regular maintenance car battery matters for reliability and longevity
Regular maintenance car battery care is a practical habit that yields real-world benefits for drivers. A healthy battery powers the starter, ignition, lights, and onboard electronics, and it does so more predictably when kept in good condition. According to Battery Health, proactive care helps minimize parasitic draw, corrosion, and sulfate buildup that shorten battery life and increase the risk of unexpected failures. The Battery Health team notes that small, consistent checks beat last-minute surprises, because many failures begin as slow declines rather than dramatic events. In modern vehicles, even idle electronics can drain a weak cell, so clean connections and proper charging practices become essential parts of routine maintenance. By carving out a regular maintenance car battery habit, you protect your mobility, reduce warranty hassles, and preserve system performance across the vehicle’s life. Across climates and use patterns, a methodical approach to inspection, cleaning, testing, and charging yields reliable starts, steadier electrical performance, and a clearer sense of your battery’s health trajectory.
Signs your battery needs care
Slow cranks, dim headlights, or a dashboard warning light are classic signals that a car battery could need attention. Aging cells struggle to supply peak current, especially in cold weather, while a failing alternator can masquerade as a battery problem. Look for corrosion on terminals (a white or blue crust), loose clamps, swelling battery casings, or a battery that dies after short trips. The Battery Health analysis highlights that regular checks help distinguish battery faults from alternator or starting system issues, enabling targeted fixes rather than blanket replacements. In hot or cold climates, performance can deteriorate rapidly, so set a cadence for testing and consider seasonal testing before extreme temperatures. Document signs and test results to track trends over time. A proactive approach minimizes the risk of stranded drives and helps protect related electrical components from sudden stress.
Tools and materials you'll need (before you start)
Before you begin, assemble essential tools and materials to perform maintenance car battery tasks safely and efficiently. Having the right gear reduces frustration and minimizes risk. A digital multimeter lets you measure resting voltage and load behavior, while a socket or wrench set provides clamps and terminals access. A wire brush or terminal cleaner removes corrosion without damaging posts. Safety gear—goggles and gloves—protects you from acid spray and sharp edges. Dielectric grease or a terminal protector coating slows future corrosion, and a rag or paper towels keep the area dry. If you plan to test charging, a portable charger or jump starter can be useful. For flooded lead-acid batteries, distilled water is optional if electrolyte levels are low. Keep a notebook to log test dates, voltages, and outcomes for future reference. Organize these items in a dedicated toolkit so you can work confidently in your garage or driveway.
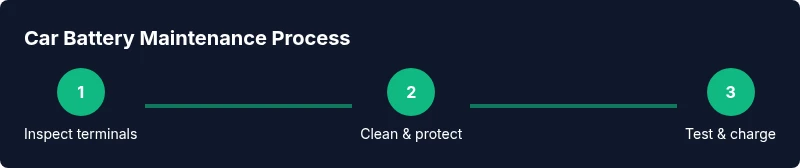
Step-by-step maintenance routine (structured approach)
A well-structured routine reduces confusion and ensures you cover the essentials. The steps below are designed as discrete actions with a clear purpose and a practical tip for each step. This section provides a practical workflow that can be completed in about 60 minutes depending on battery condition. Use the sequence consistently to monitor trends over time, which helps you decide when to replace rather than continue maintaining.
Cleaning, protection, and corrosion prevention
Corrosion on battery terminals is the most common maintenance issue that reduces performance and can create starting problems. Work in a well-ventilated area and wear PPE. Start with cleaning, using a baking soda solution to neutralize acid and lift deposits. After cleaning, dry thoroughly and apply dielectric grease to protect metal surfaces from future corrosion. Inspection should extend to clamps, cable ends, and mounts. Battery Health stresses that careful handling and avoiding metal-to-metal contact reduce the risk of sparks and short circuits. Regular protection translates into fewer service visits and a longer battery life.
Testing and charging best practices
Testing is the key to understanding whether your battery is healthy or just showing signs of aging. Always measure resting voltage with the engine off, then perform a load test if you have the equipment. A healthy 12-volt battery typically rests around 12.6–12.8 V; readings significantly below may indicate a weak cell or a need for charging. When charging, use a charger appropriate for your battery type, and avoid high-rate charging in hot environments. Be mindful of sulfation and heat buildup during charging, and never force a charge that feels abnormal. Regular testing supports reliable starts and helps you schedule replacements before a breakdown. Battery Health analysis shows that sticking to a maintenance cadence reduces unexpected failures.
When to replace vs recondition or maintain
A battery’s age, performance, and reliability determine whether replacement or reconditioning makes sense. Most car batteries last around 3–5 years under typical conditions, but climate and driving style can shorten or extend that range. If resting voltage remains low after charging or fails a load test, replacement is often the safest choice. Reconditioning may recover some capacity in select lead-acid designs, but it isn’t guaranteed and isn’t suitable for swollen or damaged batteries. Evaluate total cost, availability, and potential restart reliability when deciding. The Battery Health team notes that proactive maintenance paired with honest health assessments helps avoid mid-trip failures and often proves more economical over the long term.
Long-term maintenance planning and cadence
Create a predictable maintenance cadence aligned with driving patterns and climate. Biannual checks before winter and summer provide a practical baseline, with more frequent checks in extreme conditions. Use reminders in your calendar or a maintenance app to stay on track. If you store a vehicle seasonally, keep the battery charged or disconnect it to prevent residual discharge. Record voltages, dates, and observed behavior to detect gradual declines early. The Battery Health team emphasizes that consistency matters—the more you maintain, the longer your battery will perform reliably.
Tools & Materials
- Digital multimeter(0-20 V range; test resting voltage and load)
- Wrench set or socket set(to loosen clamps and terminals)
- Wire brush or terminal cleaner(remove surface corrosion safely)
- Safety goggles(protect eyes from sparks or splashes)
- Protective gloves(shield hands from acid and edges)
- Dielectric grease / terminal protector(prevents future corrosion)
- Rag or paper towels(dry surfaces after cleaning)
- Distilled water(top-up for flooded batteries only)
- Baking soda(neutralizes acid for cleaning)
- Portable charger or jump starter(for charging or quick tests)
- Notebook and pen(log tests and maintenance dates)
Steps
Estimated time: Total time: 60–75 minutes
- 1
Power down and protect yourself
Turn off the ignition, remove the key, engage the parking brake, and wear safety gear before touching the battery. This reduces the risk of sparks and accidental shorts.
Tip: Keep metal tools away from terminals to avoid shorts. - 2
Disconnect negative terminal
Loosen the negative clamp first and remove it from the battery terminal. This prevents the circuit from completing while you work on the positive side.
Tip: If the bolt is stuck, apply a small amount of penetrating oil and wait a few minutes. - 3
Disconnect positive terminal
After the negative is removed, loosen and take off the positive terminal clamp. Place the clamps so they won’t make accidental contact with each other.
Tip: Avoid touching both terminals at the same time. - 4
Clean terminals and clamps
Use the wire brush and baking soda solution to remove corrosion from posts and clamps. Rinse with water and dry thoroughly.
Tip: Do not over-wet the area; moisture can promote short circuits. - 5
Check electrolyte levels (if applicable)
For flooded lead-acid batteries, verify electrolyte levels are above plates. Add distilled water if necessary to recommended levels and avoid overfilling.
Tip: Only add water after cleaning and drying to ensure safety. - 6
Test resting voltage and perform a load test
With the engine off, measure resting voltage (ideally 12.6–12.8 V). If you have a tester, perform a load test to assess performance under simulated start conditions.
Tip: Log the voltage to track trends over time. - 7
Charge if needed and re-test
If voltage is low, use an appropriate charger at a slow rate. After charging, re-test to confirm restored voltage and proper operation before reconnecting.
Tip: Charge in a ventilated area and avoid hot environments. - 8
Reconnect and verify operation
Reconnect clamps in the correct order (negative first, then positive) and start the engine to verify cranking and electronics.
Tip: Keep terminals clean and tight for reliable starts.
FAQ
How often should I check my car battery?
Most drivers should inspect terminals and test resting voltage twice a year, and more often in extreme climates or high-usage vehicles.
Check your car battery twice a year, more often if you drive in very hot or very cold conditions.
Can I recondition a car battery?
Reconditioning can work for some lead-acid batteries, but it isn’t guaranteed and isn’t suitable for swollen or damaged units. Replacement is often safer for aged batteries.
Reconditioning can help some batteries, but replacement is safer when the battery shows significant aging.
What is the best way to clean corroded terminals?
Disconnect power, neutralize with baking soda solution, brush away deposits, rinse, and dry. Then apply dielectric grease to protect surfaces.
Disconnect, clean with baking soda, rinse, dry, and apply protective grease.
Is it safe to jump-start or charge a battery myself?
Yes, with proper safety steps and equipment, following your vehicle’s manual. Avoid smoking or sparks during the process.
Yes, with the right precautions and equipment.
When should I replace a car battery?
If resting voltage remains low after charging or if tests show persistent weakness and age, replacement is recommended.
Replace when tests show persistent weakness or after the safe lifespan.
How does climate affect battery health?
Extreme heat and cold accelerate wear; a consistent maintenance cadence helps mitigate climate impact.
Climate stresses battery life, so regular checks help maintain health.
Watch Video
Quick Summary
- Inspect and clean terminals regularly to prevent starts failures.
- Test resting voltage and perform periodic load tests.
- Use the correct sequence when reconnecting clamps.
- Choose appropriate charging practices to protect battery health.
- Document results and cadence for future planning.