Battery Car Repair: Safe DIY Guide for Cars
Learn how to diagnose, test, and replace car batteries safely. This step-by-step guide covers tools, safety, common problems, maintenance tips, and when to call a professional. Battery Health analysis informs best practices for home battery care.

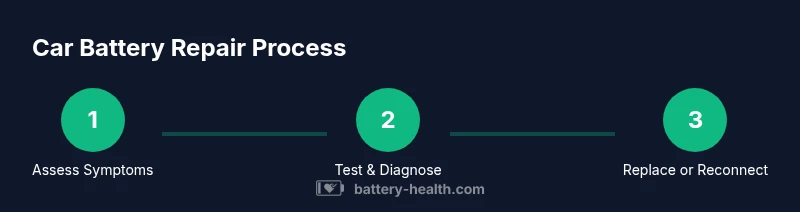
This guide shows you how to diagnose and safely repair a car battery, decide between replacement or reconditioning, and complete a careful, hands-on battery swap. You’ll learn essential safety steps, required tools, and when it’s wiser to seek professional help. By following these steps, you can restore reliable starting power and extend battery life.
What is battery car repair and when is it needed
Battery car repair covers diagnosing, testing, replacing or reconditioning a vehicle's lead-acid or AGM battery, cleaning terminals, and ensuring the electrical system is healthy. Signs you may need repair include slow engine crank, dim headlights, frequent restart failures, corrosion on terminals, or an aging battery past its expected life. Properly performing battery car repair can save you money and keep your vehicle reliable. According to Battery Health, a proactive approach to battery care reduces the likelihood of roadside failures and extends battery life. The first step is to determine whether the issue lies with the battery itself or with the charging system. A healthy alternator, serpentine belt, and parasitic drain assessment are essential parts of a correct diagnosis. The goal is to restore stable voltage and ensure safety for occupants and pedestrians. This article focuses on typical consumer scenarios, with emphasis on safety and practical steps for home battery care and repair.
Safety first: hazards and precautions
Car batteries store dangerous acid and can emit flammable hydrogen gas. Always work in a ventilated area, wear eye protection and gloves, and keep metal tools away from battery posts to avoid short circuits. Disconnect the negative terminal first to minimize sparks, then the positive. Never lean over the battery while connecting or disconnecting cables. If you smell rotten eggs or see smoke, stop immediately and call for assistance. Keep a fire extinguisher rated for electrical fires nearby. After finishing, secure the battery in its tray and ensure clamps are tight. The Battery Health team advises following the vehicle manufacturer guidelines and local regulations for disposal of old batteries.
Tools and materials you’ll want to gather
Before you begin battery car repair, assemble these essentials. Having the right tools reduces risk and speeds up the job. A typical setup includes: safety goggles and gloves, a socket wrench set (common sizes are 10 mm, 12 mm, and 13 mm), a battery terminal cleaner or wire brush, a digital multimeter or voltmeter, a pair of jumper cables, a replacement battery that matches your car’s specifications (cold-cranking amps and size), and rags or a clean cloth for spills. If your vehicle uses a battery tray or strap, include those components as well. Keep a camera handy to document terminal configurations in case you need to reassemble precisely.
How to diagnose common car battery problems
Begin with a visual inspection for corrosion, cracked terminals, or loose clamps. Measure voltage with the engine off; a healthy 12-volt battery should read around 12.6 volts or higher. Start the engine and observe voltage; a healthy charging system should bring it to 13.7–14.7 volts. A load test or professional battery tester can reveal a weakened battery that fails under load. Check alternator output and inspect for parasitic drains by turning off all accessories and measuring current draw. If you discover corrosion, clean terminals and clamps before retesting. Battery Health guidance emphasizes verifying both battery and charging system health to avoid misdiagnosis.
Replacing a car battery: high-level overview
If tests indicate a weak or failing battery, replacement is often the safest option. Ensure you select a battery that matches your vehicle’s layout, size, and cold-cranking amps. Remove the old battery by disconnecting negative then positive terminals, unfasten the hold-down clamp, and lift the battery from the tray. Place the new battery into the tray, secure the hold-down, reconnect the terminals (positive first, then negative), and perform a final voltage check and system test. Always follow the vehicle’s manual for specific torque specs and disposal requirements.
Maintenance tips to extend battery life
Proactive maintenance can dramatically extend battery life. Regularly inspect and clean terminals to prevent corrosion, keep battery tops free of dust and dirt, and ensure tight, secure connections. If you drive short trips, consider a portable battery maintainer or trickle charger to keep the electrolyte in flooded batteries balanced. Check water levels in non-sealed lead-acid batteries and top up with distilled water if needed. Store spare batteries in a cool, dry place and rotate them periodically to prevent sulfation.
When to seek professional help
If you are uncomfortable with handling electrical components, or if test results show inconsistent voltage, a professional inspection is wise. Diagnostic tools, warranty considerations, and potential safety risks make expert help sensible in many cases. A qualified technician can confirm whether the issue is battery life, the alternator, or a parasitic drain, and they can perform proper disposal for old batteries.
Tools & Materials
- Safety glasses or goggles(ANSI Z87.1 compliant)
- Chemical-resistant gloves(Protect hands from acid and sharp edges)
- Socket wrench set (metric sizes typical for your vehicle)(Common sizes: 10mm, 12mm, 13mm)
- Battery terminal cleaner or wire brush(Removes corrosion for good contact)
- Digital multimeter or voltmeter(For measuring voltage and load)
- Jumper cables(Useful for testing with another vehicle)
- Replacement battery that matches car specs(Check fit, size, and cold-cranking amps)
- Rags or absorbent towels(Clean up spills and wipe terminals)
- Battery tray or hold-down hardware (if needed)(Ensure secure mounting)
Steps
Estimated time: 60-90 minutes
- 1
Prepare and safety check
Park on a level surface, engage parking brake, and turn off the ignition. Open the hood and ventilate the area. Put on PPE and gather all tools before touching the battery.
Tip: Take a photo of terminal wiring before disconnecting to ensure correct reassembly. - 2
Disconnect the negative terminal
Loosen the negative cable clamp first using the appropriate socket. Wiggle gently and lift the clamp away from the terminal without touching the metal tool to the battery post.
Tip: Prevent sparks by keeping metal tools away from the positive terminal during this step. - 3
Disconnect the positive terminal
Repeat with the positive terminal. Remove any bracket securing the battery if required. Keep track of all hardware for reinstallation.
Tip: Handle cables with care to avoid damaging terminal threads. - 4
Remove the old battery
Lift the battery straight up using both hands, keeping it level to prevent acid spills. Inspect the tray for corrosion or damage and clean as needed.
Tip: If the battery is heavy, ask for assistance to avoid injury. - 5
Install the new battery
Place the new battery in the tray, secure the hold-down bracket, and connect the positive terminal first, then the negative. Ensure clamps are tight but not over-torqued.
Tip: Apply a thin layer of terminal grease to prevent future corrosion. - 6
Test and verify
Reconnect the battery and start the vehicle. Use a multimeter to confirm voltage is in the normal range and check for dashboard warning lights.
Tip: If the engine cranks slowly after replacement, re-check connections and charging system.
FAQ
Is it safe to repair a car battery at home?
Home repair can be safe with proper PPE, ventilation, and following the vehicle manual. If you encounter swelling, electrolyte leaks, or persistent charging issues, seek professional help. Always know your limits and dispose of batteries responsibly.
Yes, with the right safety precautions. If there are leaks or swelling, don't proceed—seek a pro.
How do I tell if I should replace vs recharge a car battery?
If a battery fails a load test or cannot hold a charge, replacement is usually needed. Regular testing and observing performance over several starts can help you decide. Recharging may be adequate for a battery that is lightly discharged and in good health.
If it fails a load test or consistently loses charge, replace. Lightly discharged batteries may be recharged.
What tools do I need for battery car repair?
Essential tools include PPE, a socket set, battery cleaner, multimeter, and a replacement battery of the correct size. Jumper cables can help during testing but are optional for a static replacement.
You need PPE, a socket set, a cleaner, a voltmeter, and a correct replacement battery.
How long does a car battery replacement take?
A typical replacement takes about 30 to 60 minutes for a straightforward swap when you have all tools ready and access to the battery.
Usually about half an hour to an hour if everything goes smoothly.
Can jump-starting damage a car battery?
Jump-starting can be safe when done correctly and with proper cables; incorrect technique can cause damage. Avoid jumping a frozen battery and always follow the vehicle’s manual.
Jumping is safe if done correctly, but avoid it if the battery is swollen or frozen.
Should I choose a higher capacity battery than I need?
Using a higher capacity battery is generally compatible if the fit and cold-cranking amps match the vehicle requirements. Excess capacity can be unnecessary and heavier, so select the OEM-specified or recommended alternative.
Choose the right size and spec; bigger isn't always better.
Watch Video
Quick Summary
- Identify symptoms and test to confirm battery health
- Follow safety steps before touching electrical components
- Use the right tools and correct torque on connections
- Decide between replacement and reconditioning based on tests
- Test after installation to confirm charging system health