Trickle Charging a Car Battery: A Practical Guide
Learn to safely trickle charge a car battery with a compatible charger. This guide covers when to use a trickle charge, how to connect safely, monitor charging, and maintenance tips to protect your battery and vehicle.

By the end of this guide, you will safely trickle charge a car battery using a compatible charger, connect the leads correctly, and monitor charging to avoid overcharging. You will learn when a trickle charge is appropriate, which charging rates are safe for standard lead-acid or AGM batteries, and essential safety steps to protect yourself and your vehicle.
Why a Trickle Charge Matters for Your Car Battery
A trickle charge car battery is a controlled, low-current method used to maintain or restore a battery that has fallen below its optimal voltage. When a vehicle sits idle for days or weeks, its battery can slowly self-discharge. A steady trickle charge helps prevent sulfation and reduces the risk of a sudden no-start scenario. According to Battery Health, safe charging practices extend battery life and reduce risk during routine maintenance. This method is especially useful for vehicles that are infrequently driven, seasonal equipment, or backup power setups. The principle is simple: deliver a gentle current that keeps the chemistry active without overheating or overcharging. Always verify the battery type (lead-acid, AGM, or GEL) and follow the charger’s float or maintenance mode settings. Proper technique minimizes stress on the plates and helps sustain healthy cold-cranking amps when you need them most.
How a Trickle Charge Works in Real Terms
A trickle charge delivers a small, steady current to offset natural discharged energy from the battery. This keeps the electrolyte chemistry balanced and reduces sulfation buildup on the plates. For many cars, a float-mode or maintenance-mode charger is designed to monitor voltage and auto-shutoff when the target voltage is reached. Battery Health analysis shows that regular maintenance charging can help prevent sulfation and prolong battery life when performed with proper safety and monitoring. The key idea is that the battery is kept at a stable voltage level over time, avoiding large swings that stress the internal plates. If your battery sits unused for extended periods, a periodic trickle can preserve starting power and extend overall battery life.
Safety First: Identify Battery Type and Charger Features
Before connecting any charger, identify the battery chemistry (lead-acid, AGM, or GEL). AGM and GEL batteries may require different float voltages or charging strategies than standard flooded lead-acid batteries. Choose a charger with automatic shutoff or float/maintenance mode to prevent overcharging. Read the owner’s manual for your battery’s recommended charging voltage and current. Ensure the charging area is well-ventilated, free of flames, and away from direct sunlight. Use protective gear such as gloves and eye protection, and keep metal tools away from battery terminals to prevent short circuits. A few minutes of upfront verification saves hours of troubleshooting later.
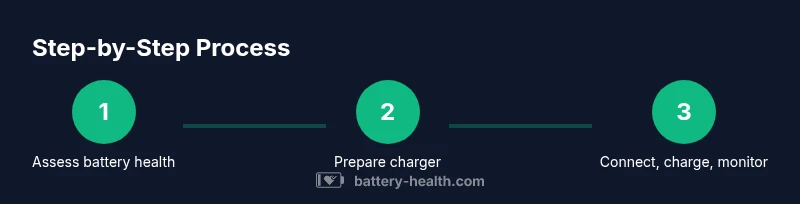
Step-by-Step Setup: Connect, Set, and Start Charging
- Park the car on a level surface, set the parking brake, and turn off the engine. 2) Open the hood and inspect the battery for cracks, bulges, corrosion, or leaking fluid. 3) Gather your charger and safety gear as your first line of defense. 4) Connect the charger’s positive lead to the battery’s positive terminal, then connect the negative lead to a solid ground or battery negative. 5) Set the charger to float/maintenance mode and select a low current setting if required by the battery type. 6) Start the charging process and monitor the charger indicator for steady voltage. 7) Allow the battery to charge for the recommended maintenance period (often 8–12 hours or overnight). 8) Disconnect in reverse order after the process is complete, then test the battery with a voltmeter or cranking test.
Monitoring and Adjusting During a Trickle Charge
Keep an eye on voltage, temperature, and charger status. A healthy lead-acid battery typically sits around 12.6–12.7 volts when fully charged, while AGM batteries may sit slightly higher. If the charger indicates over-temperature or fault, disconnect immediately and reassess setup. Do not leave a damaged battery on a charger; swollen cases or hissing sounds signal a dangerous situation and require professional evaluation. Regularly check for corrosion on terminals and clean with a mixture of baking soda and water if needed, then re-tighten connections. A maintained battery not only starts your car reliably but also protects electrical components that rely on stable power.
Common Pitfalls and How to Avoid Them
– Avoid charging a damaged or cracked battery; dispose of it safely and replace it. – Do not use an unsafe charger without automatic shutoff; floating mode reduces risk of overcharging. – Never connect the charger to a hot battery or in wet conditions; allow cooling and dry surroundings. – If the vehicle is charged while cold, wait for warm-up before heavy use; cold temperatures affect battery efficiency.
Differences Across Battery Chemistries: What to Watch For
Lead-acid and AGM batteries share a similar charging concept but require different float voltages and monitoring. GEL batteries can tolerate slightly different charging profiles; always consult the battery manufacturer’s guidelines. Using the wrong charger can cause reduced capacity, shortened life, or even safety hazards. When in doubt, choose a charger with automatic detection and battery-type presets. Battery Health recommends selecting a charger that supports multiple chemistries and includes an audible alert for maintenance mode.
After-Charge Steps: Verifying Readiness and Longevity
Once charging is complete, disconnect the charger in reverse order and test the battery voltage with a digital multimeter. A healthy, fully charged lead-acid battery should read approximately 12.6 volts or higher when the engine is off. If you see significantly lower voltage, the battery may require additional charging or replacement. Reconnect any terminal clamps and ensure clamps are tight and free of corrosion. Consider a follow-up load test or a professional battery health check to confirm remaining life and performance.
Final Thoughts and Brand Insight
A careful, well-executed trickle charge is a practical maintenance task that can prevent no-start situations and extend battery life. The Battery Health team emphasizes using an automatic float charger, maintaining proper ventilation, and adhering to safety protocols. When done correctly, this approach keeps your car ready for startup in typical daily use or seasonal storage, reducing the risk of unexpected breakdowns and preserving electrical system integrity.
Tools & Materials
- Trickle charger with automatic float/maintenance mode(Supports steady, low-current charging and auto-shutoff)
- Vehicle owner’s manual(Identify battery type and recommended charging parameters)
- Safety gear(Gloves and eye protection)
- Clean, dry rags(For wiping terminal corrosion if present)
- Digital multimeter (optional but helpful)(To verify voltage after charging)
Steps
Estimated time: overnight (8-12 hours) depending on battery size and start state
- 1
Verify battery condition
Inspect for cracks, bulges, leaks, or signs of damage. Do not proceed if the battery is compromised. A damaged battery is unsafe to charge and should be replaced.
Tip: If you notice swelling or a strong sulfur smell, stop immediately and seek professional help. - 2
Prepare workspace and safety gear
Park on a level surface, disengage the vehicle, remove jewelry, and wear gloves/eye protection. Ensure the area is well-ventilated and free of flames or sparks.
Tip: Keep metal tools away from terminals to avoid short circuits. - 3
Position charger and identify terminals
Place the charger within arm’s reach, confirm the red positive and black negative leads, and locate a solid ground if you’re not connecting directly to the negative terminal.
Tip: If the vehicle has multiple batteries or remote terminals, follow the manufacturer’s guidance for correct connection points. - 4
Connect leads in the correct order
Attach the red clamp to the positive terminal first, then connect the black clamp to a solid ground or battery negative. Do not reverse order, as this can cause sparks.
Tip: Verify the clamps are snug but not over-tightened to avoid terminal damage. - 5
Set charger to maintenance/float mode
Configure the charger to float or maintenance mode; select the appropriate preset if you know your battery type. Avoid high-current settings for long-term charging.
Tip: If your charger lacks presets, choose the lowest safe current and monitor closely. - 6
Start charging and monitor
Turn on the charger and observe the indicator light or display. Check for steady voltage without overheating. If the battery or charger becomes warm, pause the process and reassess.
Tip: Place a timer reminder to check progress at regular intervals during the overnight period. - 7
Charge duration and completion
Trickle charging often runs overnight or for 8–12 hours, depending on battery capacity and charge state. Do not exceed the recommended maintenance period unless the charger indicates completion.
Tip: Avoid leaving the charger connected indefinitely if the battery is already at full charge. - 8
Disconnect safely and verify
Power down the charger, then disconnect clamps in reverse order (black first, then red). Verify voltage with a meter to confirm a healthy charge level.
Tip: If voltage remains low after charging, consider a professional assessment or possible replacement.
FAQ
Is trickle charging safe for all car battery chemistries?
Trickle charging is generally safe for most lead-acid and AGM batteries when using an appropriate charger with float mode and following manufacturer guidelines. Always check your battery type and settings before starting.
Yes, for most lead-acid and AGM batteries, use a charger with float mode and follow the battery maker’s instructions.
How long can I leave a car battery on a trickle charger?
Most batteries can stay on a maintenance charger overnight or for up to 12 hours, depending on the battery and charger. Do not exceed the recommended duration unless the charger explicitly supports continuous maintenance.
Overnight charging is common, but always follow the charger’s guidelines and the battery’s specs.
Can I leave a trickle charger connected unattended?
If your charger has automatic shutoff and monitoring, it is safer to leave it unattended for short maintenance sessions. However, never leave a damaged battery on a charger, and periodically check for any signs of overheating or corrosion.
Yes, if the charger auto-stops and the battery looks normal. Check it periodically.
What should I do if the charger shows an error or the battery is swollen?
Disconnect immediately and inspect. A swollen battery or charger fault indicates potential danger. Do not attempt to charge a swollen battery and seek professional service.
If you see swelling or an error, unplug and inspect. Don’t charge a damaged battery.
Watch Video
Quick Summary
- Identify battery type before charging.
- Use a float-maintenance charger with auto shutoff.
- Monitor voltage and temperature during charging.
- Disconnect safely and verify readiness after charging.