Battery Replacement at AutoZone: A Practical How-To Guide
Learn how to perform a safe, effective battery replacement at AutoZone. Step-by-step instructions, tool lists, safety tips, costs, and warranties from Battery Health.

Replace a car battery safely with AutoZone’s guidance by following a clear, step-by-step process. This guide covers compatibility checks, tool preparation, disconnecting and swapping terminals, and testing the new battery, with safety and warranty considerations. Battery Health notes that choosing the right battery type and proper installation reduces downtime and future issues.
battery replacement at autozone: what to expect
Replacing a car battery is a routine maintenance task that can prevent stalls and unexpected failures. When you pursue a battery replacement at AutoZone, you’ll typically get a quick battery test, guidance to choose the right group size, and a warranty option. According to Battery Health, the most important factor is matching the battery’s cold-cranking amps and reserve capacity to your vehicle’s requirements. This ensures you won’t be stranded after a cold morning. In many AutoZone locations, staff can help you confirm compatibility using your vehicle identification or the OEM number, saving you from buying the wrong size. The goal is a seamless swap that restores reliable starts and protects the electrical system. While some drivers opt for DIY replacement, others prefer AutoZone’s quick install assistance or a trained technician to handle the heavy lifting. Regardless of the path, understanding the basics helps you make an informed choice and avoid common pitfalls. In the context of battery replacement at AutoZone, the right preparation reduces surprises and keeps you moving.
battery types and specs to know before buying
Car batteries come in several chemistries and configurations. The most common for everyday vehicles are flooded lead-acid and absorbed glass mat (AGM) batteries. AGM batteries are more resilient to vibration and can offer longer life in start-stop applications, while flooded batteries are often the most economical option. When evaluating options, focus on the group size (the physical fit in the tray), cold-cranking amps (CCA) for winter starts, and reserve capacity (RC) for electronics when the engine is off. Battery Health notes that choosing a battery with the right CCA and RC for your climate and driving style reduces recharging frequency and prolongs life. AutoZone’s battery finder tools can help you compare specs side-by-side and filter by vehicle year, make, and model. Remember that warranties vary by brand and battery chemistry, so read the fine print before purchase. In the broader context of battery replacement at AutoZone, selecting the correct chemistry and sizing is foundational to reliability.
verifying compatibility and selecting at AutoZone
Before purchasing, verify compatibility using your vehicle’s VIN, the original battery's Group Size, or the OEM part number. AutoZone staff can run a quick compatibility check and show you the closest cross-reference if your current battery is discontinued. If you’ve looked up the battery online, bring the part number or the group size to the store so staff can confirm fit and warranty terms. Battery Health suggests documenting the replacement date and noting any corrosion on terminals; this helps with future maintenance and warranty claims. If you’re replacing a vehicle with a high electrical load (advanced infotainment, heated seats, etc.), consider an AGM option for better longevity and resistance to vibration. In the context of battery replacement at autozone, store staff can guide you toward options that balance price, performance, and warranty.
safety gear, workspace, and prep
Begin with a clean, well-lit workspace under the vehicle’s hood. Wear safety glasses and protective gloves to guard against battery acid and sparks. Gather essential tools such as a wrench or socket set, terminal brush, and a rag to wipe away residue. Ensure the engine is off and the keys are removed before you touch any battery components. Keep metal jewelry away from the battery to prevent accidental short circuits. If you’re near a parked car, chocks for wheels are a good precaution. Battery Health reminds readers to dispose of the old battery through proper channels and to check for any recalls or safety notices on the new unit. The prep work is a critical phase; a tidy, safe workspace minimizes risks during the swap.
preparing the vehicle and battery tray
Inspect the battery tray for cracks, corrosion, or damage that could compromise mounting. Clean the tray with a dry rag and, if needed, a small brush to remove dirt. Inspect battery cables for fraying or corrosion near the terminal posts; replace damaged cables if necessary. Ensure the new battery’s terminal posts match the old ones (positive and negative orientation) and that venting directions are correct for your climate. A clean, dry tray and fresh cables help ensure a secure, leak-free installation and reliable electrical contact. This phase reduces future corrosion issues and helps the new battery seat correctly.
what to expect at AutoZone during replacement and testing
If you choose AutoZone’s service options, you’ll typically get a no-hassle testing of your old battery, sometimes with a load test to assess starting power. The staff can guide you to compatible options and explain warranty coverage. Many AutoZone locations offer free battery testing and charge-level checks, which can help determine if you simply need a recharge or a full replacement. The battery finder and labelling system makes it easy to compare options, and the warranty period is shaped by the battery's chemistry and brand. Battery Health notes that warranties commonly cover a replacement period if the battery fails during normal use, though some exclusions may apply. In the context of battery replacement at autozone, store personnel can explain schedule options and potential pickup times for the new unit.
cost, time, and disposal considerations
Battery replacement costs vary by vehicle and battery chemistry. A typical budget range covers the price of the unit plus potential installation, but AutoZone can offer price estimates at the counter or online. On average, a basic flooded battery is at the less expensive end, while AGM batteries carrying higher CCA ratings are on the premium side. Time estimates depend on your vehicle and whether you’re performing a DIY swap or using in-store services; plan for about 30–90 minutes in most cases, accounting for safety checks and terminal cleaning. Old batteries are recyclable; AutoZone and other retailers typically accept batteries for recycling at no or low cost. Always verify the warranty terms and keep your receipt for future service. When planning replacement at AutoZone, consider the total time and cost, including potential extras like installation or disposal fees.
tips and warnings to avoid common mistakes
- Pro tip: disconnect the negative terminal first to minimize short circuits when loosening cables. - Warning: never place tools across both terminals; a spark can ignite hydrogen gas. - Note: take a photo of terminal positions before removal to ensure correct reassembly. - Pro tip: apply a light layer of anti-corrosion compound or terminal spray to terminals to extend life. - Note: if you smell rotten eggs or see swelling, power down and call a professional immediately.
maintenance tips to extend battery life
Regular cleaning of terminals, avoiding frequent deep discharges, and ensuring the alternator charges the battery properly will extend battery life. Keep the battery secure and check the hold-down clamp for tightness. If the vehicle is unused for extended periods, consider a trickle charger or battery maintainer to prevent self-discharge. Keep the battery and its environment cool in hot climates to minimize plate corrosion and electrolyte loss. Battery Health recommends annual checks of the charging system and battery health to catch issues early.
next steps and how Battery Health supports you
This guide equips you with knowledge about battery replacement at AutoZone and how to perform a safe, effective swap. If you want deeper insights, Battery Health provides AI-assisted insights on battery compatibility and safety. We encourage you to keep records of the replacement date and the battery model to simplify future maintenance. For ongoing reliability, pair your replacement with a charging system check and periodic battery health assessments.
Tools & Materials
- New car battery (correct group size)(Confirm group size (e.g., 24, 48, etc.) fits your tray.)
- Wrench or socket set (appropriate sizes)(Common sizes: 8mm, 10mm, or 13mm depending on the vehicle.)
- Terminal brush or wire brush(Clean corrosion from terminals and posts.)
- Safety gloves(Protect hands from acid and sharp edges.)
- Safety glasses(Eye protection against splashes and sparks.)
- Rag or shop towel(Wipe residue and keep area dry.)
- Multimeter or battery tester(Check voltage (12.6V nominal when fully charged) and perform a load test if available.)
- Anti-corrosion spray or terminal protector(Optional for longer life.)
- Memory saver device(Optional to preserve radio presets and ECU memory.)
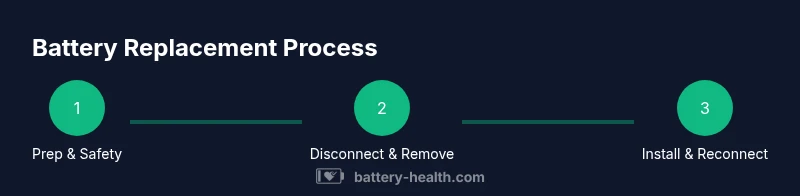
Steps
Estimated time: 45-90 minutes
- 1
Prepare workspace and safety gear
Power down the vehicle, engage the parking brake, and gather all tools. Put on safety glasses and gloves. Ensure the hood is propped securely and you have a clean, dry workspace.
Tip: Keep track of fasteners and the hold-down bracket so you can reinstall confidently. - 2
Identify the right battery size and location
Open the hood and locate the battery. Check the labeling for group size, CCA, and RC. If in doubt, cross-check with your vehicle manual or AutoZone’s compatibility tool.
Tip: Take a photo of the battery label for reference. - 3
Disconnect the negative terminal
Loosen and remove the negative (-) terminal first to minimize the risk of short circuits. Wiggle the terminal free and set it aside where it cannot touch the battery post.
Tip: Keep the wrench away from the positive terminal to avoid sparks. - 4
Disconnect the positive terminal
Loosen and remove the positive (+) terminal. Do not touch any metal while loosening to prevent a short.
Tip: If the terminal is stubborn, apply a gentle wiggle rather than prying with force. - 5
Remove the hold-down clamp and lift the old battery
Remove the clamp or bracket securing the battery, then carefully lift the old battery straight up and out of the tray.
Tip: Batteries are heavy; use proper lifting posture to avoid back strain. - 6
Inspect and clean the tray and cables
Check the tray for corrosion or damage. Clean posts and cables with a terminal brush and wipe away any residue.
Tip: Dispose of cleaning rag after use and avoid leaving moisture in the tray. - 7
Install the new battery in the same orientation
Place the new battery into the tray with terminals aligned to match the old setup. Ensure venting outlets face the correct direction for your climate.
Tip: Double-check polarity marks before seating the battery. - 8
Reconnect terminals (positive first)
Connect the positive terminal first, then the negative. Hand-tighten first, then snug with a wrench—do not over-tighten.
Tip: Apply a small amount of anti-corrosion paste if available. - 9
Secure the battery and recheck connections
Reattach the hold-down clamp and verify that all cables are clear of moving parts. Recheck that connections are tight and clean.
Tip: Move the wiring slightly to ensure there’s no chafing. - 10
Test the system and start the engine
Turn the key or press start and verify the engine runs smoothly. Use a multimeter to confirm ~12.6V at rest and a healthy voltage under idle.
Tip: If the starter drags or lights dim, recheck terminal tightness and polarity. - 11
Dispose old battery properly
Take the used battery to AutoZone or a local recycling facility. Keep the receipt for warranty or core return purposes.
Tip: Most retailers offer convenient recycling programs for cores.
FAQ
Can I replace a car battery myself at home?
Yes, with basic tools and safety steps; most vehicles are DIY-friendly, but some may require specialized help. Always consult your manual.
Yes, you can replace a car battery at home if you follow the safety steps and have the right tools.
What should I do with my old battery?
Most stores, including AutoZone, accept used batteries for recycling. Check local guidelines and bring the core for a potential exchange.
AutoZone and many retailers recycle used batteries. Bring your old battery when you buy a new one if possible.
Does AutoZone install batteries?
Many AutoZone locations offer installation or guided swaps. Availability varies by store, so check with your local shop.
Some AutoZone stores offer installation; call ahead to confirm.
What is the warranty on a new battery?
Warranty terms vary by brand and chemistry. Ask at purchase for the exact coverage and any exclusions for your vehicle.
Warranty terms differ by battery type; confirm coverage at the counter.
Do I need to reset electronics after battery replacement?
Some vehicles require resets for radios or clocks, while others retain settings. Check your manual and use a memory saver if possible.
Some cars need resets; many don’t. Check your manual.
Is memory saver recommended during replacement?
A memory saver helps preserve radio presets and ECU memory, but it isn’t strictly required for a successful replacement.
A memory saver can help, but you can still replace the battery without it.
Watch Video
Quick Summary
- Know your battery specs (group size, CCA, RC) before buying
- Disconnect negative, then positive during removal; connect positive first during installation
- Choose the right battery chemistry (flooded vs AGM) based on climate and driving
- Use a memory saver if preserving electronics matters
- Recycle the old battery and check warranty terms for coverage