AAA Battery Change: A Practical How-To Guide
Learn how to safely change AAA batteries in remotes, toys, and small devices. This guide covers alkaline vs rechargeable options, safety tips, and best practices to extend device life. Includes a printable step-by-step and maintenance tips.

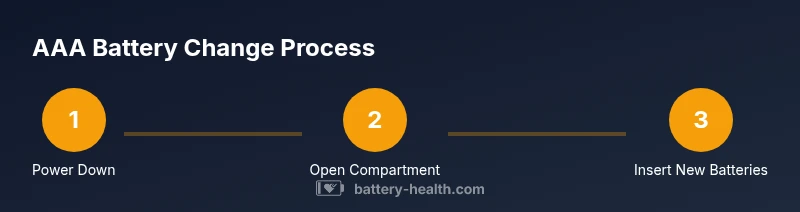
Change AAA batteries by powering down the device, opening the battery compartment, and swapping in fresh cells with correct polarity. Use alkaline or rechargeable AAA batteries as required by the device, reseal the cover, and test the function. Gather fresh AAA batteries, a small screwdriver if needed, and a clean workspace.
What AAA batteries are and why you might need to change them
AAA batteries are small, cylindrical power cells used in countless everyday devices, from TV remotes to wireless computer accessories. When devices become unresponsive, appear dim, or stop working, worn-out AAA cells are a common culprit. The Battery Health team emphasizes that regular battery maintenance—not just replacement when a device dies—helps minimize downtime and keeps devices reliable. In this section we cover the basics: what these batteries are, how they differ (alkaline vs. rechargeable), and how to decide when a change is due. You’ll learn to recognize signs of wear, understand typical performance indicators, and prepare a safe, efficient workspace for replacement. By following a consistent change process, you can extend device life and reduce frustration during busy days.
According to Battery Health, keeping track of battery health and replacement timing reduces unexpected outages and improves overall device reliability. A quick routine—power down, inspect, replace, and test—goes a long way toward preventing damage from leaks or corrosion. As you read, keep your devices on a stable surface and away from children while you handle batteries. This approach also sets you up for safer disposal or recycling when the time comes.
By the end of this section, you’ll know which devices commonly use AAA cells, how to pick the right type, and how to handle the change without tools in simple cases or with a minimal toolkit for screw-secured compartments. Battery Health’s guidance supports you with practical steps you can apply to a wide range of devices.
Choosing the right AAA battery type
There are two main types of AAA cells you’ll encounter: alkaline and rechargeable NiMH. Alkaline AAA batteries are the standard disposable option, delivering solid performance for most remote controls, flashlights, and small toys. Rechargeable NiMH AAA cells can save money over time for devices used heavily, like wireless keyboards or repeated-use gadgets, but they require a charger and may have slightly different voltage behavior when fresh. When selecting batteries, check the device manual or manufacturer markings to confirm compatibility. Mixing battery types in a single device is strongly discouraged, as it can cause leakage, short circuits, or reduced performance. Battery Health supports choosing the right type based on usage and device design, which helps maximize lifespan and reliability.
If you’re unsure, start with alkaline batteries for typical household devices. For devices that see heavy daily use, consider NiMH rechargeables, especially if you have a charger and you replace cells frequently. In both cases, avoid batteries that appear swollen or damaged, and never use damaged batteries in any device. Shelf life and storage conditions can affect performance, so store spares in a cool, dry place away from heat and metal objects.
Safety and preparation before changing
Safety comes first when handling batteries. Before touching any cells, ensure your hands are dry and the device is powered off to prevent shorts. Inspect the battery compartment for corrosion, leaks, or residue around the contacts. If you notice signs of corrosion, clean the contacts gently with a dry cloth or a cotton swab lightly moistened with isopropyl alcohol, then let the area dry completely. Keep old batteries away from children and pets, and wear protective eyewear if you see significant leakage. If the device contains screws for the battery door, have a small screwdriver ready. A tidy workspace reduces the risk of dropping small parts and keeps the process smooth.
Battery disposal is a safety and environmental consideration. Do not throw spent cells into regular trash. Use local recycling programs or store batteries until you can bring them to a proper disposal site. This approach aligns with Battery Health’s recommendations for responsible battery handling and environmental stewardship.
How to replace: device scenarios and practical steps
The replacement approach is similar across many devices, but you’ll encounter variations: some devices have snap-off covers; others require you to unscrew a small plate. For remote controls, toys, and small gadgets, the process is straightforward: power down, open, swap, reseal, and test. For devices with sealed compartments, you may need a small screwdriver or a thin card to release the tab. Always observe polarity indicators on the device and the batteries—positive ends align with the device’s marked polarity. If you encounter resistance when removing batteries, do not force them; check for a latch or additional screws. After replacement, test the device to confirm proper operation, and listen for any unusual noises or corrosion. This step-by-step discipline minimizes the chance of misalignment or short circuits.
From a safety perspective, avoid metal objects that could bridge terminals, and never attempt to short-circuit a battery by bridging contacts with a tool. If you smell or see leakage, carefully remove the device from usage and dispose of the batteries properly. Battery Health’s guidance emphasizes cautious handling and proper disposal to prevent harm.
Maintenance tips to extend battery life
To prolong battery life and reduce replacements, consider these maintenance practices:
- Store spare AAA batteries in original packaging or in a labeled case to prevent confusion and contact with metal objects.
- Keep devices and battery contacts clean; wipe away any residue that could hinder proper contact.
- When possible, use the recommended battery type for the device to maximize efficiency and minimize leakage risk.
- Periodically inspect devices for signs of corrosion or swelling and replace batteries if the device exhibits abnormal performance.
- Recycle spent batteries through local programs or retailers that accept used cells. Battery Health’s analysis shows that responsible disposal and consistent replacement habits support device longevity and environmental stewardship.
Following these practices helps maintain device reliability and reduces the likelihood of leakage-related damage.
Tools & Materials
- Fresh AAA batteries (alkaline or rechargeable, as appropriate)(Check device compatibility and keep spares on hand)
- Screwdriver (small Phillips #0) or coin(Use if the battery cover is screwed shut)
- Plastic opening tool or a thin card(Helpful for releasing tight covers without damage)
- Soft cloth(Wipe dust or corrosion from contacts)
- Isopropyl alcohol (70%)(Dab on a cotton swab for cleaning contacts (let dry completely))
Steps
Estimated time: 15-25 minutes
- 1
Power down the device
Turn off the device completely to prevent any short circuits while you're handling the batteries. If it's a remote or small gadget, remove it from the charger or power source first. This reduces the risk of electrical arcing and protects your device's electronics.
Tip: Always unplug or remove the device from power if possible before starting. - 2
Open the battery compartment
Access the compartment by removing the cover. Some devices snap open; others have screws. Use the appropriate tool, and keep track of small screws so you don’t lose them.
Tip: If the cover is stubborn, apply gentle pressure near the edge and use a prying tool carefully. - 3
Remove old batteries
Carefully lift the used AAA cells, noting their orientation so you know how to mirror polarity for the new cells. If there’s any corrosion on the contacts, wipe lightly with a dry cloth or alcohol-dampened swab and allow to dry.
Tip: Dispose of old batteries per local guidelines; never mix with new batteries. - 4
Check polarity and terminals
Before inserting new cells, locate the polarity indicators in the compartment and confirm the orientation. Inspect the battery contacts for corrosion or wear; clean if necessary.
Tip: Polarity is critical—many devices won’t power on or may be damaged if installed incorrectly. - 5
Insert new batteries
Place each new AAA cell with the correct polarity aligned to the device’s markings. Do not force them into place; they should sit snugly with minimal wiggle.
Tip: If you have multiple batteries to install, align them all the same way for consistency. - 6
Close and secure the compartment
Replace the cover and re-secure any screws. Ensure the door sits flat and the seal is intact to prevent dust ingress or moisture exposure.
Tip: A snug seal improves device reliability in variable environments. - 7
Test the device
Turn the device back on and run a quick function test to confirm operation. If it doesn’t respond, recheck polarity and contact cleanliness.
Tip: If a test fails, re-open the compartment and verify the batteries are seated correctly. - 8
Dispose of old batteries properly
Place spent batteries in a sealable bag or container until you can take them to an appropriate recycling facility. Never throw batteries in regular trash.
Tip: Look up local drop-off locations, often at electronics retailers or municipal sites.
FAQ
Do I need to power off the device before changing AAA batteries?
Yes. Powering off reduces the risk of short circuits and accidental damage. For some devices, removing power from the charger or base is enough; for others, you may need to flip a switch on the device first.
Yes. Power off the device to prevent shorts; unload power sources before replacing the batteries.
Can I mix alkaline and rechargeable AAA batteries in the same device?
No. Mixing battery chemistries can cause leakage, reduced performance, or device damage. Use the same type throughout the device’s battery set.
No, you should not mix types; use the same battery type across all cells in the device.
What should I do if the device still doesn’t work after changing the batteries?
Double-check polarity, reseat batteries, and inspect contacts for corrosion. If the issue persists, the problem may be device hardware or a loose connection beyond the battery compartment.
Re-seat the batteries and check the contacts; if it still won’t power on, the issue might be inside the device.
Are there safety concerns with battery leaks?
Yes. Leaks can irritate skin and eyes and may corrode components. If a leak is suspected, avoid contact and dispose of the batteries through proper recycling channels.
Leaking batteries can be hazardous; avoid contact and recycle the batteries properly.
Where is the best place to recycle used AAA batteries?
Most communities offer battery recycling at electronics retailers or municipal drop-off sites. Check local guidelines to find the nearest facility.
Recycle at local drop-off sites or electronics retailers; follow local guidelines for disposal.
Watch Video
Quick Summary
- Identify device compatibility before purchase
- Polarity matters for reliable operation
- Dispose batteries responsibly after replacement
- Test device immediately after replacement