Apple iPad Battery Change: Step-by-Step Guide
A comprehensive guide on apple ipad battery change, including when to replace, DIY vs Apple service, tools needed, safety tips, cost ranges, and post-replacement checks to protect data and extend device life.

In this article you will learn how to determine whether your iPad battery needs replacement, compare DIY vs professional service options, and follow safe steps for a successful apple ipad battery change. You’ll need basic tools, a compatible replacement battery, and a plan to protect data. This guide emphasizes safety and official service recommendations to minimize risk.
Why an apple ipad battery change matters
Battery health is a cornerstone of your iPad’s performance. Over time, lithium-ion battery capacity wanes, which leads to shorter run times, unexpected shutdowns, and slower responsiveness. For many users, a swollen or rapidly draining battery is more than an inconvenience—it can indicate a safety risk that requires prompt attention. According to Battery Health, properly assessing when to pursue an apple ipad battery change helps you avoid needless replacements and protects device longevity. This article focuses on practical, safety-conscious paths for device owners who want reliable results without compromising data or personal safety. We will compare DIY approaches with Apple-authorized services, outline tools and steps, and explain how a battery change can impact performance, warranty, and resale value. By understanding the process, you can decide whether to perform a DIY battery change, seek professional service, or explore official Apple options.
Keep in mind that iPad battery replacement involves delicate screen assembly and adhesive management; mistakes can cause damage or fire risk. Always prioritize safety, back up your data, and consider the model-specific requirements before starting.
Assessing battery health and symptoms
A healthy iPad battery should deliver predictable runtimes, hold charge, and not exhibit rapid heat buildup when charging. If you notice the device drains quickly, takes unusually long to charge, or shuts off at a high percentage, it could indicate reduced capacity or a swollen cell. A swollen battery is a clear safety concern and requires immediate attention from a qualified technician. For an apple ipad battery change, begin by checking the battery health status through the iPad’s settings (Settings > Battery > Battery Health) if your model supports it, and look for warning icons or message prompts. Regardless of the symptoms, never puncture or press on a swollen pack. This section also covers how to document symptoms for service reports, which can streamline diagnosis and repair.
DIY vs professional service options
DIY replacement kits promise lower costs and convenience, but they demand precision and a steady hand. The risk of damaging sensitive connectors or creating a fire hazard is non-trivial, particularly with glued displays and fragile touch panels. Apple’s official stance emphasizes using Apple Authorized Service Providers (AASP) or Apple Stores for battery work, especially if your iPad is under warranty or AppleCare. A professional service can ensure correct battery type, safety testing, and calibration. If you decide to pursue a DIY apple ipad battery change, you should be confident with micro-soldering or connector work and have a controlled, static-free workspace. This section helps you weigh feasibility, warranties, and long-term performance implications.
Tools, parts, and workspace setup
Having the right tools and a clean, organized workspace reduces the risk of damage during a battery replacement. Essential items include a set of precision screwdrivers, plastic opening tools, a spudger for connector handling, a suction cup for the display, and replacement battery adhesive. Always source a replacement battery that matches your iPad model and check for compatibility. A safe, static-free surface and ESD precautions protect components from electrostatic discharge. It’s also wise to have isopropyl alcohol and lint-free wipes to clean contact surfaces and ensure a clean reassembly. Avoid workspaces with dust or moisture, which can compromise adhesion and electronics.
Safety considerations and handling Li-ion packs
Lithium-ion polymer cells are powerful but sensitive to puncture, heat, and short circuits. Before starting, disconnect all power sources and ensure the device is fully powered down. Do not apply heat directly to the battery area for long periods; if you must loosen adhesive, use gentle warmth and patient pressure. Never bend or puncture the cell, and avoid prying on the battery edge with metal tools. Ensure you wear eye protection and gloves if available. After removal, place the old battery in a non-conductive container and dispose of it following local regulations. This section emphasizes risk awareness and proper handling of hazardous materials.
Apple’s official service channels and warranty implications
If your iPad is still under warranty or AppleCare, seek official service to avoid voiding coverage. Apple’s battery replacement policies generally cover defects and failures that arise under normal use, but accidental damage or unauthorized repairs can affect eligibility. Scheduling service at an Apple Store or through an Apple Authorized Service Provider minimizes risk and ensures that the replacement battery meets Apple specifications. If you choose a third-party shop, verify their credentials, the type of battery used, and whether they offer warranty on the replacement. This section helps you make an informed decision aligned with manufacturer guidance.
How replacement affects device performance and battery health
Replacing an aging iPad battery can restore peak performance, improve runtimes, and stabilize charging behavior. After a successful apple ipad battery change, you should experience longer usage between charges and more reliable power when under heavy load. Battery health is not a fixed property; with proper calibration and care, performance can be sustained for many months or years. Post-replacement tests, such as charging curves and runtime simulations, help verify normal operation. It’s also important to monitor the new battery's health data and be aware of any abnormal swelling or heat, which would require prompt action.
Cost considerations and time estimates
Battery replacement costs vary by iPad model and service route. Professional Apple service typically charges a service fee that includes parts, labor, and testing. DIY options may appear cheaper but require purchasing a replacement battery, tools, and adhesive, plus the risk of damaging the device. Time estimates depend on the service route: an in-store or mail-in Apple service can take days, while a DIY replacement might take several hours from disassembly to reassembly if you are meticulous. This section provides a framework to compare total cost and time while keeping safety in focus.
Post-replacement testing and data protection
After completing an apple ipad battery change, conduct basic functional tests: verify screen responsiveness, confirm camera and sensors work, ensure Wi-Fi and cellular connectivity (if applicable), and monitor charging behavior over a full cycle. Always back up data before attempting any repair, as a precaution against unexpected issues. Confirm that the device charges to 100% and maintains health metrics within normal ranges. If performance falters, consult an authorized technician for further diagnostics. This final block emphasizes keeping data secure and confirming the success of the battery replacement.
Tools & Materials
- Pentalobe screwdriver (tool kit)(Size varies by model; verify before starting)
- Plastic opening tools and spudger(Non-metal tools to avoid short circuits)
- Suction cup or display puller(Helps separate the screen without cracking glass)
- Replacement iPad battery compatible with your model(Buy from reputable source; confirm model compatibility)
- Adhesive removal strips and new battery adhesive(Keeps battery secure after reassembly)
- Isopropyl alcohol 99%(For cleaning contacts and surfaces)
- ESD-safe mat and wrist strap(Optional but recommended for anti-static protection)
- Tweezers and lint-free wipes(Useful for handling tiny connectors and debris)
- Heat source (low setting) or hair dryer(Optional for easing adhesive—use with caution)
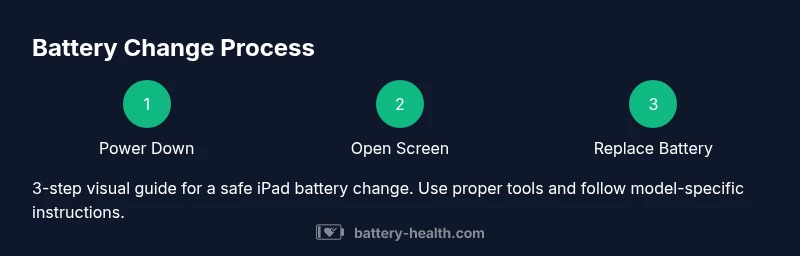
Steps
Estimated time: 60-180 minutes
- 1
Power down the iPad
Shut down the device completely and disconnect any connected accessories. This minimizes the risk of short circuits during disassembly and protects data. If the screen is unresponsive, perform a forced shutdown following the model-specific method.
Tip: Double-check that the device is not charging and there are no external power sources connected. - 2
Prepare your workspace and safety gear
Set up a clean, static-free workspace with good lighting. Put on anti-static gloves if available and arrange tools in a logical order. This reduces the chance of losing tiny screws and damaging internal components.
Tip: Use a survey mat to keep screws organized by location and size. - 3
Open the display assembly carefully
Use the suction cup and plastic pry tools to lift the display from the frame without applying excessive force. Avoid bending the display to prevent LCD damage. Disconnect the display cables slowly and keep track of connectors.
Tip: Label cables as you disconnect them so reassembly is straightforward. - 4
Disconnect the battery connector
Locate the battery connector and disconnect it using the appropriate tool. This step isolates the pack from the logic board to prevent short circuits during removal. Do not tug on wires; detach connectors cleanly.
Tip: Take photos of connector placement for reference during reassembly. - 5
Remove old battery and adhesive
Gently loosen the battery from adhesive using heat or controlled prying, avoiding punctures. Old adhesive can be sticky; replace with new adhesive strips to secure the new cell. Do not press on the battery or apply excessive force.
Tip: Keep the old adhesive in case you need to compare thickness for the new pack. - 6
Install new battery and reassemble
Place the replacement battery in the housing, reconnect the battery connector, and reattach the display. Ensure all connectors are seated correctly and that the screen re-seats without gaps. Reassemble the case in reverse order of disassembly.
Tip: Test fit before final closure to verify connector alignment. - 7
Power on, calibrate, and test
Power up the iPad and complete a basic calibration by charging to 100% and then discharging to a low level. Check screen responsiveness, cameras, sensors, and connectivity. Monitor the initial performance for any anomalies.
Tip: Run a full charge-discharge cycle and observe battery drain for the first 24 hours.
FAQ
Is it safe to replace an iPad battery at home?
Replacing an iPad battery at home carries fire and damage risk if done improperly. If you lack experience with delicate screens and adhesives, it’s safer to use Apple Authorized Service Providers. Always prioritize safety and follow model-specific guidance.
DIY can be risky; use a professional service if you’re unsure, and always back up your data before starting.
Will replacing the battery affect the iPad’s warranty?
If performed by Apple or an authorized service provider, replacements typically preserve warranty coverage. Unauthorized DIY replacements may void certain warranty protections. Always confirm policy with Apple or your retailer.
Official service usually keeps warranty intact; DIY repair may void it, depending on terms.
How long does Apple service take for a battery replacement?
Turnaround varies by location and service volume. Apple service can take a few days for mail-in requests or an in-store appointment, plus shipping time if applicable. Check current timelines with your local Apple Store.
Expect a few days to a week depending on location and load.
What are common signs my battery needs replacement?
Frequent unexpected shutdowns, slow charging, poor battery life, device warmth, or swelling are typical indicators that the battery may require replacement. If swelling occurs, stop using the device and seek professional assessment.
Look for quick drains and swelling as red flags.
Can I reuse my data after a battery change?
Data stored on the device generally remains intact after a battery replacement. Nonetheless, perform a backup prior to the repair and verify data access post-replacement.
Your data should stay intact, but back up to be safe.
What is the typical cost range for iPad battery service?
Costs vary by model and service path. Official Apple service fees differ by model and region; third-party shops may offer lower upfront costs but vary in warranty and battery quality. Always request a written estimate.
Costs depend on model and where you repair; ask for a quote upfront.
Watch Video
Quick Summary
- Assess battery health before replacing.
- Choose between DIY and official service based on risk and warranty.
- Use proper tools and safety practices to avoid injury or damage.
- Back up data and test thoroughly after replacement.