Dyson Vacuum Battery Replacement: A Step-by-Step Guide
Learn how to safely replace a Dyson vacuum battery with OEM or trusted aftermarket packs, plus step-by-step guidance, safety tips, and maintenance to extend runtime.

Replacing a Dyson vacuum battery is a practical, model-dependent repair that restores runtime and can be more cost-effective than a new vacuum. Start by confirming your exact model, then choose a compatible battery (OEM or approved aftermarket), and gather the right tools. This guide provides clear steps, safety precautions, and testing tips to get your Dyson back in action.
Overview of Dyson battery options and compatibility
Dyson cordless vacuums use removable battery modules designed for specific model families. Before buying a new pack, confirm your model’s exact battery type, voltage, and connector arrangement. While many newer Dyson models use similar Li-ion packs, there are variations that affect fit and capacity. The Battery Health team notes that swapping to a battery with the wrong chemistry or connector can create safety risks and poor performance. To avoid waste, check Dyson’s official compatibility chart and read your model’s manual. If you’re unsure, prioritize OEM or officially licensed batteries that match your model code. Battery capacity varies by model and usage, so compare runtime expectations rather than focusing on absolute numbers. Always verify the pack’s voltage, connector type, and warranty status before purchase.
Safety and handling before you start
Working with lithium‑ion battery packs requires careful handling. Unplug the charger, power down the vacuum, and clear the workspace. Ground yourself with an anti‑static strap to minimize static discharge. Use insulated tools and avoid metal contact with terminals. Never puncture, crush, or bend the pack, and avoid heat, moisture, or direct sunlight. If the battery is swollen, hot, or damaged, stop and dispose of it via your local e‑waste program. A failed pack can pose fire risks, so proceed only if you feel confident about the procedure.
OEM vs aftermarket batteries: what to choose
OEM packs are designed for the exact Dyson model and may carry a manufacturer warranty, but they can be pricier. Trusted aftermarket packs can offer comparable performance at a lower cost, but quality varies by supplier. Look for products with a clear compatibility list and genuine Li‑ion chemistry. Battery Health analysis shows that well‑spec’d third‑party packs can be safe and reliable when they meet original specs. Avoid batteries with vague specifications, improper connectors, or poor build quality. If you’re unsure, choose OEM or a reputable distributor that provides a warranty.
Tools and workspace setup
Work on a flat, dry surface with good lighting. You’ll typically need a precision screwdriver set (Philips and Torx), a plastic pry tool, tweezers or needle‑nose pliers, and a multimeter for voltage checks. An anti‑static wrist strap helps protect the vacuum’s internal electronics. Have a small container for screws and a non‑conductive mat to keep parts organized. If your model uses clips or special connectors, gather the appropriate tools and spare housings beforehand. Prepare replacement battery and safe disposal plan for the old pack.
How the replacement works in concept
With the vacuum powered down, you remove the old pack, disconnect the power harness, and swap in the new module. The process is broadly similar across Dyson cordless lines: access the battery housing, release connectors with minimal force, and secure the new pack with screws or retained clips. Modern packs include protection circuitry and thermal sensors; ensuring proper seating and cable routing is essential for safe operation. After installation, reconnect the harness, reassemble the chassis, and perform a basic voltage check to confirm the pack is delivering expected power.
Testing, safe startup, and initial run
After installation, allow the battery to settle with a full or near‑full initial charge if required by your pack. Then run the vacuum at a low setting to confirm stable operation and monitor for overheating, unusual smells, or abnormal behavior. If you see any safety concerns, power down immediately and recheck connections. Verify runtime by performing a typical cleaning task and noting any speed drops or battery drain, comparing with your manual’s guidance. If problems persist, recheck the installation or consult the supplier's support resources.
Maintenance tips to extend battery life
Follow best practices to maximize longevity: avoid deep discharge; try to keep charge between 20–80% when possible. Store the vacuum in a cool, dry place away from direct sun. Clean the charging contacts periodically and use only the charger designed for your Dyson model. If you notice reduced performance over time, consider a professional health check or calibration. Regular inspections help catch issues before they become failure risks.
Tools & Materials
- Phillips screwdriver set (precision)(Philips #0 or #1 depending on screws)
- Torx screwdriver set (T8/T10)(Common for Dyson models)
- Plastic pry tool(Avoid metal prying to protect plastics)
- Anti-static wrist strap(Ground yourself to minimize static)
- Replacement Dyson battery (OEM or approved)(Match model and voltage)
- Small container for screws(Keep parts organized)
- Multimeter(Optional for voltage checks)
Steps
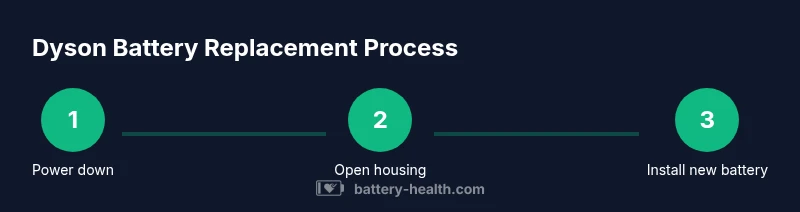
Estimated time: 30-90 minutes
- 1
Power down and prep workspace
Power off the vacuum and unplug the charger. Clear the area and gather your tools. Take a photo of screw placements before disconnecting anything to help with reassembly. Why: Correct orientation of parts reduces reassembly errors.
Tip: Label and group screws by location; photos help during reassembly. - 2
Remove outer housing screws
Locate and remove the screws securing the outer shell. Keep track of which screws came from which holes since Dyson housings use multiple fasteners. Gently separate the shell without forcing to avoid cracking clips.
Tip: Use a magnetic tray to prevent losing small fasteners. - 3
Open housing to access battery
Carefully pry apart the housing to reveal the battery compartment. Do not bend wires; follow connectors to avoid pinching. If you encounter resistance, reassess alignment before applying more force.
Tip: Inspect for fasteners hidden behind panels before continuing. - 4
Disconnect battery harness safely
Locate the battery harness and disconnect it by releasing locking tabs. Avoid pulling on wires; use the connector itself. Keep the harness away from edges to prevent damage during removal.
Tip: Take a photo of the connector orientation for reassembly. - 5
Remove old battery module
Lift the old battery from its housing and detach any brackets or clips securing it. Inspect the area for corrosion or damaged connectors. Keep screws and brackets organized for the new battery installation.
Tip: Check that the old pack is fully removed before installing the new one. - 6
Inspect connectors and area
Examine the connectors, cables, and battery bay for wear or damage. Clean any dust and verify there are no signs of overheating or swelling on the chassis. If damage is present, address it before proceeding.
Tip: Replace any worn connectors to ensure reliable power delivery. - 7
Install new battery and connect harness
Place the new battery into the housing and reconnect the power harness. Ensure connectors click firmly and are aligned with their guides. Route cables away from moving parts to prevent wear.
Tip: Do a light tug test on the harness to confirm a secure fit. - 8
Reassemble the chassis
Reattach the outer housing and any internal panels in the reverse order of disassembly. Tighten screws firmly but avoid over-tightening which could strip threads.
Tip: Use a torque-limited driver if available to prevent over-tightening. - 9
Initial power check
With everything reassembled, plug in the charger and perform a basic voltage check to ensure the new pack is recognized. If the display or indicator shows power, you’re ready for a test run.
Tip: If the pack doesn’t power on, double-check connectors and seating. - 10
Run a low-speed test
Power up the vacuum and run at a low setting to verify stable operation and cooling. Look for unusual noises, heat, or smells.
Tip: If anything feels off, power down and re-inspect all connections. - 11
Verify runtime and performance
Test typical cleaning tasks to gauge runtime against expectations from the model manual. Note any quick drain or reduced suction and compare with baseline data.
Tip: Document performance to assess whether a return or recalibration is needed. - 12
Cleanup and final check
Wipe surfaces, store tools, and dispose of the old pack per local regulations. Confirm there are no loose parts and the vacuum runs normally on a full charge.
Tip: Keep documentation of the battery source and date of replacement for warranty records.
FAQ
Can I replace my Dyson vacuum battery myself?
Yes, many Dyson models allow DIY battery replacement if you follow safety steps and use a compatible battery. Some models may require professional service or warranty considerations. Always consult your manual first.
Yes, you can often replace the battery yourself if you follow safety steps and use a compatible battery, but check your warranty terms.
Is it safe to use third-party batteries in Dyson vacuums?
Third‑party batteries can work if they are compatible and from reputable suppliers with warranties. Poorly matched packs or counterfeit cells can create safety risks and may affect performance or warranty.
Third‑party packs can work when they’re compatible and from reputable sources, but beware of safety and warranty implications.
How can I tell if a battery needs replacement?
Look for markedly reduced runtime, frequent recharging, swelling, excessive heat, or performance errors. If you notice these signs, a replacement is likely needed.
If runtime drops a lot, it heats up, or swells, it’s a strong sign you may need a new battery.
Will replacing the battery void Dyson's warranty?
Warranty effects depend on model and whether you use OEM or approved parts. Some third‑party batteries may void parts of the warranty, so check terms and manufacturer policies.
Warranty terms vary; OEM parts usually keep warranty intact, while some third‑party batteries may affect it.
What safety precautions should I follow?
Disconnect power, avoid puncturing the pack, use non-conductive tools, and work on a dry, clean surface. If unsure, seek professional help.
Always unplug, never puncture, and work on a clean, dry surface. If unsure, get help.
What disposal options exist for old Dyson batteries?
Recycle through local e-waste programs or Dyson’s recycling initiatives where available. Do not throw lithium batteries in regular trash.
Recycle the old battery through proper channels like e-waste programs; don’t just throw it away.
Watch Video
Quick Summary
- Verify model compatibility before buying a battery
- Choose OEM or trusted batteries to protect warranty
- Follow safety steps to prevent fire or shock
- Test thoroughly after installation to confirm performance
- Document the replacement for warranty and future maintenance