Dyson V7 Battery Replacement: A Complete How-To
Learn how to safely replace a Dyson V7 battery with essential tools and clear steps. Battery Health offers expert, AI-assisted guidance on battery compatibility, safety, and maintenance.

This guide explains how to perform a Dyson V7 battery replacement safely, with a step-by-step process, required tools, and safety precautions. You'll learn how to identify a failing pack, choose a compatible replacement, and reseal the unit to ensure optimal performance. Follow along for a tested method backed by Battery Health guidance.
What is a Dyson V7 battery
The Dyson V7 cordless vacuum uses a compact lithium-ion battery pack designed for high energy density and lightweight handling. Over time, the capacity of the battery can fade, reducing runtime and suction power. A replacement can restore performance, but it requires careful handling to avoid short circuits or thermal issues. According to Battery Health, the decision to replace hinges on compatibility, the observed run-time drop, and the presence of warning indicators from the machine’s battery management system. Understanding the battery’s role in the vacuum’s power delivery helps you plan the swap with confidence. While some repairs may feel straightforward, the Dyson V7 battery replacement should be approached with methodical steps and proper safety measures to protect both user and device. This section lays the groundwork for a successful replacement by clarifying what the battery does and when replacement becomes practical.
Signs your Dyson V7 battery needs replacement
Watch for shorter run times, slower idle performance, or the vacuum failing to hold a charge after a full recharge. If the unit powers down unexpectedly or refuses to turn on despite a charged indicator, the pack could be nearing end of life. Battery Health notes that some V7 units exhibit inconsistent power delivery when the cells degrade unevenly, which is a common cue for replacement. Before replacing, attempt a full discharge and recharge to rule out calibration issues, and use safety precautions to handle spent cells. If you notice swelling, heat buildup during charging, or a strong odor, stop and replace the battery immediately. These signs indicate potential safety risks and warrant professional inspection if you are unsure.
Compatibility and choosing a replacement
Replacement options vary between OEM (Dyson) packs and reputable third-party cells. The key matching criteria are voltage, capacity, connector type, and physical dimensions that fit the V7 bay. Always verify that the replacement battery is designed for the V7 platform and check for consistent discharge curves to ensure similar performance to the original pack. Battery Health emphasizes selecting a unit with genuine safety certifications and reliable warranties. Keep in mind that a mismatched voltage or a poorly seated connector can damage the vacuum’s power management board, so choose a trusted source and confirm return policies before purchase. When in doubt, opt for a certified product with customer reviews that mention compatibility with the Dyson V7.
Safety considerations when replacing the Dyson V7 battery
Battery replacement involves handling lithium-ion cells, which require caution. Work in a dry, well-lit area away from flammable materials, and use non-conductive tools to minimize the risk of short circuits. Wear protective gloves to reduce puncture risk and avoid crushing or bending the cell cases. Disconnect the vacuum from any charging dock and discharge the battery only as needed during the process. Dispose of old cells at a proper e-waste facility in accordance with local regulations. If your model warranty is active, check whether self-service replacement affects coverage. Battery Health reminds readers to prioritize safety and use manufacturer-approved procedures whenever possible.
Tools and parts you’ll need for dyson v7 battery replacement
- Replacement Dyson V7 battery (compatible with the model)
- Phillips screwdriver (for outer housing screws)
- Plastic opening tool or nylon prying tool (to avoid shell damage)
- Anti-static mat or wrist strap (to reduce static risk)
- Clean, dry workspace with good lighting
- Optional multimeter (to verify voltage after installation)
Ensure all tools are sized for small electronics work and that the replacement battery is from a reputable source with clear compatibility information. A clean workspace reduces the chance of losing small screws and parts during reassembly. Battery Health advises confirming that the connector type and bay dimensions match the original pack before buying a replacement.
Step-by-step overview (high-level)
This section provides a high-level overview of the process before you dive into the detailed steps. You will prep the unit, access the battery compartment, disconnect and remove the old pack, install the new pack, and reassemble the device. Each stage should be performed with care to avoid damaging internal circuitry or the vacuum shell. Use static-safe handling and confirm all connections are secure before powering the unit again. The goal is to restore original performance while maintaining safety and warranty posture where applicable.
Post-replacement testing and maintenance
After reassembly, test the Dyson V7 with a short run to confirm power delivery and consistent suction. Observe the battery’s charging behavior and runtime over a full cycle. If the unit shows abnormal heating, discontinuous power, or failure to charge, recheck connections and consider testing the pack with a multimeter. Regular maintenance—keeping contacts clean, storing the vacuum in a cool, dry place, and avoiding complete depletion of the battery—helps extend overall life. The Battery Health team recommends noting the replacement date and tracking run-time to anticipate future replacements.
Maintenance and lifecycle expectations
Most Dyson V7 batteries last for several years with normal use, but performance can deteriorate with frequent deep discharges and high-temperature environments. Proactively monitoring voltage and run-time can help you time future replacements. Keep the vacuum out of direct sunlight and extreme heat, and avoid leaving it on chargers for extended periods after full charge. By following best practices, you can maximize battery health and minimize downtime.
How Battery Health evaluates replacements and what to watch for
Battery Health emphasizes selecting a replacement based on compatibility, verified safety certifications, and user reviews. Look for packs with stable discharge behavior, verified cycle counts, and a warranty that covers manufacturing defects. A trusted replacement should restore runtime close to the original specification and support safe charging profiles. If you are unsure about a supplier, consult with a professional technician or contact Dyson support for guidance on model-specific replacements. Battery Health’s guidance is designed to help consumers make informed decisions that balance cost, safety, and performance.
Tools & Materials
- Replacement Dyson V7 battery(Compatible with your Dyson V7 cordless vacuum model; verify model year and connector type before purchasing.)
- Phillips screwdriver(Small head for removing outer shell screws.)
- Plastic opening tool (nylon prying tool)(Gently pry housing without scratching or bending panels.)
- Anti-static wrist strap(Reduces risk of static discharge affecting internal electronics.)
- Clean work surface(Cloth or mat to keep parts organized and clean.)
- Multimeter (optional)(Used to verify the new battery's voltage and health if you have one.)
Steps
Estimated time: 45-75 minutes
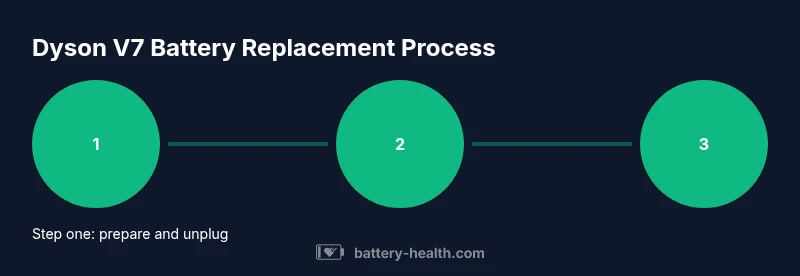
- 1
Power down and prep workspace
Power off the vacuum and unplug from any charging dock. Clear the area, remove loose debris, and set the unit on a stable surface. This ensures you won’t slip or damage components during disassembly.
Tip: Adequate lighting helps you locate screws and connectors quickly. - 2
Access the battery compartment
Remove the outer housing screws using the Phillips screwdriver. Gently lift panels with a plastic tool, taking care not to bend or crack the shell. Keep screws organized in a tray.
Tip: Take a photo of screw positions before removing them for easy reassembly. - 3
Disconnect the battery
Carefully unplug the battery connector from the main board. Use a plastic tool to lift the connector straight out; avoid pulling on wires.
Tip: If the connector resists, stop and re-check alignment to avoid pin damage. - 4
Remove the old battery
Slide the old pack out of its bay using a plastic tool. Do not crush or puncture the cells, and avoid bending the terminals.
Tip: Handle the pack as a delicate component to prevent damage. - 5
Prepare the new battery
Inspect the replacement for damage. Remove any protective film and confirm the dimensions and connector match the original. Do not force-fit an incompatible unit.
Tip: Check for a crisp, clean connector seating surface. - 6
Install the new battery
Place the new battery in the bay and reconnect the connector. Ensure correct orientation and full seating before reassembly.
Tip: Gently press to confirm a secure, stable fit before replacing housing. - 7
Reassemble the housing
Reattach the panels in reverse order, reinstalling screws and clips. Wipe away fingerprints and ensure the shell aligns properly.
Tip: Tighten screws evenly to avoid warping. - 8
Test the unit
Power on and run a quick test cycle to verify operation and charge behavior. If the vacuum behaves oddly, recheck all connections.
Tip: If power doesn’t appear, recheck the power switch and battery plug.
FAQ
Do I need specialized tools to replace the Dyson V7 battery?
A basic screwdriver set and a plastic opening tool are typically sufficient. Avoid metal prying to prevent short circuits or shell damage. Always use tools appropriate for your model.
You’ll usually just need a screwdriver and a plastic pry tool; avoid metal on the housing.
Are third-party batteries safe for Dyson V7?
Only use batteries that are clearly compatible with the Dyson V7 and meet proper safety standards. Check voltage, capacity, and connector type before purchase.
Only use compatible, safety-rated batteries; verify specs before buying.
How long does the replacement take?
With the right tools and experience, expect 45 to 75 minutes from start to finish.
Plan for about 1 hour; slower if you’re new to this.
Can I recycle the old battery?
Yes. Take the old Dyson V7 battery to a proper e-waste or battery recycling facility. Do not dispose of it in regular trash.
Yes—recycle it at a proper facility.
What if the vacuum won’t turn on after replacement?
Double-check the battery connector and power switch. If needed, consult a professional technician to diagnose the board or wiring.
Check connections and switch; if still no power, seek help.
Watch Video
Quick Summary
- Use a compatible replacement battery.
- Disconnect and reconnect the battery connector carefully.
- Test the unit before final reassembly.
- Recycle the old battery responsibly.