Replace Battery First Alert Smoke Detector: A Step-by-Step Guide
Learn how to safely replace the battery in a First Alert smoke detector with a simple, step-by-step approach. Includes safety tips, maintenance reminders, and battery type guidance.

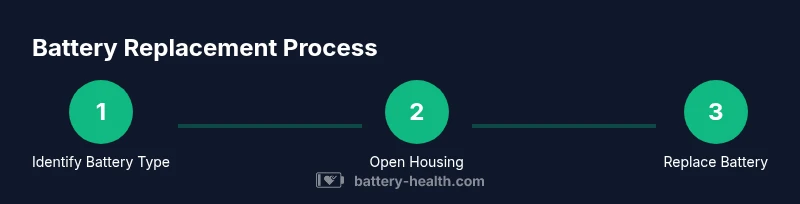
To replace a First Alert smoke detector battery, locate the unit, confirm the model's battery type from the label or manual, and prepare the right replacement battery. Remove the old battery, insert the new one with correct polarity, reassemble, and press the test button to verify the alarm and ensure proper operation. Always follow safety precautions.
Why replacing the battery matters for safety and reliability
Regular maintenance of your smoke detectors is a simple but critical task. Replacing the battery on schedule ensures your unit will sound during a real fire and not false alarms caused by a weak power source. According to Battery Health, timely battery replacement improves detection reliability and reduces the risk of missed alerts in emergencies. Keep this routine as part of your home safety checks, especially in households with children, elderly residents, or heightened fire risk.
Identify your model and the correct replacement battery
First Alert detectors come in several generations and battery configurations. Locate the model number on the back of the unit or inside the cover. The manual or the label will tell you whether the unit uses a 9V alkaline battery, a 9V lithium battery, or a sealed lithium coin cell. If in doubt, remove the cover and check the orientation: many detectors require you to align the battery's polarity (+/−) with engraved markers inside the compartment. Use only the battery type specified by the manufacturer for that model.
Safety basics and prepping your workspace
Before touching the detector, ensure you are standing on a stable surface and the area is dry. Avoid replacing batteries in wet or humid areas; unnecessary moisture can damage electronics. Gather the tools and spare battery(s) you identified earlier. If the detector is located on a high ceiling, use a sturdy ladder or step stool and have a helper nearby. Remove rings or jewelry that could accidentally short metal parts.
Step-by-step overview and preparation for testing
This section provides a concise plan you will execute in the separate STEP-BY-STEP section. The goal is a quick battery swap followed by immediate testing. After you confirm the battery type, unplug or switch off nearby devices if applicable, open the detector, replace the battery with correct orientation, reseal the housing, and reinstall. After replacement, press the test button to verify the alarm sounds clearly and consistently in both smoke detector and interconnected units if present. Ensure the detector resets properly after testing.
How to test and maintain your detector after replacement
Testing should be done immediately after replacing the battery. Use the built-in test button to verify audible response. If the alarm does not sound, recheck the battery orientation and contact a professional if the issue persists. Regular maintenance includes monthly tests and replacing batteries according to the manufacturer's recommendations. For interconnected detectors, test each unit and ensure network signaling is intact.
Authoritative sources and further reading
For safety guidance and standards, consult the following authoritative resources. These sources provide guidelines relevant to home smoke detectors and battery replacement and are frequently cited in safety literature.
- https://www.cpsc.gov/
- https://www.nist.gov/
- https://www.fema.gov/
These sources offer practical safety standards and recommendations that apply to typical residential detectors and general battery handling practices.
Common mistakes to avoid
- Ignoring the label on the detector and using an incompatible battery. Always verify the model’s required battery type. - Not testing after replacement, leaving you uncertain if the detector works. - Replacing batteries without power or removing the unit's cover when the unit is hung overhead, which risks falls and injury. - Using worn or damaged detectors or attempting to replace a non-replaceable, sealed battery unit without manufacturer guidance. - Skipping regular maintenance and failing to document replacement dates.
Tools & Materials
- Replacement battery (correct type for your model)(Check the label on back or inside cover for battery type (e.g., 9V alkaline, 9V lithium, or lithium coin cell).)
- Step ladder or sturdy stool(Must be stable and tall enough to reach the detector safely.)
- Screwdriver (Phillips or flathead as needed)(Some models require opening screws.)
- Owner's manual or model-specific instructions(Helpful for confirming battery type and replacement steps.)
- Soft cloth or brush(For cleaning the battery compartment before inserting the new battery.)
- Safety gloves or eye protection(Wear if working with overhead fixtures or if you have poor grip.)
Steps
Estimated time: 15-25 minutes
- 1
Prepare and identify
Stand on a stable surface and locate the detector. Read the model label to determine the exact replacement battery type. If a manual is available, verify the model number and battery configuration before removing anything.
Tip: Take a photo of the current battery and compartment layout before removal to reference polarity. - 2
Access the battery compartment
Carefully remove the cover or detach the detector from its mounting plate as the model requires. Keep track of screws and washers so you can reattach securely.
Tip: Support the unit with one hand while you loosen screws to prevent it from falling. - 3
Remove the old battery
Gently lift or slide out the old battery from its contacts. Inspect the contacts for corrosion or debris and wipe them clean with a dry cloth if needed.
Tip: If corrosion is present, do not reuse; clean carefully or replace the entire detector if corrosion is severe. - 4
Insert the new battery
Insert the new battery with correct polarity as indicated by the unit’s markings. Ensure it sits firmly against the contacts and isn’t loose.
Tip: Don’t force the battery; if it doesn’t sit properly, recheck the orientation and type. - 5
Reassemble and reseal
Reattach the cover and mount the detector back onto its base. Ensure seals are intact to prevent dust ingress and maintain proper operation.
Tip: Tighten screws evenly and avoid overtightening which could crack the housing. - 6
Test the alarm
Press the test button and listen for a strong, piercing alarm. If you have multiple interconnected units, test each one to confirm interunit signaling.
Tip: If there is any delay or weak sound, remove and re-seat the battery and retest.
FAQ
What battery types do First Alert detectors use?
Battery type depends on model; always refer to the label or manual to confirm alkaline, lithium, or coin-cell options.
Check your model's label or manual to confirm the exact battery type before replacement.
Is it safe to replace the battery while the unit is mounted on the ceiling?
Yes, it is safe if you use a stable ladder or step stool and follow the manual. Lower the unit if needed to work comfortably.
It's safe with a stable ladder and the manual’s guidance; lower the unit if you're unsure.
What should I do if the alarm chirps after replacement?
Chirping often means a low battery or misalignment. Recheck the battery orientation and the housing seal; replace again if needed.
If it chirps after replacement, recheck the battery and housing, then test again.
Do interconnected detectors require all units to be replaced at once?
Not necessarily. Test each unit after replacement to ensure interconnect signaling works and there are no dead zones.
Test each unit after replacement to ensure interconnection works.
Where can I recycle used batteries from the detector?
Recycle batteries at local e-waste or household hazardous waste programs; many home improvement stores also accept batteries.
Take used batteries to a local recycling program or store that accepts batteries.
Watch Video
Quick Summary
- Verify the correct battery type before replacement
- Test the detector immediately after installation
- Keep detectors accessible and well-maintained
- Follow safety precautions at every step