Smoke Alarm Battery Replacement: Step-by-Step Guide
Learn how to safely replace a smoke alarm battery, identify battery types, and test your detector to maintain home fire safety. Expert guidance from Battery Health.

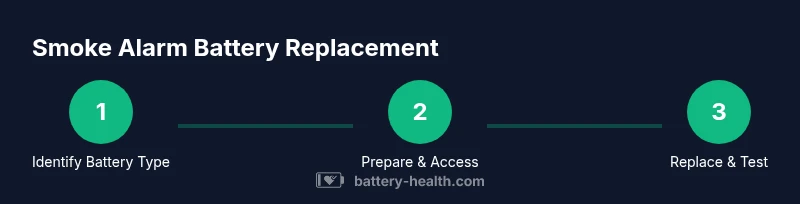
This guide shows you how to perform a smoke alarm replace battery safely and effectively. You’ll identify the battery type, gather the correct replacement, and test the alarm after installation. If the unit is hardwired, switch off power at the breaker before opening the cover, then reattach and run a test.
Why smoke alarm battery replacement matters
A functioning smoke alarm is one of the most important safety devices in your home. The simple act of a smoke alarm replace battery when needed keeps the detector ready to sound an alert during a fire or heavy smoke. When the battery is weak or depleted, the unit may chirp constantly or fail to respond to smoke, giving occupants less time to evacuate. Regular battery replacement also reduces nuisance chirps that lead people to ignore warning sounds, which defeats the device's purpose. The Battery Health team notes that proactive maintenance preserves sensitivity, minimizes false alarms, and extends the overall life of the alarm system. In short: this small maintenance task protects lives and property. If you’re evaluating your home safety plan, add a scheduled battery check to your routine. Battery Health analysis suggests treating each smoke alarm as a separate device with its own battery cycle, especially in multi-story homes with several detectors. The key takeaway: never skip the step of confirming a healthy power source before assuming your detector is fully functional.
Battery types used in smoke alarms
Smoke alarms use a few different battery configurations, and knowing which type your unit accepts makes the smoke alarm replace battery task safer and easier. Most common designs rely on standard consumer batteries, while newer models may use sealed, long-life cells that cannot be replaced individually. Understanding these options helps you plan maintenance without surprise outages:
- 9-volt alkaline batteries are common in many older alarms and offer straightforward replacement.
- AA or AAA cells power many mid-range units and provide accessible replacements.
- Sealed lithium batteries are found in newer, low-maintenance models and cannot be replaced; in these cases you replace the entire detector when the battery reaches end of life.
- Some hardwired alarms include a backup battery designed to keep power during outages; these backup cells follow the same replacement principles but may have a different access method.
Always check the label on the front or back of the device, or consult the manual, to confirm the exact battery type for your model.
Safety first: power, access, and handling
Before you begin the smoke alarm replacement process, prioritize safety. If the unit is hardwired, turn off the circuit at the breaker and verify there is no voltage at the unit before you touch any wiring. Work on a stable ladder or step stool in a dry, well-lit area. Avoid touching metal contacts with wet hands, and never force a battery into a slot if polarity is reversed. Dispose of a removed battery properly according to local guidelines, and keep a spare for future use. Keeping the work area clean and dry helps prevent accidental short circuits. If you smell burning or hear sizzling while handling the unit, stop and power down immediately. These precautions are essential to ensure a safe smoke alarm replacement and reliable recertification of your home protection system.
Tools and preparation you’ll need
Before you start the smoke alarm replacement task, assemble a small toolkit. Essential items:
- Replacement battery: ensure it matches your alarm's battery type and size.
- Screwdriver: typically Phillips head; some models use a flathead or Torx.
- Ladder or sturdy stool: reach detectors on ceilings safely.
- Clean cloth or compressed air: remove dust from the detector's vents.
Optional items:
- Electrical contact cleaner: if the unit shows corrosion on contacts.
- Permanent marker or label: note the replacement date for maintenance tracking.
Step-by-step overview for common designs
This section provides a high-level overview of how the smoke alarm replace battery is performed across typical designs. Use the STEP-BY-STEP block for exact actions; here we summarize the approach:
- Battery-powered alarms: remove the cover, disconnect or unclip the battery, insert a fresh cell with correct polarity, and replace the cover.
- Hardwired alarms with backup battery: switch off power, detach the detector from its base, replace the backup battery, reattach, and restore power.
- Sealed-unit alarms: if the unit is sealed, you cannot replace the battery; replace the entire detector instead.
If your model differs, always follow the manufacturer’s instructions to prevent damage and ensure safety.
Testing, maintenance, and when to replace the entire unit
After completing the smoke alarm replacement, perform a full test to verify operation. Press and hold the test button until you hear a loud siren or chirp; if you hear nothing, re-check the battery alignment and power connections. Let the device acclimate for a minute and retest. Schedule routine maintenance, such as monthly tests and annual battery changes, and keep a log for each detector. If a detector is more than 10 years old or malfunctions after replacement, consider replacing the entire unit to maintain protection standards.
Common mistakes and troubleshooting tips
Avoid these frequent errors:
- Using the wrong battery type or incorrect polarity; verify markings before insertion.
- Failing to turn off power on hardwired units; this can cause shocks or shorts.
- Installing a dead battery or mixing old and new cells in the same device.
- Forgetting to reattach the detector firmly to its base, which can compromise the seal.
Troubleshooting tips:
- If the alarm doesn't sound on test, re-check wiring and contacts, then replace the battery again.
- If there's corrosion, clean contacts with a dry cloth and reseat the battery after ensuring dryness.
Maintenance schedule and best practices
Establish a simple maintenance cadence to keep your smoke alarm battery life optimal. Monthly tests help confirm function; annual battery changes are a common standard, though sealed units may differ. Create a replacement log that records detector location, battery type, replacement date, and next due date. For multi-story homes, set reminders per floor so you don’t miss a detector. When in doubt, err on the side of safety and replace the entire unit if you cannot verify internal components.
What to do after replacement: safety logs and reminders
Document the action you took for future reference. Note the detector's location, battery type, replacement date, and the next due date in a home maintenance notebook or digital reminder system. Encourage household members to report any nuisance chirps promptly, as those signals may indicate degraded batteries or other issues. Finally, keep spare batteries in a dedicated, accessible location so you can perform future smoke alarm replace battery tasks quickly and safely.
Tools & Materials
- replacement battery(Type must match your alarm (9V, AA/AAA, or sealed lithium))
- screwdriver(Phillips head most common; adapt to model)
- ladder(Stable and tall enough to reach ceiling detectors)
- gloves or eye protection(Optional for handling old batteries or dusty detectors)
- clean cloth(Dust-free wipe for vents and contacts)
Steps
Estimated time: 20-40 minutes
- 1
Identify the correct battery type
Read the unit label or manual to determine the exact battery type and polarity. If the model number is unclear, pause and look up the exact replacement part before proceeding. Using the wrong battery can damage the unit or reduce performance.
Tip: Having the manual or model number handy speeds up correct battery selection. - 2
Power down the unit and prepare the area
If the alarm is hardwired, switch off the circuit at the breaker and confirm there is no voltage. Clear the area under the detector and set up a stable ladder. Ensure hands are dry and you have good light before touching any components.
Tip: Dry hands and a dry surface reduce the risk of shorts during replacement. - 3
Remove the alarm from its mounting
Gently twist or unclip the detector from its base, depending on the model. Support the unit as you detach it to avoid dropping it on the floor. Take note of how the wiring or battery leads connect for reassembly.
Tip: If you feel resistance, double-check the mounting design before applying more force. - 4
Replace the old battery and inspect contacts
Remove the depleted battery, discard it properly, and insert the new battery with the correct polarity. Wipe any dust from the contacts and inspect for corrosion or damage. Do not reuse old batteries in the same device.
Tip: Ensure the battery seats fully and the contacts are clean for a solid connection. - 5
Reattach the detector to its base
Align the unit with the mounting plate and secure it per the model’s instructions. Confirm the seal around the cover is intact to maintain the detector's sensitivity. Tighten screws evenly without overtightening.
Tip: A snug, even fit prevents false alarms caused by a loose housing. - 6
Test the alarm
Press and hold the test button until you hear the siren. If there is no sound, recheck the battery type, polarity, and wiring connections. If the test fails repeatedly, the unit may need replacement.
Tip: Test from a safe location and avoid direct exposure to smoke during testing. - 7
Record the replacement
Date and note the battery type and detector location in a maintenance log. This helps plan future replacements and keeps the safety schedule up to date. Consider adding a reminder for the next due date.
Tip: A simple log reduces the chance of missed replacements. - 8
Finish and normalize safety checks
Return the area to normal, store spare batteries in a known spot, and remind household members to report any chirps or alarms promptly. Reassess your coverage by walking through the house and testing each detector once more if necessary.
Tip: Consistency is key; regular checks prevent gaps in protection.
FAQ
Do I need to turn off power to a hardwired smoke alarm before replacing the battery?
Yes. For hardwired alarms, shut off the associated circuit at the breaker to avoid shock. Then proceed with the battery replacement following the manufacturer’s guidance.
Yes. If your alarm is hardwired, switch off the circuit at the breaker before opening the unit and replacing the battery.
What battery types do smoke alarms use?
Most use 9-volt alkaline, AA or AAA cells, or sealed lithium batteries. Check the label on the front or back of the device or the manual to confirm the exact type.
Most detectors use 9-volt, AA or AAA, or sealed lithium batteries; always verify the exact type on the device label.
Can sealed-unit smoke alarms be replaced, or must the entire unit be?
Sealed-unit alarms have non-replaceable batteries and should be replaced as a whole when the battery degrades.
Sealed units can't have their batteries replaced; you replace the entire unit when needed.
How often should I replace smoke alarm batteries?
Follow the manufacturer guidance, but perform a battery check at least annually and test monthly. Many find it helpful to schedule a yearly replacement.
Check the manual. Most batteries are replaced at least once a year, and you should test monthly.
What should I do if the alarm chirps after replacement?
Chirping usually means a low battery or installation issue. Confirm the correct battery type and polarity, reseat the unit, and test again. If the chirp persists, replace the unit.
If it chirps after replacement, recheck the battery and installation; if it continues, the detector may be failing.
Is it safe to replace several alarms at once?
Yes, as long as you follow safety steps and test each unit. Plan the replacements to avoid gaps in coverage and keep logs up to date.
Yes, you can replace several, but plan and test each unit individually.
Watch Video
Quick Summary
- Test after replacement to confirm operation.
- Use the correct battery type for each detector.
- Hardwired units require power-off safety steps.
- Keep a replacement log to schedule future changes.
- If in doubt, replace the entire unit to maintain protection.