Smoke Alarm Battery Replacement Guide
Learn how to safely replace a smoke alarm battery, identify the correct battery type for your model, install it properly, and test the alarm for reliable home protection.

In this guide, you’ll learn how to safely replace a smoke alarm battery, identify the correct battery type for your model, install it properly, and test the alarm to ensure continued protection. The steps apply to most 9V, AA, and lithium battery models. Always follow manufacturer instructions and disconnect power if your system is wired.
Why replacing the battery matters
Your smoke alarm is a critical line of defense against home fires. A fresh, correctly installed battery ensures the device will sound when smoke is present, helping you and your family evacuate safely. Regular battery replacement also reduces nuisance chirps that can mask real alarms and helps ensure the detector retains power during an emergency. According to Battery Health, regular inspection and proper replacement of smoke alarm batteries is essential for home safety. Always follow the manufacturer’s instructions for your specific model, as battery types and access methods vary by brand. If the unit is interconnected with other detectors, replacement should be performed in accordance with the system guidelines to maintain synchronized operation.
Key indicators that you should replace the battery include persistent chirps, a warning light, or a beep pattern specified by your model's manual. When in doubt, replace with a battery type listed on the back label or inside the cover. Never mix battery types or use damaged batteries, which can cause corrosion or leakage and compromise safety. By keeping fresh batteries on hand and marking the date of replacement, you’ll reduce the chances of being caught by a failing alarm.
Understanding battery types and compatibility
Smoke alarms come with different battery configurations, and using the wrong type can prevent the unit from functioning correctly. The most common configurations are: 9V rectangular batteries, AA or AAA cylindrical batteries, and long-life lithium cells built into sealed units. Some detectors are designed to accept only one battery type, while others use a battery compartment that can accept multiple sizes. Check the back of the device or the user manual for the exact type and the correct orientation. If you replace with the wrong type, you may damage contacts or fail to seal the unit properly, which could compromise performance. For interconnected systems, ensure the entire network remains synchronized after replacement, following the manufacturer’s guidance.
If your detector uses a sealed 10-year battery, you cannot replace the battery; in these cases you’ll need to replace the entire unit at the end of its life. Sealed-battery detectors often provide a warranty period and a replacement cycle recommended by the manufacturer. For best results, keep a small reference folder with model numbers and compatible battery types to speed future replacements.
Tools, safety and access
Before you begin, gather the essential tools and take basic safety precautions. A clean, well-lit workspace helps you see battery terminals clearly and reduces the chance of misplacing parts. Use a flashlight to inspect the backside of the alarm for battery information. Keep a small garbage bag handy for old batteries and never mix old and new batteries. Wear eye protection if you work around dusty or dusty-laden camera-light batteries, though this is usually not necessary for typical household detectors. If you have a hard-wired interconnected system, you may need to turn off the power at the circuit breaker or switch off the affected branch to avoid shocks while handling the unit. Place the detector on a stable surface or hold it securely during the process. Always wash your hands after handling batteries and dispose of old batteries according to local regulations.
Having the right workspace and clean hands reduces the risk of short circuits or dropping the alarm, which could cause damage to the device or surrounding objects. A simple checklist can help you stay organized: identify the battery type, verify the replacement battery is fresh, set up a safe disposal plan, and reassemble according to the manufacturer’s instructions.
Step-by-step replacement process overview
This section provides a high-level walkthrough of the replacement process. For the exact, step-by-step actions with micro-details, see the dedicated STEP-BY-STEP block below. In most cases, replacement follows a consistent pattern: remove the detector from its base, access the battery compartment, replace the old battery with a new one of the correct type and orientation, reseat the cover, reattach the detector, and run a test. If the unit is interconnected with others, a network reset may be required after replacement to ensure all units are in sync. Always perform a test immediately after replacement to confirm proper operation and audible alerts.
When you’re ready, begin with steps that verify compatibility and safety, then proceed to the battery change itself, followed by reassembly and testing. This sequence minimizes the risk of misplacing parts or accidentally powering the device off during the process.
Testing and maintenance after replacement
Once you’ve replaced the battery, testing is essential to confirm the alarm works correctly. After reinstalling the detector, press and hold the test button until you hear a loud alarm from the unit. If you have multiple detectors in your home, test a few in different rooms to verify that interconnected units respond appropriately. If the alarm does not sound, recheck the battery orientation, ensure contacts are clean, and confirm the battery is fresh. Maintain a routine of periodic checks—especially after major events like a power outage or device relocation. Cleaning the detector and ensuring the vents are free from dust will improve sensitivity and reduce false alarms over time. Battery Health analysis shows that timely battery changes significantly improve reliability and reduce nuisance chirps, contributing to safer homes. For extra assurance, maintain a replacement schedule that aligns with the manufacturer’s recommendations and your household’s risk profile.
Record the date of replacement in a simple log or digital note so you know when the next change is due. If your unit lacks a replaceable battery, replace the entire detector according to the manufacturer’s suggested lifecycle.
Troubleshooting, safety warnings, and common mistakes
Even well-maintained detectors can yield surprises. If your alarm chirps intermittently after replacement, check that the battery is seated correctly and that the contacts are clean and free of corrosion. If the chirp persists, review the model’s manual to confirm you used the proper battery type and orientation. In some cases, a weak battery or a failing unit can trigger a false alarm or a nuisance chirp; replacing the detector may be necessary. Do not force-fit batteries or use damaged components, and avoid touching the metal terminals with bare skin to prevent short circuits. If you experience any electrical hazards or suspect a larger problem with the wiring or power supply, contact a licensed professional. For households with old detectors, consider upgrading to newer models that offer improved sensitivity, self-testing features, and better power efficiency.
Battery Health’s guidance emphasizes adherence to manufacturer directions and proper disposal of old batteries. By following these best practices, you’ll optimize safety and extend the life of your detectors.
Authority sources and quick reference
To support best practices, consult trusted sources for fire safety and building code guidance. For additional details, you can review:
- US Fire Administration (USFA): https://www.usfa.fema.gov
- Consumer Product Safety Commission (CPSC): https://www.cpsc.gov
- National Fire Protection Association (NFPA): https://www.nfpa.org
These sources provide general guidance on fire safety, detector maintenance, and replacement considerations. Remember to replace non-functioning units promptly and follow your local regulations for disposal and replacement timing. For ongoing learning, keep the model numbers handy and check the manufacturer’s official site for the most current battery type and replacement recommendations.
Authority sources (inline reference)
- https://www.usfa.fema.gov
- https://www.cpsc.gov
- https://www.nfpa.org
Tools & Materials
- Replacement battery(s) compatible with your smoke alarm(Check model to confirm battery type (9V, AA/AAA, or lithium).)
- Non-conductive gloves(Optional for better grip and to avoid contact with dirty components.)
- Small screwdriver (Phillips or flat-head as needed)(Needed to release screw-down covers on some models.)
- Flashlight(Use to inspect labels and battery orientation in dim areas.)
- Soft cloth or brush(Use to wipe away dust around the detector vents.)
- Disposal bag or container for old battery(Dispose of old batteries according to local regulations.)
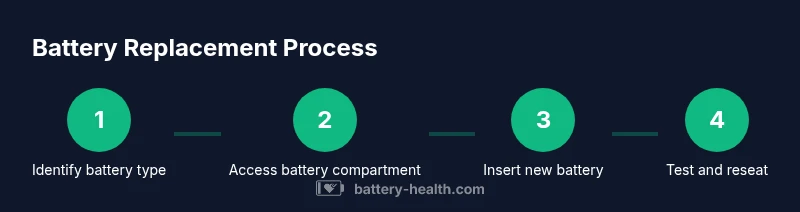
Steps
Estimated time: 5-12 minutes
- 1
Identify battery type and access the battery compartment
Carefully remove the detector from its mounting bracket or gently twist off the cover to access the battery area. Look for a label on the back or inside the cover that specifies the required battery type and orientation. If the label is unclear, consult the manual or manufacturer’s website for guidance.
Tip: Take a photo of the label and orientation for future reference. - 2
Remove the old battery
Gently detach the old battery by releasing any clips or sliding it out of the compartment. Note the orientation of the battery so you can insert the new one correctly. If you encounter corrosion or residue, wipe the contacts with a dry cloth before inserting the new battery.
Tip: Do not use excessive force; if the battery won’t come out easily, consult the manual. - 3
Install the new battery
Place the new battery into the compartment with the correct polarity as indicated by the device. Ensure the battery sits firmly and the terminals contact the springs or clips. Reattach any cover or screws securely to seal the unit.
Tip: Double-check polarity before closing the cover to avoid damage. - 4
Restore the detector and perform a test
Reattach the detector to its mounting base or reassemble the cover. If required, restore power to any wired system. Press and hold the test button until you hear the alarm sound clearly from the device. If you have multiple detectors, test a couple of nearby units to confirm network synchronization.
Tip: Listen for a full alarm tone; partial beeps may indicate a mis-seated battery or wiring issue. - 5
Assess whether replacement is needed for sealed units
Some detectors use sealed, long-life batteries that cannot be replaced. If your unit doesn’t have a removable battery, you’ll need to replace the entire detector at the end of its life or as recommended by the manufacturer.
Tip: If unsure about battery accessibility, check the model’s manual or contact the manufacturer.
FAQ
How often should I replace the battery in my smoke alarm?
Most manuals recommend replacing the battery when it can no longer hold a charge or when the alarm chirps. If your detector is interconnected, test after replacement and follow the manufacturer’s guidance for lifecycle.
Replace the battery when it no longer holds charge or when the alarm chirps, and always test interconnected detectors after replacement.
What type of batteries are used in smoke alarms?
Detectors commonly use 9V, AA/AAA, or sealed long-life lithium batteries. Check the device label or manual to confirm the exact type and orientation.
Most alarms use 9V, AA/AAA, or sealed lithium batteries; check your model's label to confirm.
Can I replace a sealed 10-year battery?
If your unit has a sealed 10-year battery, you cannot replace the battery separately. You should replace the entire detector according to manufacturer recommendations.
If the detector has a sealed battery, you must replace the whole unit when needed.
What should I do if the alarm chirps after replacement?
Ensure the battery is properly seated and oriented. Check for corrosion or a loose connection, and verify you used the correct battery type. If problems persist, replace the detector.
If chirping continues after replacement, recheck the battery and connections, then consult the manual or replace the detector if needed.
Is it safe to replace batteries in a house with interconnected detectors?
Yes, as long as you follow safety steps and test after replacement. Ensure all detectors respond to a test and that the power remains stable during the process.
Yes, just follow the steps and test all units afterward.
Do all detectors require removing the device to replace the battery?
Most detectors require removing the device from its base to access the battery. Some models offer easy-access compartments without full removal. Always follow the manufacturer’s instructions.
Most require removing the device, but some models allow battery access without full removal.
Watch Video
Quick Summary
- Always identify the correct battery type before replacement
- Test each detector after installation to ensure proper function
- Do not replace a sealed battery unit with an open-battery model
- Dispose of old batteries safely and keep replacement logs