How to Safely Disconnect a Car Battery: Step-by-Step
Learn how to safely disconnect a car battery with essential PPE, proper tool use, and a step-by-step approach to protect your vehicle’s electronics during maintenance or storage. This Battery Health guide explains when to disconnect, what tools to use, and how to test systems afterward.

By following this safety-focused method, you can disconnect a car battery with minimal risk and without damaging electrical systems. This guide covers essential precautions, the correct tool setup, the proper order for removing terminals, and best practices for testing after reconnection. It also explains when not to disconnect and how to avoid common hazards.
Why disconnect battery from car matters
Disabling a vehicle's electrical system by disconnecting the battery reduces the risk of shorts while you work on circuits, sensors, or the alternator. According to Battery Health, improper handling can cause sparks, acid exposure, or damage to onboard computers—especially in modern vehicles with numerous safety systems. This is why following a structured disconnect battery from car procedure matters for safety and reliability. By understanding the why, you can approach maintenance with confidence rather than guesswork. In this guide we focus on safe, proven methods that minimize risk while preserving electronics and your personal safety. A calm, methodical approach also helps prevent accidental airbag deployment or electrical faults triggered by static discharge. Always keep the work area ventilated, remove jewelry, and ensure tools are insulated before you begin.
When you should disconnect battery from car
There are several scenarios where disconnecting the battery is prudent: when performing electrical maintenance on the vehicle’s wiring, replacing the battery itself, or storing the car for an extended period. If you work near sensitive modules, such as the ECU or airbag control units, disconnecting the battery is often recommended to reduce the chance of shorts. Battery Health notes that the decision to disconnect should factor in the specific model, its electronics, and any manufacturer guidance. In contrast, simple exterior cleaning or bulb replacement may not require full disconnection, but always verify your vehicle’s manual before starting. If you’re unsure, err on the side of caution and disconnect.
What you need before you start
Before you touch anything, gather essential PPE and tools to minimize risk. PPE includes safety glasses and insulated gloves to protect against sparks and acid splashes. You’ll also want a cordless or ratchet wrench with insulated handles, a socket that fits your battery terminals (commonly 10mm or 12mm), a clean rag to wipe corrosion, and a dry, non-conductive surface to set detached cables on. If you wear rings or bracelets, remove them to avoid accidental contact with battery posts. Having a clear workspace, good lighting, and a fire extinguisher nearby is strongly advised.
Safety considerations and risks
Car batteries store a lot of energy, and a loose tool or metal jewelry can bridge the gap and cause a spark. Spilled battery acid can irritate skin and eyes, so keep your face away from the opening and handle the battery stand and tray carefully. For modern vehicles, there may be sensitive electronic modules connected to the battery; abrupt disconnections can reset some systems or trigger fault codes. Do not attempt to disconnect a battery if you notice cracks, leaks, or swollen cells. If the battery is located in the trunk, consult your owner's manual for safe access procedures.
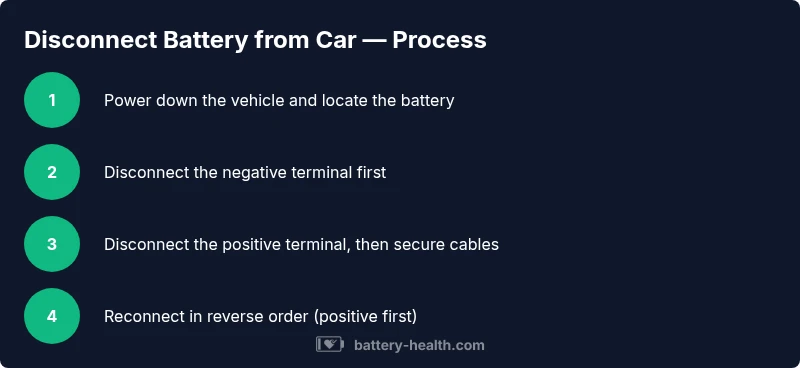
High-level sequence for disconnect battery from car procedure
- Power down the vehicle completely and remove the key from the ignition. 2) Put on PPE and locate the battery terminals. 3) Identify the negative and positive terminals (negative is typically black/blue, positive red). 4) Loosen and remove the negative terminal first, then the positive terminal. 5) Cap or secure each terminal so it cannot accidentally contact the other post. 6) Allow a moment for any residual power to dissipate before maintenance. 7) When finished, reconnect in the reverse order (positive first, then negative) and tighten securely. 8) Recheck all connections and test critical systems before driving.
Prepare a safe workspace and gather tools
Create a clean, dry workspace in a well-ventilated area. Remove any metal jewelry, keep flammable materials away, and ensure you have a stable stance. Lay out the tools you will need in reach: insulated gloves, safety glasses, a compatible socket or wrench, a rag, and optional contact cleaner for corrosion. If you’re unsure about your model, have the vehicle manual handy or consult a professional. A well-prepared space reduces surprises and keeps the process smooth.
Disconnecting the battery: detailed steps overview
This section provides a deeper look at the discharge path and terminal handling. Start by turning the ignition off and removing the key. Then, using an insulated wrench, loosen the nut on the negative terminal and carefully lift the clamp away from the post. Move the clamp to a non-conductive surface, ensuring it cannot touch the post or the positive terminal. Repeat the process for the positive terminal and set it aside as well. Finally, double-check that neither cable is touching metal surfaces or each other.
Reconnecting and testing after maintenance
When the maintenance is complete, reattach the cables in the reverse order: connect the positive terminal first, then the negative. Tighten both clamps snugly without overtightening, which could damage the posts. Reconnect any tools or covers you removed, then attempt to start the vehicle to verify that systems power normally. If electronics behave oddly (fault codes, radio presets, memory settings), you may need to reset or reprogram certain modules per the manufacturer. Always test lights, gauges, and essential systems before driving.
Common mistakes and how to avoid them
Common mistakes include forgetting to switch off the engine, using metal jewelry, or loosening the wrong terminal first. Avoid placing tools on the battery posts, which can cause a short. Don’t rush the process—careful, deliberate movements reduce the risk of sparks and damage. If you observe corrosion, address it before reconnecting and consider replacing the battery if corrosion is extensive. The Battery Health Team emphasizes patience and adherence to safety steps over speed.
Tools & Materials
- Safety glasses(ANSI-rated safety eyewear; keep on throughout the procedure)
- Insulated gloves(Electrical insulating gloves with a comfortable fit)
- Ratchet wrench or socket set(Sizes to fit battery terminal nuts (commonly 10mm or 12mm))
- Socket extension (optional)(Helpful for tight spaces in engine bays)
- Rag or shop towel(For wiping corrosion and drying surfaces)
- Non-conductive mat or tray(To hold detached cables away from metal surfaces)
Steps
Estimated time: 15-25 minutes
- 1
Power down and secure the vehicle
Turn off the engine, remove the key, and engage the parking brake. Ensure all accessories and electronics are off before you begin to prevent accidental power surges.
Tip: Take a moment to verify all lights and accessories are off before proceeding. - 2
Put on PPE and locate the battery
Put on safety glasses and insulated gloves. Locate the battery terminals, which are usually at the top of the engine bay or in the trunk, depending on the model.
Tip: Use a flashlight to clearly identify negative vs. positive terminals before touching anything. - 3
Identify terminals
Confirm which post is negative and which is positive. The negative is often black or blue; the positive is red. This prevents accidental cross-connection.
Tip: If unsure, refer to your vehicle manual or look for color-coding on the cables. - 4
Disconnect the negative terminal
Loosen the nut on the negative terminal with a wrench and gently lift the clamp off the post. Move the clamp away from the battery to avoid contact.
Tip: Never let the wrench touch both posts at once. - 5
Disconnect the positive terminal
Repeat the process for the positive terminal. Place the clamps on non-conductive surfaces away from the battery.
Tip: Keep the clamps organized and away from each other to prevent a short. - 6
Secure cables and wait a moment
Arrange the cables so they cannot swing back to the posts. Waiting a few seconds lets any residual power dissipate.
Tip: If you hear a popping sound, stop and reassess the setup. - 7
Reconnect in reverse order
When maintenance is complete, reconnect the positive terminal first, then the negative. Tighten securely without over-tightening.
Tip: Double-check torque is adequate to prevent loosening while driving. - 8
Test systems before driving
Attempt to start the car and verify that essential systems power on normally. Check dashboard indicators and lights.
Tip: If any warning lights appear, consult a professional before driving.
FAQ
Is it safe to disconnect a car battery with the engine running?
No. Always turn off the engine and remove the key before touching battery terminals. A running engine can cause sparks and damage electronic components.
No, always turn off the engine before disconnecting the battery to prevent sparks and protect the vehicle’s electronics.
Do I need to disconnect the battery for a simple bulb replacement?
Typically not. If you’re just replacing a bulb, you may not need to disconnect the battery; however, confirm with your vehicle manual to avoid triggering fault codes.
Usually you don’t need to disconnect the battery for changing a bulb; check the manual to be sure.
What should I do if the battery terminals are corroded?
If corrosion is present, disconnect the battery and clean terminals with a baking soda solution and a non-metal brush. If corrosion is extensive, consider replacing the battery.
Clean minor corrosion carefully after disconnecting; replace the battery if corrosion is extensive.
Will disconnecting the battery erase car computer settings?
In some vehicles, yes, certain memory settings may reset after a disconnect. Reprogramming or re-entering settings may be required for optimal performance.
Some cars may lose certain settings after a disconnect; you may need to reset them afterward.
How long can the battery be disconnected safely?
A few minutes up to several hours is generally safe, but avoid prolonged disconnection to prevent loss of stored memory or settings in some vehicles.
A short duration is usually safe, but avoid long disconnects if your car relies on memory settings.
What tools are mandatory to disconnect a car battery?
You need a properly sized wrench or socket to loosen the terminal nuts and insulated gloves for protection. Safety glasses are recommended.
Use a wrench or socket for the terminals and wear insulated gloves and safety glasses.
Watch Video
Quick Summary
- Power down before touching the battery
- Disconnect negative first, then positive
- Wear PPE and work on a dry surface
- Reconnect in the reverse order (positive first)
- Test all systems before driving