Which Battery Cable to Remove First: A Safe Disconnect Guide
Learn the correct order for removing car battery cables, why it matters, and a practical step-by-step approach to reduce sparks and damage. Battery Health provides expert, safety-focused guidance.

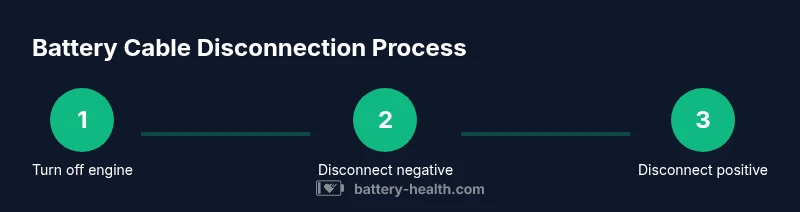
To safely disconnect a car battery the correct first cable to remove is the negative terminal, followed by the positive. This order, plus basic safety practices, minimizes sparks and prevents short circuits. Always switch off the engine, wear PPE, and keep metal tools away from exposed terminals. See the full step-by-step for details.
Why the correct order matters
If you’re asking which battery cable to remove first, the answer starts with safety and order. The negative terminal is connected to the vehicle chassis and provides a direct path to ground. A careless move—such as bridging the positive terminal to a grounded surface—can cause a spark, damage electronics, or blow a fuse. By removing the negative cable first, you deactivate most metal paths that could lead to a short. This principle also reduces the risk of electricity arcing when you loosen clamps. Throughout this guide, you’ll find practical steps to protect yourself and your vehicle while performing this common safety task: disconnecting a battery. This topic is a core part of maintaining electrical safety in automotive work, and getting it right helps prevent avoidable incidents.
Safety prerequisites before you begin
Before touching anything, set up a safe, controlled workspace. Park on level ground, turn off the engine, and remove the key. Put on safety glasses and insulated gloves, and remove any loose jewelry. Keep metal tools away from the battery terminals and avoid smoking or open flames nearby. Use a dry rag to wipe away any moisture or battery acid residue. If you notice corrosion, address it after you finish the primary disconnection. Following these precautions dramatically lowers risk during a routine maintenance task.
Understanding the standard order: negative first, then positive
The standard order to disconnect is deliberate: remove the negative terminal first, then the positive. This reduces the chance of a short circuit if your tool accidentally bridges the two clamps or touches the chassis. Do not attempt to touch or bridge the two clamps with a metal tool. When removing, keep the clamp moving away from the terminal as you loosen it, and avoid spinning the wrench against the battery body. Each step should be deliberate and controlled to minimize sparks and personal injury.
Step-by-step logic: what to do, and what to avoid
The practical steps below expand on the quick answer. Start with a dry, well-lit area and a cool engine. Loosen clamps carefully with insulated tools, wipe away corrosion as needed, and avoid wearing jewelry that could conduct electricity. Do not lean the wrench against the battery surface or any metal other than the clamp. If a clamp is stubborn, reset your grip, apply a little more leverage, and avoid forcing it, which can damage the terminal. After removing the negative, repeat the process for the positive terminal. Finally, inspect both cables and the clamps for wear before reconnecting in reverse order.
Tools and materials you should have on hand
A safe disconnection requires the right gear. You should have: safety glasses; insulated gloves; an insulated socket wrench or combination wrench; terminal cleaner or a wire brush for corrosion; a dry rag or paper towels; and optional dielectric grease for post-connection protection. Ensure the tools are in good condition and the working area is dry. Having everything ready before you start minimizes delays and helps you stay focused on safety throughout the process.
How to handle corrosion and damaged cables
Corrosion on terminals can increase resistance and cause poor connections. If you see white, blue, or green buildup, clean it with a terminal cleaner or wire brush after you’ve loosened the clamps but before removing them completely. If cables are cracked, heavily corroded, or the clamps show heat damage, replacement is safer than repair. After cleaning, proceed with the removal sequence and re-inspection before reassembly. Regular inspection reduces future maintenance time and protects electrical components.
Reconnecting and testing after removal
When you’re ready to reconnect, do not rush. Reattach the positive terminal first, then the negative. Tighten clamps firmly but not so tight as to strip the terminals. Once reconnected, gently test electrical systems (lights, accessories) with the engine off, then start the vehicle to confirm everything operates normally. If you detect slow cranking, flickering lights, or unusual smells, stop and reassess the connections. Consistent checks help prevent repeated battery issues and support long-term reliability.
Tools & Materials
- Safety glasses(ANSI Z87.1 or equivalent)
- Insulated gloves(Electrical-rated, 1000V insulation if available)
- Insulated socket/wrench(Size fits terminals (commonly 10mm, 12mm, or 13mm))
- Terminal cleaner or wire brush(For corrosion on terminals)
- Rag or paper towels(Wipe spills; keeps workspace clean)
- Dielectric grease (optional)(Used after reconnecting to prevent future corrosion)
Steps
Estimated time: 10-15 minutes
- 1
Prepare your workspace
Park on level ground and ensure the area is dry. Put on safety gear and clear away jewelry. Have your tools within reach before you start to minimize trips to the toolbox.
Tip: Avoid working in damp areas to reduce the risk of shock or corrosion. - 2
Turn off the engine and remove keys
Make sure the ignition is off and the keys are removed. This prevents the electrical system from powering during the disconnection and reduces the risk of sparks.
Tip: If the vehicle has a push-button start, ensure the system confirms the engine is fully off. - 3
Identify the negative and positive terminals
Locate the black (-) terminal and the red (+) terminal. Confirm which clamp is connected to the chassis (negative) and which runs to the starter and electronics (positive).
Tip: Double-check orientation to avoid removing the wrong clamp. - 4
Disconnect the negative terminal
Loosen the negative clamp with an insulated wrench and lift it away from the terminal. Keep it clear of the battery surface to avoid accidental contact.
Tip: Do not let the wrench touch the battery or the chassis while loose. - 5
Disconnect the positive terminal
Repeat for the positive clamp. If the clamp is stubborn, don’t pry; re-grip and apply steady, even pressure.
Tip: Avoid prying the clamp against the battery post; it can damage the post threading. - 6
Inspect, reconnect, and test
Inspect clamps for corrosion or damage. Reconnect in the reverse order: positive first, then negative. Tighten firmly and test electrical systems with the engine off, then start the vehicle.
Tip: If you notice any issues, stop and reevaluate the connections before driving.
FAQ
Which battery cable should you remove first?
Always remove the negative terminal first to reduce the risk of short circuits. This isolates the battery from the vehicle chassis before touching the positive terminal.
Always remove the negative terminal first to reduce short-circuit risk.
What should I do before disconnecting the battery?
Turn off the engine and remove the key, wear PPE, and clear any jewelry. Ensure the working area is dry and free of flammable materials.
Turn off the engine, remove the key, and wear PPE before starting.
Can I remove both cables at once?
No. Remove one cable at a time to avoid accidental short circuits and potential sparks.
Do not remove both clamps at the same time.
What if I see corrosion on the terminals?
Clean corrosion with a terminal cleaner or wire brush after loosening the clamps. If corrosion is heavy, consider replacing the cables or clamps.
Clean corrosion with proper cleaner; replace parts if needed.
Is it safe to re-connect with the hood closed?
Open the hood and ensure no tools are left in contact with terminals. Reconnect in the correct order and test the system before driving.
Open the hood, check for tools, then reconnect safely.
How long does the process typically take?
For a basic check, expect about 10 minutes from start to finish, depending on corrosion and clamp stiffness.
About ten minutes for a straightforward disconnection.
Quick Summary
- Disconnect negative first to reduce risk
- Inspect terminals for corrosion and clean if needed
- Reconnect in reverse order for safety
- Wear PPE and maintain a dry, clear workspace