Clean Car Battery Contacts: A Safe Step-by-Step Guide
Learn how to clean car battery contacts safely, prevent starting issues, and extend terminal life with this detailed, expert-backed guide from Battery Health. Includes tools, step-by-step instructions, safety tips, and maintenance advice.

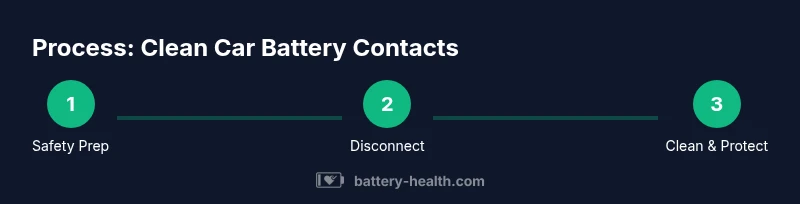
You will learn to safely disconnect the battery, inspect terminals for corrosion, clean with electronic contact cleaner, and protect terminals with dielectric grease. You’ll also test for proper connection and reassemble with correct torque. Essential safety steps, suitable tools, and a maintenance plan are covered to prevent future issues.
Why clean car battery contacts matters
Corrosion and oxidation at battery terminals create resistance, which can hamper current flow and lead to slow starts, dim lights, or intermittent electrical issues. Clean battery contacts restore a solid connection, improve starter performance, and protect the electrical system from accelerated wear. Regular care helps prevent corrosion buildup and prolongs the life of clamps and cables. According to Battery Health, keeping terminals clean reduces parasitic resistance and improves overall system reliability. The Battery Health team found that even light tarnish can raise contact resistance enough to impact performance, especially in cold starts. This section explains the why behind the task, and how a clean, secure connection supports safe, dependable vehicle operation. It also sets expectations: you’re aiming for a bright, metallic contact surface and a snug clamp that doesn’t rock or wiggle when you tug on the cable.
Safety first: precautions before you begin
Before you touch anything, put on eye protection and gloves. Work in a well-ventilated area away from flames or sparks, because battery compartments can release flammable gases. Disconnect the negative terminal first, then the positive, to minimize the risk of short circuits. Never use metal jewelry near the battery, and avoid leaning directly over the battery while loosening clamps. If you notice a strong battery odor, leaking fluid, or cracked casing, stop and seek professional help. After lifting the hood, ensure the vehicle is off and the ignition key is removed. Keep a dry, clean workspace and place tools on non-conductive surfaces. Battery safety is non-negotiable, and following these steps reduces the risk of personal injury and damage to electrical components.
How oxidation forms and what to look for during inspection
Terminals accumulate white-green or blue-green crust from electrolyte exposure and metal oxidation. This crust (often called corrosion) increases electrical resistance and can loosen clamps over time. When inspecting, look for dull or pitted metal, loose battery clamps, or frayed cables. Check both the clamp and the terminal post, and gently wiggle to ensure a firm grip. A visual check plus a light touch with a clean cloth helps identify hidden corrosion inside the clamp throat. If you see heavy buildup or damaged connectors, plan to replace the clamps or battery posts. The goal is a clean, bright metal surface that accepts a secure, even clamp.
Tools and cleaning agents explained: what you really need
Choosing the right cleaner is critical. Use an electronic contact cleaner or 99% isopropyl alcohol, never household cleaners that leave residues. A small stiff brush (nylon or nylon-bristle) helps remove crust without scratching the metal. Microfiber towels absorb moisture and avoid lint. Dielectric grease protects terminals after cleaning and helps prevent future corrosion. For stubborn buildup, a specially formulated terminal cleaner or a corrosion-removal solution may be used following manufacturer directions. Have a torque wrench handy if your clamps require re-tightening to a specific spec. Always dry all surfaces completely before reconnecting.
The maintenance plan: cleaning frequency and preventive steps
A proactive maintenance plan reduces the likelihood of future corrosion and electrical faults. Inspect battery terminals every 6–12 months or sooner after exposure to moisture, road salt, or heavy use. After cleaning, apply a thin layer of dielectric grease to the terminal posts and inside the clamps to repel moisture and slow oxidation. Regularly inspect cable insulation for cracks or wear and replace damaged leads promptly. If you live in an area with high humidity or winter road salt, consider more frequent checks. A simple, consistent routine keeps the system reliable and helps prevent unexpected breakdowns.
Troubleshooting: what to do if starting issues persist after cleaning
If the car still struggles to start after cleaning, re-check the terminal clamp fit. A loose connection can mimic a bad battery and cause intermittent failure. Re-tighten clamps to the correct torque specification if you know it, or tighten until the clamp sits firmly without movement. Inspect for hidden corrosion inside the clamp throat and around the cable end. If corrosion persists after cleaning and reseating, you may need new terminal clamps or a battery replacement. In cases of repeated symptoms, test the battery under load or have it professionally tested to ensure it can hold charge.
Maintenance tips to extend terminal life and prevent future issues
Keep terminals dry and free of residue by wiping with a clean microfiber cloth after cleaning. Use dielectric grease sparingly to create a moisture barrier without attracting dust. Inspect the battery tray and hold-downs to ensure the battery is secure, as movement can loosen clamps and disturb connections. If you notice rapid re-accumulation of corrosion, check for moisture ingress, acid leaks, or a failing battery. Replace corroded clamps promptly to avoid ongoing resistance and ensure a solid electrical path.
What not to do: common mistakes that cause more harm than good
Don’t use household cleaners, abrasive tools, or metal wires that can scratch terminals and worsen corrosion. Avoid over-torquing clamps, which can damage posts or cables. Never spray cleaner directly into the battery vent area, and don’t attempt to clean a battery while it’s connected and energized. Avoid skipping safety PPE or working near sparks; even a small mistake can cause injuries or an explosion risk. Finally, don’t ignore signs of damaged cables or cracked battery cases; replace components rather than attempting a quick fix.
Tools & Materials
- Safety goggles(Eye protection to shield from splashes or sparks)
- Chemical-resistant gloves(Protect hands from cleaners and battery acid residues)
- Insulated socket/wrench set(For safe terminal disconnection and connection)
- Electronic contact cleaner or 99% isopropyl alcohol(Specialized cleaner leaves no residue)
- Nylon or nylon-bristle brush(Gentle abrasion to remove crust)
- Microfiber towels(Dry surfaces thoroughly and prevent lint)
- Dielectric grease(Moisture barrier to slow future corrosion)
- Torque wrench (if applicable)(Use only if you know the terminal torque spec)
- Replacement battery clamps or cables (optional)(Keep spares on hand for heavy corrosion)
Steps
Estimated time: 25-40 minutes
- 1
Disconnect the negative terminal
Power down the car and put on safety gear. Use an insulated wrench to loosen the negative clamp, then remove the cable from the terminal. This prevents accidental short circuits while you work on the positive terminal.
Tip: Always disconnect the negative first to minimize risk of sparks. - 2
Disconnect the positive terminal
Loosen and remove the positive cable from its post. If the clamp is stuck, gently rock it instead of forcing it. Take note of how the cable sits to reattach correctly.
Tip: Keep track of clamps and their positions to avoid reassembly errors. - 3
Inspect terminals and clamps
Visually inspect for corrosion, pitting, or bent posts. Wiggle the clamps to judge the grip. Any damaged components should be replaced rather than forced.
Tip: Write down any obvious damage for procurement later. - 4
Clean the terminals
Spray electronic contact cleaner or wipe with isopropyl alcohol. Use a nylon brush to remove crust from the post and clamp interiors. Wipe dry with a microfiber towel and repeat if needed until surfaces look bright and clean.
Tip: Do not oversaturate; surface moisture is fine as long as it evaporates completely. - 5
Apply dielectric grease
Apply a thin layer of dielectric grease to the contact surfaces. This helps repel moisture and slows future corrosion without attracting dust.
Tip: A light coat is enough; excess can attract grit and hinder contact. - 6
Reconnect the terminals
Reconnect the positive cable first, followed by the negative. Hand-tighten, then snug with a wrench if needed to the proper torque. Ensure clamps sit squarely and do not rock.
Tip: Check that the clamps are seated flat against the posts before final tightening. - 7
Test the connection
Start the car to verify a clean start and watch for any flicker in lights. If the engine still struggles, recheck clamps and consider a professional check or battery replacement.
Tip: If you hear grinding or see a faint spark, stop and re-evaluate.
FAQ
Is it safe to clean car battery terminals at home?
Yes, with proper safety precautions and the right tools. Work in a ventilated area, wear eye protection, and disconnect the negative terminal first. If you see leaks or damage, seek professional help.
Yes, you can do it at home, but follow safety steps and use the right tools. If you notice damage, contact a professional.
What cleaner should I use for terminal cleaning?
Use electronic contact cleaner or 99% isopropyl alcohol. Avoid household cleaners that leave residues or corrode plastics.
Use electronic contact cleaner or pure alcohol; avoid cleaners that leave residue.
Do I need to remove the battery from the car to clean terminals?
Generally, you can clean terminals with the battery in place, but you should disconnect the negative and follow safety steps. Removing the battery is only needed in some repair scenarios.
You usually don’t have to remove the battery; just disconnect it safely and clean the posts.
What if I see heavy corrosion or damaged clamps?
Heavy corrosion or damaged clamps should be replaced rather than cleaned. Corrosion can indicate a failing battery or compromised connections.
If corrosion is severe, replace clamps or cables rather than trying to clean them.
How often should I inspect terminal connections?
Inspect terminals every 6–12 months, or sooner if you live in a humid or snowy climate. Regular checks catch problems early.
Check terminals twice a year or more often if you’re in a harsh climate.
Can dielectric grease cause electrical issues?
When used sparingly, dielectric grease protects surfaces from moisture. Too much can trap dust or impede contact—apply lightly.
Used thinly, it protects; avoid heavy application that could interfere with contact.
Watch Video
Quick Summary
- Inspect terminals regularly for corrosion
- Use proper cleaners and dielectric grease
- Disconnect safely, then reconnect with correct torque
- Test start-up to confirm a solid connection