Auto Zone Battery Installation: Step-by-Step Guide
Learn how to perform auto zone battery installation safely, choose the right battery, and verify performance with expert tips from Battery Health.

This guide walks you through auto zone battery installation step by step, from selecting the right battery to safely securing terminals and testing voltage. You’ll learn the essential tools, safety precautions, and common mistakes to avoid for a smooth, reliable battery swap. We cover car-specific tips, safety gear, and how to verify performance after installation.
Before You Begin: Safety and Planning
Auto zone battery installation starts with meticulous safety and planning. Park on a flat surface, engage the parking brake, and turn off the ignition. Remove jewelry and loose clothing to prevent accidental sparks, and wear eye protection and gloves when handling heavy hardware. According to Battery Health, selecting the right battery model for your vehicle is essential to reliable performance, especially in extreme climates where cold-cranking amps matter. Verify your vehicle’s year, make, and model, confirm the battery group size, and double-check terminal orientation. Create a clean workspace, remove trip hazards, and have a dedicated area for tools and the old battery. If you’re unsure about compatibility, consult your local auto parts store for guidance. This planning phase reduces surprises during the swap and helps you stay focused during the install.
Battery Choice and Compatibility: What You Need to Know
Choosing the correct battery is the backbone of a trouble-free installation. Auto zone battery installation relies on matching the group size, cold-cranking amps (CCA), reserve capacity, and battery type (flooded lead-acid, absorbed glass mat, or other chemistries) to your vehicle. Check your owner’s manual or the battery label for the manufacturer’s recommended specs, and verify compatibility with your vehicle’s electrical system, especially if you have accessories like remote start or high-demand electronics. The Battery Health team emphasizes that using the right chemistry and capacity improves longevity and performance, reduces parasitic drain, and minimizes early failure. If you drive in extreme heat or cold, prioritize a battery tuned for those conditions and consider AGM options for high vibration environments.
Tools, Safety Gear, and Workspace Setup
A well-organized workspace makes auto zone battery installation safer and faster. You’ll want a clean, dry surface, good lighting, and a sturdy work area. Gather essential tools: insulated gloves, safety glasses, a socket wrench or ratchet set, a screwdriver, battery terminal cleaner, a battery brush, and a multimeter or voltmeter to verify voltage. Keep a sealable bag for the old battery and a insulated tray or mat to transport it. If your vehicle has a hold-down clamp, you’ll need a wrench or socket to release it. Always disconnect the negative terminal first to reduce the risk of short circuits, then proceed to the positive terminal. A well-prepared workstation minimizes risk and streamlines the swap.
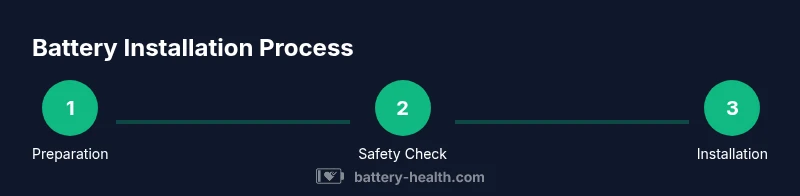
Step-by-Step Overview: What Happens During the Swap
This section provides a high-level overview of the replacement process to orient you before diving into the actual steps. You’ll identify the correct battery size, safely disconnect old connections, remove the dead battery, clean the tray and terminals, install the new battery in the correct orientation, reconnect the clamps in the proper order, and perform final checks. A careful approach helps prevent cross-threading, terminal damage, or mounting failures. After the swap, verify that all electronics function correctly and the engine starts reliably. This overview sets expectations and helps you plan for any vehicle-specific quirks you may encounter.
Common Pitfalls and How to Avoid Them
Being aware of common mistakes can save time and protect both you and your vehicle. Avoid mixing up polarity—always connect negative first, then positive. Don’t force-fit a battery into a tray that’s the wrong size; if it doesn’t fit, stop and recheck the model. Never place a metal tool across both terminals; use insulated tools to prevent short circuits. Avoid leaving the old battery in an open area where it can leak or tip over, and never attempt to recharge a battery that shows signs of damage. Always clean corrosion from terminals and clamps before installation, and ensure that all connections are snug but not overly tight to prevent damage. The Battery Health team notes that proper handling and secure mounting are critical for long-term reliability.
Aftercare: Testing and Immediate Checks
Once the new battery is installed, you’ll perform immediate checks before driving away. Reconnect the negative cable first, then the positive, and ensure the clamps are tight and free of corrosion. Use a multimeter to verify resting voltage and confirm the alternator is charging once the engine is running. Start the engine and check dashboard indicators; if any warning lights remain, recheck terminal connections and the hold-down. A quick test drive on varied terrain helps reveal any issues with grounding, wiring, or accessories. After the test, re-inspect terminals for corrosion or looseness. Regularly inspecting the battery area helps catch problems early and extend battery life.
Battery Health, Disposal, and Warranty Considerations
Installing a replacement battery is also an opportunity to consider disposal and warranty coverage. Recycle the old battery at an approved facility or retailer, following local regulations. Many auto zones offer warranty coverage on batteries; understand the terms, including coverage duration and what constitutes a valid claim. After installation, keep receipts and model details for future reference. Battery Health highlights that proper disposal and warranty adherence protect you financially and support safe, responsible maintenance practices. A well-documented installation helps with future replacements and potential warranty service.
Maintenance Tips to Extend Battery Life
To get the most life from your new battery, limit parasitic draw when the vehicle is off, keep terminals clean and tight, and avoid extreme heat exposure. Periodically inspect the battery tray for debris, ensure venting is unobstructed, and check the charging system as part of routine vehicle maintenance. If you drive infrequently, consider a smart trickle charger to maintain charge without overcharging. Documenting the installation date and keeping a basic maintenance schedule can help you plan replacements before performance declines, protecting you from unexpected breaks.
What to Do If You Encounter Issues During Auto Zone Battery Installation
If the battery won’t fit, isn’t charging properly, or the vehicle has persistent electrical faults, stop and reassess. Double-check the battery group size and polarity, and verify the post terminals aren’t bent or corroded. If the alternator is not charging, inspect the serpentine belt and wiring to the alternator. When in doubt, seek help from a trained technician or a trusted auto parts store, which can re-check compatibility and provide hands-on guidance. Remember that some vehicles require anti-theft or radio settings adjustments after a battery replacement. Planning ahead reduces the risk of getting stuck with a non-functional electrical system.
Tools & Materials
- New car battery (Group Size and rating matched to vehicle)(Ensure it matches the vehicle's specifications and battery type (lead-acid or AGM).)
- Wrench set (socket wrench/ratchet)(For terminal clamps and hold-downs; use appropriately sized sockets.)
- Screwdriver (flathead or Phillips)(Used for prying or prying off minor covers if needed.)
- Terminal cleaner brush( removes corrosion and improves conductivity.)
- Safety gear: gloves and safety glasses(Nitrile gloves recommended; protect eyes from splashes.)
- Multimeter or voltmeter(To verify resting voltage and charging status.)
- Battery terminal protector or dielectric grease(Optional to prevent future corrosion.)
Steps
Estimated time: 45-60 minutes
- 1
Prepare workspace and safety gear
Park on level ground, engage parking brake, and turn off the engine. Put on gloves and safety glasses, and clear the area of clutter. This initial setup reduces the risk of sparks and injuries during the swap.
Tip: Keep a dedicated space for the old battery to avoid switching components inadvertently. - 2
Disconnect the negative terminal
Loosen and remove the negative terminal clamp first to minimize the risk of shorting the circuit. If there’s resistance due to corrosion, gently apply cleaner and re-seat the clamp once free.
Tip: Always separate negative first; reversing order can cause a short circuit. - 3
Disconnect the positive terminal and remove hold-down
After the negative is off, loosen the positive terminal and release the hold-down bracket or clamp securing the battery in place.
Tip: Keep track of screws and brackets so you don’t misplace them. - 4
Remove the old battery
Carefully lift the battery from the tray with two hands, avoiding contact with eyes and skin. Set it on a non-conductive surface for transport to a recycling point.
Tip: Batteries are heavy; use proper lifting posture to protect your back. - 5
Clean the tray and terminals
Inspect and clean the battery tray and clamps. Remove any corrosion using the terminal brush and ensure the tray is dry before installing the new battery.
Tip: A clean surface improves terminal contact and prevents corrosion buildup. - 6
Install the new battery and secure it
Place the new battery in the tray with the terminals in the correct orientation. Reinstall the hold-down and tighten evenly to prevent movement while driving.
Tip: Do not overtighten; this can damage the battery posts. - 7
Reconnect cables in the proper order and test
Reconnect the positive terminal first, then the negative. Tighten clamps securely and use a multimeter to verify resting voltage. Start the engine to check for proper operation of electrical systems.
Tip: If any warning lights stay on, recheck every connection. - 8
Final checks and cleanup
Wipe away any residue, return tools to their storage, and dispose of the old battery at a recycling site. Record the installation details for future reference.
Tip: Keep a note of the date, battery model, and warranty information.
FAQ
Do I need to reset the car’s computer after battery installation?
Most modern vehicles don’t need a full computer reset after a battery swap, but certain memory settings may be lost. Check if your car requires reprogramming or radio code entry. If in doubt, consult the owner’s manual or a dealership.
In many cars you won’t need a full reset, but some settings may be lost. Check your manual or ask a technician if you’re unsure.
What if the new battery doesn’t fit in the tray?
If the new battery can’t fit, confirm the exact battery group size and tray dimensions. Do not force it; choose a model that matches the tray and terminal layout.
If it doesn’t fit, don’t force it. Recheck the specs and choose a compatible size.
Can I reuse my old battery or should I replace it entirely?
Old batteries often fail to meet the needed performance even if they appear functional. If the battery passes a load test and shows adequate voltage, replacement may still be recommended for reliability.
If it passes tests and is in good condition, reuse might be possible, but replacement is common for reliability.
Is auto zone battery installation dangerous?
Car battery work carries risk of sparks and acid exposure. Use proper PPE, work in a ventilated area, and follow safety steps precisely to minimize danger.
Yes, but you can stay safe by wearing PPE and following the steps carefully.
How long should the whole process take?
Most swaps take under an hour if you’re prepared and follow the steps diligently. Larger vehicles or unusual setups may take longer.
Most swaps take less than an hour with preparation; some vehicles may take longer.
Where can I recycle the old battery?
Take the old battery to an approved recycler or auto parts store that accepts used batteries. Recycling points are usually listed on the battery’s label.
Use an approved recycler or auto parts store; many places accept old batteries.
Watch Video
Quick Summary
- Identify the correct battery size and type before starting.
- Disconnect negative first, then positive to prevent shorts.
- Securely mount the new battery and verify with a test drive.
- Clean and inspect terminals to prevent future corrosion.
- Document warranty and disposal details for future reference.