Battery Car Change: Step-by-Step Car Battery Replacement
Learn how to safely replace a car battery with a detailed, step-by-step guide from Battery Health. Includes tools, safety tips, disposal guidance, and maintenance to extend battery life.

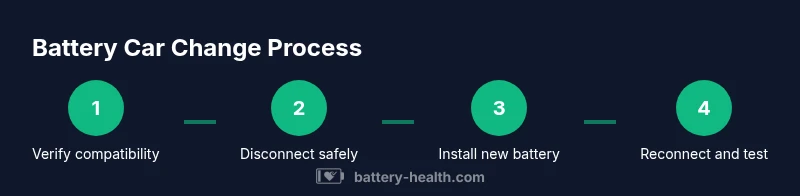
During a battery car change, you’ll safely replace a worn 12V battery by following a clear, step-by-step process. Prepare essential tools, isolate the vehicle, disconnect terminals in the correct order, install the replacement, and test voltage before driving. The guide also covers safety precautions, disposal, and post-install maintenance. For high-voltage EV batteries, always consult manufacturer guidelines.
What is a battery car change?
A battery car change refers to replacing a vehicle's battery, typically a 12-volt lead-acid or AGM unit, when it no longer provides reliable cranking power or shows signs of failure. In everyday driving, this is one of the most common maintenance tasks that prevents breakdowns and ensures reliable starts. For many cars, the 12V battery functions as the brain of the electrical system, powering the starter, lights, sensors, and the onboard computer while the alternator recharges it while driving. The term covers ICE (internal combustion engine) vehicles and, with caveats, the traditional 12V battery in hybrids with high-voltage systems. The process is different for electric vehicles, which rely on a much larger high-voltage pack and specialized safety protocols. A successful battery car change requires choosing the right battery type and size, verifying compatibility with your vehicle’s make, model, and year, and following manufacturer guidance. Battery Health emphasizes that compatibility and correct installation are critical to safety and performance. By planning ahead, you can avoid situations like corroded terminals, unstable mounts, or a battery that fails within days of installation.
Why replacing a car battery matters
A failing battery can leave you stranded, cause electrical issues, and degrade other components due to unexpected charging demands. Replacing it on a timely schedule protects your vehicle’s starting reliability, helps maintain electronics like the infotainment system and telematics, and prevents damage from parasitic drains. According to Battery Health, practical battery car change workflows reduce risk and ensure proper disposal. Early signs include slow engine crank, dim lights, electrical accessories behaving erratically, or a dashboard battery light that remains on after the engine starts. Modern cars may display a battery health readout or an LED indicator showing weak charge, making monitoring easier. It's important to confirm that symptoms aren’t caused by a faulty alternator, poor connections, or corroded terminals. If you ignore early warnings, you may end up stranded in a remote location or facing costly repairs to the alternator or starter motor. The replacement decision also hinges on climate, driving patterns, and storage conditions; extreme heat or cold can shorten a battery’s life. Battery Health analysis shows that climate and usage patterns influence battery life, underscoring the value of choosing the right chemistry for your region and driving style. When done correctly, a battery car change restores starting power, preserves electronics, and reduces the risk of roadside outages.
Assessing the right battery for your vehicle
Choosing the correct replacement means matching the battery size (group size), cold-cranking amps (CCA), and overall chemistry to your vehicle’s demands. Most modern cars use 12V lead-acid or AGM batteries; some hybrids need higher-performance AGM variants, while classic vehicles may still run flooded types. Verify the exact group size from your owner’s manual or the battery labeling, and check compatibility with your car’s electrical system and warranty requirements. Consider climate-related factors: extreme temperatures reduce battery efficiency and range, while frequent short trips increase parasitic drain. If you drive in very hot climates, AGM batteries can resist corrosion better than flooded types, but they typically cost more. Battery Health recommends sticking to reputable brands and avoiding off-brand models that lack proper venting and warranty support. If your vehicle has special features like stop-start or hybrid systems, you may need a battery that is specifically designed to handle those loads. Finally, always verify the replacement battery’s terminal layout (positive/negative) and ensure the mounting hardware and tray fit properly. A mismatch can lead to poor charging, vibration, or terminal damage over time.
Safety first: prerequisites and precautions
Safety is paramount when performing a battery change. Always wear eye protection and insulated gloves, work on a flat, dry surface, and keep metal tools away from exposed terminals to prevent sparks. Disconnect the negative terminal first to reduce the risk of short circuits, then the positive terminal. Never place metal tools across both terminals. If you hear crackling sounds, smell sulfur, or see smoke, stop immediately and wait for the area to vent. Work in a well-ventilated area to avoid hydrogen gas buildup. If you’re unsure about airbag or ABS electrical systems, consult the vehicle manual or a professional. After installation, check for loose connections or corrosion, and test the system with a multimeter before attempting a drive. Always handle the old battery with care and transport it to a recycling center that accepts lead-acid batteries.
Tools and materials overview
A successful battery change requires a curated toolkit and the right battery. The following items cover most standard ICE vehicle replacements. We’ll categorize essential tools first, then optional but helpful accessories.
- Safety glasses (required) – protects eyes from acid splashes and debris.
- Insulated gloves (required) – shields hands when handling live terminals.
- Wrench set and socket set (required) – common sizes for terminal clamps and hold-downs.
- Torque wrench (optional) – ensures clamps are tightened to spec.
- Battery replacement (required) – the correct group size and chemistry for your vehicle.
- Battery terminal cleaner or baking soda solution (optional but helpful) – removes corrosion.
- Dielectric grease (optional) – reduces future corrosion at terminals.
- Anti-spark terminal protector (optional) – adds extra protection on modern cars.
- Multimeter (optional) – checks voltage before and after installation.
- Jack and stands or a vehicle lift (required if you must raise the vehicle).
- Cable ties and absorbent rag (optional) – keeps the area tidy and prevents leaks.
Step-by-step overview of a standard 12V battery replacement
A standard 12V battery replacement involves a sequence of actions designed to minimize risk and maximize reliability. Begin by confirming the battery type, size, and orientation. Park on a level surface, engage parking brakes, and ensure the car is off with keys removed. Remove the negative terminal first, then the positive, and take steps to isolate them to prevent accidental contact. Remove the hold-down clamp or bracket and carefully lift the old battery out of the tray, keeping your back straight and using your legs to lift. Clean the battery tray of any corrosion and inspect for cracks or damaged mounts. Place the new battery into the tray with the correct orientation, secure the hold-down, apply dielectric grease to the terminals if desired, and reconnect the positive terminal first followed by the negative. Tighten clamps to spec, but avoid over-tightening. Recheck all connections, clear any loose tools, reset any electrical components if needed, and perform a voltage check to confirm a healthy charge. Start the car to verify the system is functioning normally and remember to dispose of the old battery at a certified recycling facility. If your vehicle features advanced safety systems, re-scan the vehicle to ensure modules recognize the new battery. A proper test run helps confirm that alternator charging, electrical load handling, and ignition performance are all within expected ranges.
Aftercare and maintenance to extend battery life
After a successful change, take steps to maximize battery life and reliability. Keep terminals clean and tight, and inspect them every few months for corrosion. Apply a thin layer of dielectric grease on the terminals to mitigate future oxidation. If you have a stop-start system or AGM battery, ensure your charging system is within spec and that your alternator is performing correctly. Limit deep discharge by avoiding leaving headlights on or running high-drain accessories with the engine off. Regularly test battery health using a multimeter; a healthy 12V battery should display a steady voltage around 12.6–12.8V when at rest. If you notice a significant drop in voltage or frequent loss of charge, consult a technician as soon as possible. Remember to recycle the old battery responsibly and verify the recycling center’s accepted battery types. Keep a maintenance log noting installation dates, replacement intervals, and performance observations to anticipate future needs.
EV vs ICE battery changes: what to know
Electric vehicles (EVs) use high-voltage battery packs that require specialized safety protocols and equipment. A traditional 12V car battery change is well within DIY capability for most ICE vehicles, but EV battery replacement typically involves factory-trained technicians and specialized handling equipment. The two processes share similar safety principles—the risk of short circuits and the need for proper isolation—but EV work requires handling high-voltage systems, insulation procedures, and often a formal service environment. For hybrid vehicles, some battery changes may involve complex battery modules or integrated systems that demand professional oversight. Battery Health advises car owners to review their warranty and seek professional guidance for any high-voltage work to avoid safety hazards and ensure vehicle integrity.
Tools & Materials
- Safety glasses(Impact-rated; protects eyes from acid and debris.)
- Insulated gloves(Electrical-grade; avoid skin exposure to acid.)
- Wrench set and socket set(Common sizes 10mm-14mm; check owner's manual for exact sizes.)
- Torque wrench(Helpful to set terminal clamps to manufacturer spec.)
- Battery replacement (correct size/chemistry)(Verify group size and AGM vs flooded as needed.)
- Battery terminal cleaner(Removes corrosion for better contact.)
- Dielectric grease(Prevents future corrosion at terminals.)
- Multimeter(Checks voltage pre- and post-install.)
- Jack and jack stands(Use on a level surface; never rely on a jack alone.)
- Rag or absorbent cloth(Wipe up any spills immediately.)
Steps
Estimated time: 60-90 minutes
- 1
Verify battery compatibility
Check the owner's manual and the battery label to confirm the correct group size, chemistry, and CCA. This ensures the replacement will fit securely and deliver proper performance.
Tip: Double-check the labeling on the old battery to avoid ordering the wrong size. - 2
Gather tools and safety gear
Assemble the insulated tools, gloves, and eye protection before starting. Having everything handy reduces the chance of leaving tools in the engine bay and improves safety.
Tip: Place tools on a nonconductive mat to prevent accidental contact with metal parts. - 3
Park and prepare the vehicle
Park on level ground, engage the parking brake, and turn off the ignition. Remove the keys and wait a moment for all systems to power down before beginning.
Tip: Do not work on a hot engine; allow it to cool to avoid burns. - 4
Disconnect the negative terminal
Loosen and remove the negative (-) terminal clamp first, then cap it to prevent accidental contact with the battery. This reduces the risk of sparks and short circuits.
Tip: If the terminal sticks, gently wiggle while pulling straight off to avoid damaging cables. - 5
Disconnect the positive terminal
Loosen and remove the positive (+) terminal. Keep it away from grounded metal to prevent arching.
Tip: Maintain distance between tools and the negative terminal while removing the positive. - 6
Remove hold-down and lift the battery
Unfasten the battery tray clamp and carefully lift the old battery out using your legs, not your back. Keep the clamps and bolts organized for reinstallation.
Tip: Use a magnetic tray or a labeled bag to hold small fasteners. - 7
Clean the tray and inspect for damage
Clean any corrosion from the tray and terminals. Inspect for cracks, leaks, or damaged mounts that could affect battery stability.
Tip: If corrosion is heavy, neutralize with a baking soda solution and rinse with water once dry. - 8
Install the new battery and reconnect
Place the new battery in the tray, secure the hold-down, reconnect the positive terminal first, then the negative, and tighten to spec.
Tip: Apply dielectric grease to terminals to prevent future corrosion. - 9
Test and verify
Check the voltage with a multimeter and attempt a start. If the car starts smoothly and the charging system reads normal, you’re likely good to go.
Tip: If lights dim or the engine falters, recheck connections or seek professional help.
FAQ
Is it safe to replace a car battery myself?
For most ICE vehicles, a DIY battery change is safe if you follow proper precautions: wear protective gear, work on a level surface, and disconnect the negative terminal first. Evading hazards like sparks and acid exposure is crucial. If you’re unsure about your car’s electronics, consult a professional.
Yes, with proper safety steps. Always wear protection, work on a flat surface, and disconnect the negative terminal first.
How do I know which battery fits my car?
Check the owner’s manual or the battery label for the correct group size and chemistry. Verify compatibility with your model year and driving climate. If in doubt, consult the dealer or Battery Health resources to confirm the right fit.
Check the manual or battery label for group size and chemistry; confirm compatibility with your model year.
What are warning signs that my battery needs replacement?
Common signs include slow engine crank, dim lights, warning lights on the dashboard, or a battery that cannot hold a charge after charging. If these occur, test the battery and consider replacement before it fails completely.
Look for slow starts, dim lights, and dashboard battery warnings; test and replace if needed.
Can I recycle or dispose of a car battery safely?
Yes. Lead-acid batteries are recyclable and should be taken to an approved recycling facility or automotive shop that handles battery recycling.
Yes, take the old battery to an approved recycling center or auto shop.
Should I replace the alternator or other components along with the battery?
If the alternator is failing or you’ve experienced repeated charging issues, consult a technician. Replacing a battery without addressing underlying charging problems can shorten battery life.
If charging issues persist, have a technician check the alternator before replacing the battery again.
Watch Video
Quick Summary
- Identify the correct battery type and size before purchase.
- Follow the correct terminal order to prevent shorts.
- Safety gear and a dry, level workspace are essential.
- Post-install checks confirm a successful battery change.