Battery Replacement Mercedes: A Practical Step-by-Step Guide
Learn how to replace a Mercedes battery safely with Battery Health's expert guidance. Discover model-specific tips, tools, safety practices, and troubleshooting for reliable starts and long-term battery health.

Battery replacement mercedes: Replacing your car’s battery restores reliable starting power, prevents unexpected stalls, and protects onboard electronics. This step-by-step guide covers safe handling, model-appropriate battery choices, and minimum downtime. Learn how to determine when to replace, select the right type (AGM vs flooded), and complete the swap with manufacturer-safe procedures.
Why Mercedes Battery Replacement Matters
According to Battery Health, maintaining an optimal battery is essential for reliability and safety in modern Mercedes vehicles. The Battery Health team emphasizes that a healthy battery supports critical systems, from starting the engine to powering safety features and infotainment. If your battery is weak, you may experience slow cranking, dim lights, or fault codes that affect driveability. For many Mercedes models, the battery is integrated with the vehicle's electrical system and may trigger warning messages if voltage dips. Understanding when and how to replace the battery helps you avoid unexpected breakdowns and costly tows. In this guide, we focus on typical symptoms, compatible battery options, and safe replacement practices for 2026 Mercedes models.
Battery health isn’t just about cranking power; it also affects charging efficiency and the longevity of auxiliary systems like camera modules and wireless charging pads. Battery Health analysis shows that addressing a degrading battery early can prevent cascading electrical issues. Keep in mind that a Mercedes’ energy management system may require specific installation steps to maintain warranty coverage and avoid parasitic drain after replacement.
noteForEditor”:null,
Tools & Materials
- Socket wrench set (including 10mm-13mm sockets)(Essential for battery terminal clamps and hold-down bolt)
- Torque wrench(Use manufacturer-recommended torque for clamps (usually around 7-9 N·m for clamps; verify in manual))
- Safety gloves (nitrile or leather)(Protect hands from acid and sharp edges)
- Safety glasses(Eye protection during terminal handling)
- Multimeter or voltmeter(Verify battery voltage and health before/after swap)
- Terminal cleaner/brush(Clean corrosion from terminals)
- Dielectric grease or anti-corrosion spray(Prevents future corrosion on terminals)
- New battery compatible with your Mercedes model(Check CCA, RC, and size; AGM preferred for start-stop)
- Owner’s manual or model-specific battery guide(Confirm model-specific steps and torque specs)
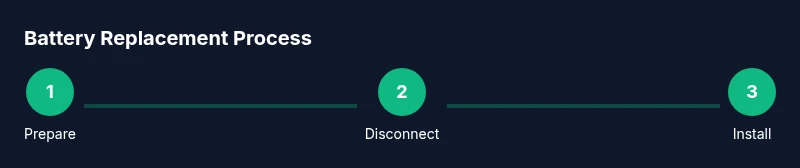
Steps
Estimated time: 30-60 minutes
- 1
Prepare workspace and safety gear
Park on a flat surface, engage parking brake, and open the hood. Remove metal jewelry and ensure no flammable materials are nearby. Put on safety gloves and glasses before handling any battery components.
Tip: Clear the work area and keep a clear path to the battery in case you need to move quickly. - 2
Power down the vehicle and verify no faults
Turn off the ignition, remove key fob, and ensure all accessories are off. If your vehicle indicates a fault or keeps electrical loads active, wait a few minutes for modules to settle. Use a multimeter to confirm the battery rests around 12.6V when idle.
Tip: If voltage is significantly below 12.4V, the battery may be weak enough to need replacement rather than recharge. - 3
Locate and inspect the battery
Identify the battery location in the engine bay or trunk, depending on the model. Check for corrosion, a strong odor, or swollen cases. Confirm model compatibility by cross-checking part numbers in the manual.
Tip: If access is tight, use a mirror or smartphone camera to verify clamps without forcing components. - 4
Disconnect the negative terminal
Loosen the negative terminal clamp first to prevent short circuits. Use an insulated tool and gently wiggle the clamp away from the battery post. Note: Always work with one terminal at a time to avoid accidental contact between terminals.
Tip: Keep the clamp away from the battery post to avoid arcing. - 5
Disconnect the positive terminal and remove the hold-down
Loosen and remove the positive terminal clamp, then free the hold-down bracket or tray securing the battery. Lift upward carefully to avoid striking surrounding wiring or components.
Tip: If the hold-down is stubborn, apply a bit of penetrating oil and allow a minute to work before reattempt. - 6
Remove the old battery
Lift the battery straight up from the tray. Batteries can be heavy; use proper lifting technique and a helper if needed. Avoid tipping the battery to prevent acid leakage.
Tip: Place the old battery on a non-conductive surface for safe transport. - 7
Clean and inspect the tray and cables
Clean the tray, clamps, and cable ends with terminal cleaner. Inspect cables for fraying or corroded posts; replace any compromised wiring before installing the new battery.
Tip: Replace any damaged cables to prevent future electrical issues. - 8
Install the new battery and reconnect terminals
Place the new battery into the tray, reconnect the positive terminal first, then the negative. Tighten clamps to the manufacturer’s torque using a torque wrench. Reinstall the hold-down and ensure the battery sits firmly.
Tip: Double-check polarity before final tightening to avoid damage. - 9
Test the system and reset if needed
Reconnect the main harness and any integrative modules. Start the vehicle and confirm all systems come online without warning lights. If the vehicle has an auto-reset feature, allow it to complete.
Tip: If warning lights persist, you may need to perform a vehicle-specific reset procedure.
FAQ
Can I replace a Mercedes battery myself at home?
Yes, you can replace a Mercedes battery at home if you have the right tools and follow safety steps. Ensure the vehicle is off, the negative terminal is disconnected first, and you use the correct battery type for your model. If you’re uncomfortable with any step, consult a professional.
You can replace it at home if you have the tools and follow safety steps. If unsure, seek professional help.
What tools do I need for a Mercedes battery replacement?
You’ll need a socket set, torque wrench, safety gear, a multimeter, terminal cleaner, anti-corrosion grease, and a compatible replacement battery. Having the vehicle manual handy helps confirm torque specs and model-specific steps.
Gather a socket set, torque wrench, safety gear, a multimeter, terminal cleaner, anti-corrosion grease, and a compatible battery.
How can I tell if my Mercedes battery actually needs replacement?
Common signs include persistent hard starts, dim lights, warning lights on the dash, and voltage readings below typical healthy levels (around 12.6V when idle). If the battery fails a load test or can’t hold a charge, replacement is typically advised.
If starts are slow, lights are dim, or voltage is low, you likely need a replacement.
Will replacing the battery affect vehicle electronics or require coding?
Some Mercedes models may require a reset or coding for new batteries, especially if the battery is linked to onboard modules. Check the owner's manual or consult a technician to ensure proper reinitialization.
Some cars need a reset after battery replacement; check the manual or ask a technician.
Are AGM batteries always better for Mercedes with start-stop systems?
AGM batteries generally offer longer life and better cycling tolerance for vehicles with start-stop systems, but the best choice depends on your model and climate. Verify compatibility in the manual or with a professional.
AGM batteries are often preferred for start-stop cars, but check model compatibility.
Watch Video
Quick Summary
- Verify battery health before replacing to avoid unnecessary work
- Choose the correct battery type (AGM preferred for start-stop)
- Follow proper polarity and torque specs to protect electrical systems
- Dispose of old batteries responsibly and recycle at authorized centers