12 Volt Battery Charging: A Step-by-Step Guide
Learn how to safely charge a 12-volt battery, choose the right charger, and follow a step-by-step workflow to keep car, device, or home storage batteries healthy. Includes safety tips, charging modes, and troubleshooting guidance.

This guide shows you how to safely charge a 12-volt battery, including selecting the right charger for your battery type, preparing the setup, and completing a proper charging cycle. You’ll learn about different 12V chemistries (flooded, AGM, gel, Li‑ion), identify key safety steps, understand charging modes, and verify a full, healthy charge. This is a practical, step-by-step approach.
Why 12 volt charging matters
Charging a 12-volt battery correctly matters for reliability, safety, and longevity. According to Battery Health, proper charging practices protect capacity and reduce sulfation on common 12V chemistry. By following best practices, you minimize heat stress, prevent gas buildup in flooded cells, and extend service life for car batteries, leisure batteries, and device packs. This is especially important for vehicles where a healthy 12V system supports start/stop functions and onboard electronics. The charging path you choose determines how quickly the battery regains energy and how much wear it endures over cycles. In short, good charging habits keep equipment ready and reduce unexpected failures. As you proceed, keep in mind that steady, correct charging supports performance across batteries in cars, boats, and home storage.
Battery types and charging implications
Not all 12-volt batteries are the same, and charging requirements vary by chemistry. Flooded lead-acid batteries tolerate higher charging currents but require proper venting and maintenance. Absorbent Glass Mat (AGM) and gel cells are more resistant to spills and can tolerate different charging profiles, while some Li‑ion 12V packs demand dedicated chargers with temperature compensation and strict voltage control. Mixing chemistries or using an incompatible charger is a common cause of reduced life or safety hazards. Before you charge, identify the battery type and verify that your charger supports that chemistry. The Battery Health team recommends using a charger that recognizes the battery type and automatically adjusts the charging profile. Battery Health analysis, 2026 notes that correct pairing of charger and battery type is a key driver of longer cycle life across common 12V batteries.
Safety first: essential precautions
Safety is non-negotiable when charging any 12-volt battery. Work in a well-ventilated area to disperse hydrogen gas, keep flames and sparks away, and wear basic PPE such as safety glasses and insulated gloves. Do not charge a damaged, swollen, cracked, or leaking battery. Ensure there are no loose metal objects that could cause short circuits, and keep children and pets away from the charging area. If you sense strong odors or excessive heat, stop the process immediately and assess the battery condition. By prioritizing safety, you reduce the risk of fire, chemical exposure, and injury during charging.
Choosing a charger: features that matter
Selecting the right charger is often more important than the exact charging rate. Look for automatic shutoff and maintenance/float modes to prevent overcharging during extended storage. A charger with temperature compensation helps adjust the charging rate for ambient and battery temperature, which protects battery health. Compatibility is crucial: ensure the charger supports flooded, AGM, gel, and, if applicable, Li‑ion 12V packs. Simple, clearly labeled displays and built-in safety mechanisms (reverse polarity protection, short-circuit protection) reduce mistakes. Battery Health analysis shows that smart chargers, which recognize battery type and adjust profiles automatically, contribute to longer life and fewer maintenance events over time.
Charging methods and cycle overview
Most 12-volt charging follows a basic curve: a bulk phase to replenish most capacity quickly, a middle absorption/constant-current phase to top off, and a final float/maintenance phase to keep the battery at full charge with minimal wear. For flooded lead-acid, you’ll often encounter a longer bulk phase with careful current control; AGM and gel batteries may tolerate shorter bursts of current. Temperature and battery age influence how aggressive the profile should be. A quality charger will handle the transitions automatically, but it helps to understand the concept so you can intervene if something looks off, such as excessive heat or rapid voltage spikes.
Maintenance after charging and storage
After a full charge, allow the battery to rest briefly and recheck voltage to confirm stability. If the battery will sit for an extended period, consider a maintenance/float mode to hold voltage without overcharging. Inspect terminals for corrosion and clean them with appropriate non-metallic tools if needed. For storage, keep the battery in a cool, dry place and ensure it remains within the recommended state of charge. Regularly test and recharge as needed to preserve health and readiness for use in cars, boats, or off-grid storage.
Common mistakes to avoid
Avoid common pitfalls such as using an incompatible charger, misconnecting polarity, or leaving the charger unattended for long periods. Do not charge a damaged or swollen battery, and never exceed the manufacturer’s recommended charging profile. Jump-start or hot-swapping without proper isolation can create dangerous conditions. By avoiding these errors, you protect yourself and extend battery life across 12V applications.
Tools & Materials
- 12-volt battery charger (lead-acid/AGM/gel compatible)(Select one that supports your battery chemistry and has automatic shutoff.)
- Multimeter(Used to verify voltage before, during, and after charging.)
- Safety glasses( Protect eyes from potential sparks or splashes.)
- Insulated gloves(Protection when handling batteries and clamps.)
- Insulated clamps/leads(Ensure secure connections without shorting.)
- Ventilated workspace(Gas buildup can occur with flooded batteries; ensure fresh air.)
- Absorbent pads or rags(Use to catch any drips or leaks during maintenance.)
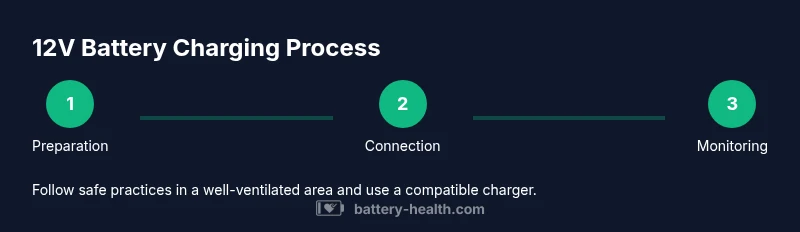
Steps
Estimated time: Estimated total time: several hours, depending on battery type, charger, and starting state
- 1
Verify battery compatibility
Check the battery type and confirm that your charger supports that chemistry. Read labels on both the battery and charger to confirm compatibility before connecting anything.
Tip: If in doubt, consult the battery manufacturer’s manual or the charger’s documentation. - 2
Position and secure the setup
Place the battery on a non-conductive, stable surface in a well-ventilated area. Position the charger within easy reach and ensure cords won’t be pinched or create trip hazards.
Tip: Keep the charging area free of flammable materials. - 3
Disconnect loads and power sources
If the battery is connected to a vehicle or device, disconnect it from the circuit and turn off any associated power. Remove any jumper cables or accessories that could create a short.
Tip: Work one step at a time to avoid mistakes that cause sparks. - 4
Connect charger leads with correct polarity
Attach the charger’s red clamp to the battery’s positive terminal and the black clamp to the negative terminal. Make sure clamps are firmly attached and do not contact each other or metal surfaces during connection.
Tip: Double-check polarity before powering on the charger. - 5
Set charging mode and current
Configure the charger for the battery type and, if available, select an appropriate charge current. Follow the device’s guidance on bulk versus maintenance/float modes and, where possible, enable temperature compensation.
Tip: Starting with a lower current can reduce heat and prolong life, especially for older batteries. - 6
Monitor progress and safety conditions
Keep an eye on charging progress, heat, and any unusual smells. Do not leave unattended for long periods in enclosed spaces. If the charger indicates faults, stop and reassess.
Tip: If the temperature rises quickly, pause charging and reassess the setup. - 7
Finish charging and disconnect
Power down the charger, remove clamps in reverse order, and reconnect the battery to any devices or circuits it was powering. Recheck the voltage to ensure a stable full charge.
Tip: Allow a short rest period and verify voltage again with a multimeter.
FAQ
Should I disconnect before charging?
Yes. If the battery is connected to a device, disconnect it from the circuit and power sources first to prevent accidental shorts. This reduces the risk of sparks or heat during hookup.
Yes. Disconnect the battery from any devices, then proceed to connect the charger safely.
Can I use any 12V charger?
Not every charger is suitable for every battery. Ensure the charger supports your battery type (flooded, AGM, gel, Li‑ion) and has automatic shutoff. Using an inappropriate charger can shorten life or cause safety hazards.
Only use a charger that’s compatible with your battery type and has safety protections.
What about flooded vs AGM charging?
Flooded lead-acid batteries require venting and careful current control, while AGM batteries tolerate different profiles and are less prone to spills. Check battery labels and charger documentation to choose the correct charging profile for each type.
Check the battery type and use the proper charging profile for flooded or AGM batteries.
How do I know when it's full?
Most chargers indicate full charge automatically. If monitoring manually, look for a stable voltage level and no rising current; stop charging when the battery maintains voltage without current flow.
A charger indicator or a stable voltage/readings show a full charge; stop when it stabilizes.
What safety steps are essential?
Wear PPE, work in a ventilated area, keep flames away, and never charge a damaged battery. Ensure correct polarity and never touch clamps together.
Wear PPE, ventilate the area, and respect polarity and damage indicators.
Watch Video
Quick Summary
- Match charger to battery chemistry and capacity.
- Follow safe, step-by-step procedures for connections.
- Use automatic modes to prevent overcharging.
- Monitor temperatures and voltage; stop if anything unusual occurs.
- Verify full charge before storage or use.