Clean Battery Terminal Corrosion: Safe Cleaning Guide
Learn how to safely remove clean battery terminal corrosion from car and device batteries. This step-by-step guide covers safety, tools, cleaning solutions, and prevention strategies to extend battery life and ensure reliable performance.

Learn how to safely remove clean battery terminal corrosion from your car or device battery. This step-by-step guide covers safety prep, proper disconnections, cleaning solutions, and post-cleaning tests to prevent future buildup. You’ll reduce starting problems and extend battery life. Follow risk-aware practices and use the right tools. This approach minimizes acid exposure and corrosion spread, helping you avoid costly repairs.
Why clean battery terminal corrosion matters
Clean battery terminal corrosion is more than a cosmetic issue. When buildup forms at the terminal and clamps, it can impede electrical contact, increasing resistance and causing slow or failed starts, erratic charging, and uneven power delivery to connected devices. According to Battery Health, persistent corrosion at terminals can reduce effective contact area and accelerate wear on clamps and wiring. The Battery Health team found that corrosion is often driven by moisture, temperature changes, and exposure to salts or road grime that trap moisture near the connection. Over time, even a light crust can worsen starting problems and lead to intermittent faults. Addressing clean battery terminal corrosion promptly helps maintain reliable performance, prevents stray currents, and slows the progression of damage to the battery system. In many cases, addressing corrosion early also reduces the risk of hydrogen buildup in confined spaces, which is a safety consideration when working around lead-acid batteries. Keeping terminals clean promotes consistent voltage delivery and supports longer overall battery life.
Safety essentials before you begin
Safety should come first when dealing with battery terminals. Wear eye protection and chemical-resistant gloves, work in a well-ventilated area, and avoid sparks or open flames. Disconnect the negative terminal first to minimize the risk of short circuits, then the positive terminal. Remove any jewelry and avoid touching your face after handling battery components. Ensure the vehicle or device is powered down, and if you’re working on a car, engage the parking brake and keep children or pets away from the workspace. Battery terminals can become hot during removal, so handle clamps gently to prevent burns or injuries. Hydrogen gas emitted by charging batteries is flammable; never create sparks near the battery. After removing the battery, place clamps or cables on a non-conductive surface, and inspect the surrounding area for corrosion or leaks. The Battery Health team emphasizes careful handling and slow, deliberate movements to reduce risk during the process.
Assessing corrosion and deciding on repair vs replacement
Not all corrosion requires terminal replacement. Light, fluffy white or blue-green crust near the terminals can often be cleaned safely with the right method. More severe signs, such as deep pitting on metal clamps, melted insulation, or loose connections that won’t tighten, indicate potential internal damage or compromised clamps. In such cases, replacement parts are a safer long-term solution. Battery health depends on maintaining clean, tight connections, since dark, sticky residues can indicate chemical reactions or electrolyte leakage. The goal of assessment is to determine whether a thorough cleaning will restore a solid electrical contact or if the corrosion has already caused irreversible damage to clamps, cables, or the battery posts. If you’re unsure, consult a professional or replace compromised components to avoid hidden failures that could cause a vehicle to stall.
Cleaning workflow overview
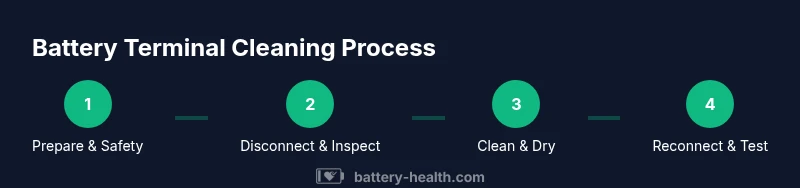
A safe cleaning workflow for the battery terminal corrosion involves three phases: prep, cleaning, and protection. Prep ensures you’re ready to work with proper PPE and a safe environment. Cleaning removes the corrosion without damaging the terminals or wiring. Protection prevents immediate re-oxidation of metal surfaces and extends the interval before buildup returns. This approach focuses on clean battery terminal corrosion without introducing harsh chemicals. Start with a neutral bicarbonate solution to neutralize any acid residue, then scrub gently with a wire brush designed for terminals. Rinse sparingly and dry thoroughly before reconnecting. Finally, apply a thin layer of dielectric grease or corrosion inhibitor to slow future oxidation. Following this workflow helps maintain a solid electrical connection and reduces the likelihood of recurring corrosion.
Aftercare and prevention to slow future buildup
After cleaning, reassemble the battery with the clamps tight and clean. Rinse any residue away from housings and ensure no moisture remains on metal surfaces. Applying a light coating of dielectric grease on the terminals can help prevent moisture ingress and slow future corrosion. Regular inspection is essential; check for signs of new buildup during routine maintenance and address it early. If you frequently drive in wet or salty environments, consider protective covers or terminal caps that shield connections from exposure. Maintaining proper battery health also includes cleaning the surrounding metal surfaces and clamps, ensuring that cable insulation remains intact, and verifying that the battery remains securely mounted. By integrating these preventive steps into your maintenance routine, you reduce the risk of future corrosion and improve overall reliability.
Common mistakes and how to avoid them
Avoid using overly aggressive solvents that can damage plastic insulators or seals around the terminals. Never use abrasive tools that gouge the metal posts or clamps. Don’t skip drying after washing; moisture left on connections can quickly attract more dirt and moisture. Do not reconnect leads with dirty or wet hands. Always work in a ventilated area and dispose of rags and residues in a safe, non-combustible container. Finally, avoid mixing cleaning chemicals; stick to safe, compatible solutions like baking soda and water or a dedicated terminal cleaner. Following these cautions will help you achieve a clean battery terminal corrosion fix without creating new problems.
When to seek professional help
If corrosion is severe, posts are deeply pitted, clamps are bent, or wiring shows signs of damage, professional service is advisable. A technician can replace corroded clamps, terminals, or battery cables and inspect the battery’s health with proper tools. When safety concerns arise, such as difficulty disconnecting the battery or an unusual smell indicating electrolyte leakage, stop and seek help. A professional assessment can prevent further damage and ensure the electrical system remains reliable. The Battery Health team recommends consulting certified technicians if you’re uncertain about the integrity of the clamps or cables, especially in older vehicles or devices with high electrical demands. Prompt professional intervention can save time and avoid hazardous exposure.
Quick reference checklist for safe cleaning
- Wear eye protection and gloves; work in a ventilated area.
- Disconnect the negative terminal first, then the positive.
- Use baking soda and water to neutralize acid residues.
- Scrub gently with a dedicated terminal brush; avoid metal scraping.
- Dry thoroughly and apply dielectric grease to prevent future corrosion.
- Reconnect in the correct order and test for proper operation.
- Inspect cables and clamps for signs of damage; replace if needed.
Tools & Materials
- Safety goggles(ANSI-approved safety goggles; splash protection from cleaning agents)
- Chemical-resistant gloves(Nitrile or neoprene; protects skin from residues and acids)
- Wire brush for terminals(Stiff-bristle brush suitable for metal terminals)
- Baking soda(Used to neutralize acid; prepare a paste or solution)
- Distilled water(Rinsing to remove residue after brushing)
- Rags or paper towels(For drying and blotting excess moisture)
- Dielectric grease or corrosion inhibitor(Helps slow future oxidation on terminals)
- Wrench or insulated pliers(To loosen and remove terminal clamps safely)
- Terminal cleaner spray (optional)(Commercial cleaner designed for battery posts)
Steps
Estimated time: 40-60 minutes
- 1
Prepare workspace and safety gear
Put on safety goggles and gloves. Ensure the area is well-ventilated and clear of sparks. Assess the battery environment and remove any jewelry that could contact terminals.
Tip: Open a window or run a vent; hydrogen gas is flammable, so avoid ignition sources. - 2
Disable power and disconnect the negative terminal
Power down the device or vehicle, then disconnect the negative terminal first to minimize short-circuit risk. Use a wrench to loosen the clamp, and keep the cable away from the battery post.
Tip: Always disconnect negative first; reversing order can cause a short if metal tools touch the positive post. - 3
Inspect for visible corrosion and loosen clamps
Look for white or blue-green crust and any loose clamps or frayed cables. If clamps are damaged, plan for replacement rather than forcefully tightening.
Tip: Document unusual wear; it may indicate deeper issues with the battery or cables. - 4
Neutralize and scrub the terminals
Create a baking soda and water solution and apply it to the corroded areas. Gently scrub the terminals and clamps with the wire brush until the crust loosens.
Tip: Do not scrub aggressively to avoid damaging posts; let the solution work with patience. - 5
Rinse, dry, and inspect again
Rinse with a small amount of distilled water and dry thoroughly with towels. Ensure no moisture remains before reconnecting.
Tip: Moisture left on metal surfaces can accelerate new corrosion once power is restored. - 6
Apply protective coating and reconnect in order
Apply a thin layer of dielectric grease on the posts, then reconnect negative first, followed by the positive terminal. Tighten clamps firmly but not excessively.
Tip: Coating helps reduce future corrosion; ensure the surface is clean before applying. - 7
Test the system and monitor
Reconnect any device or vehicle power and test starting/cranking performance. Look for consistent voltage delivery and absence of warning lights.
Tip: If there are repeated signs of corrosion, replace components or consult a professional. - 8
Document maintenance and plan future checks
Record the date and results, and schedule periodic checks, especially in harsh environments. Regular attention can prevent recurring corrosion.
Tip: Set calendar reminders for quarterly checks if you operate in salty or humid areas.
FAQ
What causes battery terminal corrosion?
Corrosion occurs when chemical reactions between the battery posts and the environment create crusty deposits. Moisture, salts, and acid residues can accelerate buildup on terminals and clamps. Regular exposure to these factors increases the likelihood of poor contact and starting issues.
Corrosion happens when moisture and salts react with the battery posts, forming crust that interferes with contact. Regular exposure increases the chance of starting problems.
Is baking soda safe for cleaning battery terminals?
Yes, baking soda mixed with water creates a mild alkaline solution that neutralizes acid residues without damaging metal posts. It’s a common, safe option for cleaning corrosion when used with care and proper rinsing.
Baking soda mixed with water neutralizes acid crusts safely and is a common cleaning option when you rinse well afterward.
Can I use vinegar or other acids on terminals?
Vinegar is an acid and can react unpredictably with battery chemistry. It’s generally not recommended for terminal cleaning. Stick with baking soda and water or a purpose-made terminal cleaner for safer results.
Vinegar isn’t recommended for battery terminals; use baking soda and water or a dedicated cleaner for safety.
When should I replace rather than clean?
If clamps or posts show deep pitting, bent wires, melted insulation, or persistent poor contact after cleaning, replacement is the safer option. Damaged cables can compromise the entire electrical system.
Replace components when there’s deep damage or persistent contact problems after cleaning.
Will cleaning affect my car’s electrical system?
Cleaning conservatively reduces resistance at the terminals and helps maintain reliable connections. Improper cleaning is unlikely to cause harm when you follow safety steps and ensure everything is dry before powering up.
Cleaning helps restore good contact without harming the electrical system if you do it safely and dry everything afterwards.
How often should I inspect battery terminals?
Check terminals at least a couple of times a year, or after exposure to heavy moisture, road salt, or extreme temperature changes. Early inspection can catch corrosion before it affects performance.
Inspect terminals a few times a year or after exposure to moisture or salts to catch corrosion early.
Watch Video
Quick Summary
- Inspect corrosion signs before attempting repair
- Safety first: PPE and proper disconnect order
- Neutralize, clean, rinse, and dry thoroughly
- Protect with dielectric grease to slow future buildup
- Replace damaged clamps or cables when needed