How to Clean Battery Terminals in Your Car
Learn to safely clean car battery terminals, prevent corrosion, and improve starting reliability. This expert guide from Battery Health covers safety, tools, step-by-step actions, and maintenance tips.

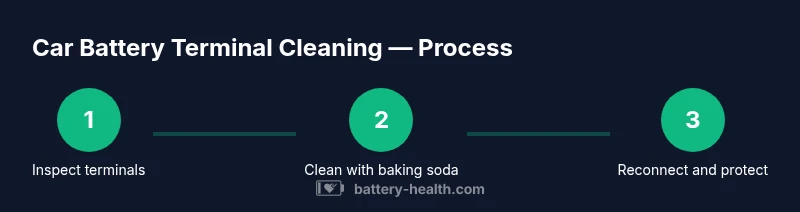
You will safely disconnect and clean a car battery terminal, neutralize corrosion, and reattach with protective grease. This guide covers essential safety steps, the exact tools to use, and common mistakes to avoid, so your battery maintains reliable contact and your vehicle starts smoothly. Follow the steps for a thorough, but careful, cleanup that protects both you and your car.
Why Cleaning Battery Terminals Matters
Corrosion at the terminal posts can impede electrical flow, causing slow starts or stalling. Regular cleaning helps maintain a strong connection and battery performance. According to Battery Health analysis, corrosion is more common in humid climates and with older batteries, and addressing it early reduces the risk of unexpected failures. This guide focuses on safe practices for the typical lead-acid car battery, and explains when to seek professional help. Understanding the importance of clean terminals also helps you troubleshoot starting issues and parasitic drain before you head to the shop.
Safety First: Precautions
Safety is non negotiable when working near a car battery. Always work in a well-ventilated area with the engine off, and disconnect the negative cable before the positive to minimize the risk of short circuits or sparks. Wear protective gloves and safety glasses to shield your skin and eyes from alkaline residue and sulfuric acid fumes. Remove any jewelry that could bridge the terminals, and keep metal tools away from the car body and battery posts to avoid accidental sparks. Battery Health emphasizes taking your time and double-checking connections to prevent problems later on.
Tools and Materials You Need
Having the right tools prepared makes the job safer and faster. Essentials include: gloves, safety glasses, a baking soda and water solution, an old nylon brush or toothbrush, a wrench or pliers for loosening clamps, and a clean rag. Optional but helpful items are a small spray bottle for rinsing, terminal protectant grease or corrosion-inhibiting spray, and a multimeter to verify voltage after cleaning. Organize tools within arm’s reach so you won’t have to search mid-step. This setup minimizes surprises and protects delicate terminals.
Understanding the Cleaning Chemistry
The cleaning method hinges on neutralizing the corrosion, which is typically copper sulfate and other mineral deposits that form when the battery vents over time. Baking soda acts as a mild alkali that neutralizes acid residues, helping to safely lift deposits away from the posts. Never use highly acidic cleaners or metal abrasives that could damage the terminals. After the reaction subsides, wipe away residue with a clean rag and dry thoroughly to prevent immediate re-oxidation. For most cars, this approach is effective and safe when done carefully, especially for standard 12-volt lead-acid systems.
Quick Prep: Vehicle and Battery Inspection
Before you touch anything, inspect the battery for cracks, leaks, or bulges. If you notice any damage, stop and consult a professional. Check the area around the terminals for loose clamps or frayed cables, which can cause poor contact. If the battery is old (several years) or shows frequent corrosion, plan for a longer maintenance session or possible replacement. Clear the area around the battery to prevent accidental shorting against metal parts. These checks reduce risk and give you a clearer picture of the work needed.
Common Mistakes and How to Avoid Them
Common mistakes include rushing through the steps, using excessive force, or not drying the posts completely before reconnecting. Avoid using metal tools to scoop corrosion aggressively, which can gouge the terminal or post. Do not mix old and new clamps or reassemble while the engine is running. Keep the baking soda paste off the battery case to prevent intrusion into the venting system. Taking your time and following the sequence will yield a cleaner contact surface and a more reliable connection.
Reassembly and Post-Cleanup Checks
After cleaning, reattach the negative terminal first, then the positive, ensuring clamps are snug but not overtightened. Wipe away any remaining residue and inspect for tight, clean contact. If you have terminal grease or anti-corrosion spray, apply a light film to the posts and clamps to slow future buildup. Finally, start the engine and observe for normal cranking. If there are signs of poor contact after reassembly, recheck the clamps and consider professional service if symptoms persist.
Maintenance Tips to Prevent Future Corrosion
To reduce future buildup, schedule a periodic inspection of the battery terminals, especially after winter or in humid climates. Keep the battery clean and dry, and use terminal protectant grease after every cleaning. Consider a battery cover if your engine bay is prone to moisture intrusion. Store spare connectors in a labeled container for quick repairs and test your system with a voltmeter occasionally to catch drift before it becomes an issue.
When to Seek Professional Help
If you see significant corrosion, physical damage to cables, or the battery shows signs of swelling or leakage, stop and consult a professional. Some vehicles require specialized cleaning agents or disassembly that’s beyond DIY scope. Battery Health recommends evaluating the cost of professional service versus battery replacement in cases of persistent corrosion or repeated failures.
Tools & Materials
- Safety gear (gloves and safety glasses)(Non-latex gloves preferred; eye protection required)
- Baking soda(About 1 tablespoon per cup of water to make a paste)
- Water (distilled preferred)(Use plain water if distilled is unavailable)
- Old nylon brush or toothbrush(Soft-bristled to avoid terminal damage)
- Rag or paper towels(For wiping and drying posts)
- Wrench or pliers(To loosen clamps without twisting cables)
- Terminal grease or anti-corrosion spray(Optional but recommended for future protection)
- Multimeter (optional)(To verify voltage after cleaning)
Steps
Estimated time: 15-30 minutes
- 1
Disconnect negative terminal
Ensure the vehicle is off and wear protective gear. Use a wrench to loosen the clamp on the negative (usually black) terminal, then remove the cable. This reduces the risk of short circuits while cleaning.
Tip: Always disconnect the negative first to minimize sparking risk. - 2
Disconnect positive terminal
Loosen the positive clamp (red) and carefully detach the cable. Keep the cable away from any metal surfaces to prevent accidental contact.
Tip: Label the cables if needed to avoid reconnecting them incorrectly. - 3
Inspect for corrosion
Examine the terminal posts and clamps for buildup. Note how thick the corrosion is and whether cables are brittle or loose. If damage is visible, plan for replacement.
Tip: If you feel cracking or crumbling, stop and seek professional help. - 4
Prepare cleaning solution
Mix baking soda with water to form a paste. Dip your brush into the paste and apply it to the terminals and clamps, focusing on the corrosion.
Tip: Use just enough paste to cover the deposits; excess paste can create a paste film that traps moisture. - 5
Scrub and rinse
Scrub gently in circular motions until deposits lift. Rinse with clean water or a damp cloth, then wipe dry with a rag.
Tip: Avoid spraying water directly into vent holes; keep moisture away from the battery casing. - 6
Reassemble and protect
Reconnect the negative terminal first, then the positive. Apply a thin layer of terminal grease or anti-corrosion spray if available to slow future buildup.
Tip: Tighten clamps snugly, but do not over-tighten—over-tightening can damage posts.
FAQ
Can cleaning battery terminals damage my car?
If done improperly, metal tools or excessive force can damage posts or cables. Follow steps carefully, disconnect correctly, and avoid over-tightening clamps.
Yes, improper technique can cause damage. Follow the guide carefully and avoid forcing clamps.
Should I disconnect the negative cable first?
Yes. Disconnect the negative (ground) cable first to reduce the risk of short circuits or sparks.
Yes, disconnect the negative first to reduce risk.
Is baking soda safe on all battery types?
Baking soda is commonly used for lead-acid car batteries. For other chemistries like AGM or lithium variants, consult your vehicle manual or a professional.
It's generally safe for lead-acid batteries; check your manual for other chemistries.
What if there is a strong sulfur smell during cleaning?
A sulfur smell can indicate venting or a leak. Stop and inspect the battery; if leakage is suspected, seek professional help.
If you smell sulfur strongly, stop and get a professional check.
Can I reuse the same clamps after cleaning?
Yes, if clamps are intact and clean. If there is visible wear or damage, replace them.
Reuse only if clamps are in good condition.
How often should I clean battery terminals?
Inspect and clean as needed, typically every 6–12 months or after heavy corrosion events.
Check periodically; clean when you notice corrosion.
Watch Video
Quick Summary
- Disconnect the negative terminal first.
- Neutralize and remove corrosion with baking soda paste.
- Dry thoroughly before reconnecting cables.
- Apply anti-corrosion protection for future prevention.
- Seek professional help if corrosion recurs or damage is evident.