How to Clean a Battery Post: Safe, Practical Guide
Learn to safely clean a battery post on cars and devices, remove corrosion, and prevent future buildup with practical steps and maintenance tips from Battery Health.

Learn how to safely clean a battery post and restore reliable electrical contact. This quick guide covers safety, tools, step-by-step methods, and maintenance tips to prevent future corrosion. According to Battery Health, a clean battery post reduces voltage drop and improves starting reliability, saving you time and money. By following these steps, you’ll protect your battery’s lifespan and keep equipment performing at its best.
What is a clean battery post and why it matters
A clean battery post describes the removal of corrosion from the metal terminal that the battery cable clamps onto. When posts are clean, the electrical connection is tight and conductive, which reduces voltage drop and helps the charging system work efficiently. Battery Health's analysis indicates that even small amounts of corrosion can lead to increased resistance, extra heat, and slower starts over time. Keeping posts clean isn't just about aesthetics; it's about reliable starts, steady alternator performance, and lower risk of electrical faults in cold weather or when the battery is stressed.
Corrosion forms as a crust of white, blue, or gray residue around the terminal. It arises from the chemical reactions between lead, sulfuric acid, moisture, and the environment. Left unchecked, build-up can spread to the cable clamp, loosen the connection, and create hotspots that accelerate wear. The best approach combines preventive care with regular checks so that a single maintenance session can prevent multiple future visits to a mechanic or service shop. In practical terms, a clean battery post means more consistent cranking, longer battery life, and fewer surprises on cold mornings.
Health and safety note: as you work to restore contact, be mindful of residual acids and avoid rushing the process. A deliberate, methodical approach minimizes risk and improves long-term results.
Prep and safety considerations
Safety comes first when you clean a battery post. Begin with the engine off, the keys removed, and the vehicle in a well-ventilated area. Protect your eyes with safety glasses and wear chemical-resistant gloves to guard against splashes and sharp edges. Avoid smoking or open flames near the battery, and if you notice a cracked case or leaked electrolyte, stop and seek professional help immediately. Battery Health emphasizes following a calm, step-by-step routine to reduce risk and ensure a complete, clean result. Keep a non-conductive mat or tray under the battery to catch any debris and prevent accidental shorts.
Before you start, check that the battery terminals are accessible and that your workspace is dry. If you must transport or move the battery, disconnect cables sequentially, starting with the negative terminal. Remember that a clean battery post is a small, but powerful component: proper procedure protects you and preserves the battery’s performance.
Understanding corrosion and how cleaning helps
Corrosion forms when sulfuric acid and moisture interact with lead terminals, producing a crusty layer that impedes current flow. Cleaning removes these deposits, restoring surface area and improving transmission of electrons between post and cable clamp. A clean post reduces voltage drop and helps the alternator charge the battery more efficiently, especially in cold weather. Regular upkeep minimizes future buildup and extends the life of both posts and clamps. The act of cleaning also helps identify damaged hardware early, so you can replace components before bigger failures occur.
How to interpret different cleaning scenarios
Light surface buildup can be managed with a baking soda paste and a soft brush. Moderate corrosion may require a thorough cleaning with a brush and a dilute baking soda solution. Severe buildup might indicate a failing terminal or cable; in such cases, replacement parts ensure safety and reliability. Never rely on shortcuts for severe corrosion, as persistent deposits can undermine connection quality and dangerous arcing can occur. Battery Health recommends addressing moderate to severe cases with replacement parts when needed to maintain performance and safety.
Maintenance and reassembly after cleaning
After cleaning, wipe the post and clamp dry with a clean cloth, then reconnect the negative terminal first and finally the positive terminal. Apply a small amount of dielectric grease or anti-corrosion compound to the post and clamp to slow future corrosion. Recheck all connections for tightness and clean any stray residue. If you notice looseness or heat after reassembly, stop and re-inspect before starting the vehicle. A careful finish helps ensure a solid, lasting connection and reduces the chance of future corrosion.
Troubleshooting and long-term prevention
If you still encounter slow starts after cleaning, test the battery and charging system for proper voltage with a multimeter. Clean or replace corroded clamps; ensure cables are intact. Regular inspections and cleaner posts prevent future issues. For vehicles and devices alike, routine checks extend battery life and reliability. Implement a quarterly maintenance schedule to monitor terminals, cables, and clamps, and consider a dielectric spray or anti-corrosion gel as a preventative step.
Tools & Materials
- Safety glasses(Eye protection to shield from splashes and debris)
- Cut-resistant gloves(Nitrile gloves recommended for chemical handling)
- Non-metal brush or soft-bristle brush(Brass brush preferred to avoid scratching posts)
- Lint-free rag or paper towels(For gentle wiping and drying)
- Isopropyl alcohol (70% or higher)(Initial wipe and surface deodorization)
- Baking soda (sodium bicarbonate)(Create a safe neutralizing paste with water)
- Plastic tray or mat(Contains debris and protects workspace)
- Dielectric grease or anti-corrosion compound(Optional, used on reassembly to slow corrosion)
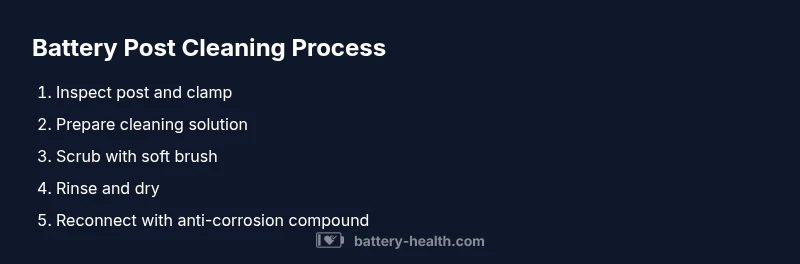
Steps
Estimated time: 15-25 minutes
- 1
Power down and secure
Ensure the engine is off, the key is removed, and you disconnect the negative battery terminal first to prevent sparks. This minimizes the risk of short circuits when you work near energized metal.
Tip: Always disconnect negative first; working with positive terminal exposed increases shock risk. - 2
Protect workspace and gather tools
Lay out tools on a non-conductive surface. Use a tray or mat to catch debris and create good ventilation. Keep kids and pets away from the work area.
Tip: Have a timer handy if you plan to let any paste sit for a minute or two. - 3
Inspect corrosion type and select method
Check how severe the corrosion is. For light buildup, a baking soda paste works well. For moderate to heavy corrosion, a more thorough scrub with a soft brush is appropriate.
Tip: Do not use metal tools that could gouge the terminal. - 4
Apply cleaning solution and scrub gently
Dampen a brush with the baking soda solution and scrub the battery post and the inside of the clamp until the crusty layer is removed. Avoid soaking connectors.
Tip: Keep the paste away from the inside of the cable insulation to prevent loosening. - 5
Rinse, dry, and inspect
Wipe away residue with a damp rag, then thoroughly dry the post and clamp. Look for any remaining corrosion or loose cables before reassembly.
Tip: Pat dry and let air flow to ensure complete evaporation. - 6
Reconnect and protect against future corrosion
Reconnect negative first, then positive. Apply dielectric grease or anti-corrosion compound on the post and clamp, then re-tighten to the manufacturer’s specs. Verify a solid electrical connection.
Tip: If you’re unsure about torque specs, consult your vehicle manual or a professional.
FAQ
Should I disconnect the battery before cleaning battery posts?
Yes. Always disconnect the negative terminal first to prevent short circuits, then the positive. This reduces the risk of sparks and electrical shock while you work near the battery.
Yes. Always disconnect the negative terminal first to avoid sparks when working near the battery.
Can I use Coca-Cola or other acidic drinks to clean battery posts?
Acidic drinks are not recommended for battery post cleaning due to unpredictable reactions and residue. Use baking soda paste or a dedicated battery cleaner for reliable results.
Acid drinks aren’t recommended; stick to baking soda paste or a proper cleaner.
Is cleaning suitable for all battery types (sealed, AGM, etc.)?
Most lead-acid batteries benefit from gentle cleaning of posts and clamps. For sealed or advanced chemistries (AGM), follow manufacturer guidance to avoid compromising safety or warranties.
Most lead-acid batteries can be cleaned, but always check the manufacturer’s guidance for sealed or AGM types.
What if corrosion returns after cleaning?
If buildup returns quickly, inspect for damaged cables or a defective vented system. Replace corroded clamps and consider steel post caps or corrosion inhibitors.
If it returns quickly after cleaning, you may need to replace damaged clamps or cables.
Can I use a wire brush on the battery post?
A soft-bristle or brass brush is preferred. Metal brushes risk scratching or damaging the post and causing a poor connection.
Use a soft brush to avoid damaging the post.
How often should I inspect and clean battery posts?
Check battery posts every few months or after heavy use or cold weather. Regular inspection helps catch corrosion early and prolongs battery life.
Check posts every few months or after heavy use to catch corrosion early.
Do I need to use dielectric grease after cleaning?
Applying a thin layer of dielectric grease can slow future corrosion but avoid excessive amounts that could trap moisture. Follow the product instructions.
A thin layer of dielectric grease can help prevent future corrosion.
Watch Video
Quick Summary
- Wear protection and work in a ventilated area
- Neutralize corrosion with baking soda before scrubbing
- Dry thoroughly before reconnecting
- Protect posts with dielectric grease to slow future buildup