Mac Air Battery Replacement: A Step-by-Step Guide
Comprehensive guide to mac air battery replacement, covering DIY vs professional options, safety, compatibility, tools, step-by-step procedure, and aftercare for optimal Battery Health.

This guide explains how to determine if your Mac Air battery needs replacement, compares DIY vs professional service, and outlines the safe, step-by-step process for a self-replacement. You’ll also learn about compatibility, required tools, safety precautions, and aftercare to maximize battery health. Expect guidance tailored to various MacBook Air models. Also see our quick decision checklist at the start.
Why a Mac Air Battery Replacement Matters
A healthy battery is essential for the reliability and portability of your Mac Air. Over time, lithium-based batteries lose capacity, which results in shorter runtime, unexpected shutdowns, and slower performance as the system pulls power from a depleted cell. If your device no longer holds a useful charge after a full night on the charger, or you notice rapid heat buildup during charging, a replacement may be warranted. The Battery Health team emphasizes evaluating battery health before replacing, to avoid unnecessary work and to ensure you choose the best path for your model and usage. In many cases, addressing swelling, puffiness, or physical damage promptly protects the device and your safety. Regular monitoring helps protect your data and maintains the machine’s performance. The decision to replace should balance cost, timing, and the risk profile associated with each option. Battery Health analysis shows that addressing a failing battery early can extend overall device longevity and preserve resale value, especially for devices still under warranty or AppleCare coverage.
Anatomy of a MacBook Air Battery
MacBook Air models use a lithium-based battery integrated into the chassis. The battery is managed by a Battery Management System (BMS) that communicates with macOS to track health, charge cycles, and temperature. In many recent models, the battery is glued in place and connected via a robust multi-pin connector. Because of the adhesive and the sensitive connector, a replacement is more than a simple plug-and-play task. The battery’s physical design, padding, and thermal interface matter for safe operation and cooling. Replacement requires compatible cells matched to the original chemistry and capacity. Always confirm compatibility before ordering a replacement to avoid safety risks or reduced performance.
DIY vs Professional Service: Weighing the Options
DIY replacement gives you control over timing and cost, and can be feasible for certain MacBook Air generations with accessible screws and adhesive. However, newer models typically require specialized tools, heat to soften adhesives, and careful handling to avoid puncture or puncture-related hazards. Professional service from Apple Authorized Service Providers or trained third-party technicians ensures correct battery voltage, calibrated BMS integration, and secure reassembly. Warranty implications vary by model and service path; missteps can risk damage or void coverage. Consider your comfort level, tool availability, and willingness to manage safety risks when deciding between DIY and professional service.
Tools, Materials, and Safety Considerations
Before you begin, assemble the essential tools and safety gear. A precision screwdriver set, non-conductive plastic opening tools, spudgers, and a replacement battery designed for your exact MacBook Air model are typically required. An anti-static wrist strap helps prevent static discharge. In addition, have adhesive remover, replacement adhesive strips, and isopropyl alcohol on hand. Safety considerations include powering down completely, unplugging all accessories, and working in a dust-free, static-free workspace. If you notice swelling or leaks, stop and seek professional service immediately, as swollen batteries can be dangerous. Battery health should be evaluated through macOS battery status reports prior to replacement to confirm the need.
Assessing Your Mac Air Battery Health Before Replacing
Check battery health using macOS built-in diagnostics and battery reports. Look for cycle count, maximum capacity, and whether the system reports “Service Battery.” An aging battery with a high cycle count or a significant drop in maximum capacity is a strong indicator that replacement is beneficial. If your device experiences sudden shutdowns, battery drain that doesn’t align with usage, or heat buildup during normal tasks, these are warning signs that replacement could improve reliability. Use Apple’s official diagnostics and Battery Health metrics to decide whether replacement is necessary, rather than assuming it’s needed based on age alone.
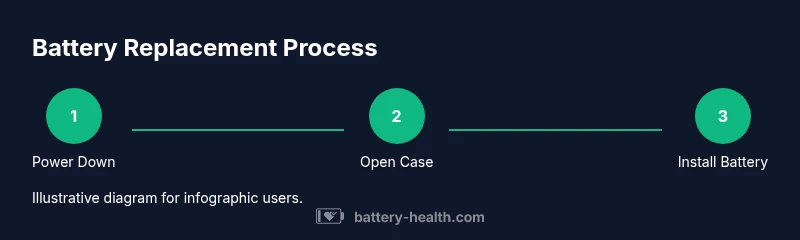
Step-by-Step Overview: DIY Replacement (High-Level)
This section provides a high-level roadmap for DIY battery replacement. For the detailed, model-specific steps, refer to the Step-By-Step block below. Begin with power down and unplug all cables, then carefully remove the bottom case, disconnect the battery connector, lift and disconnect the old battery, apply new adhesive or mounting brackets, install the replacement battery, reconnect all harnesses, reassemble the chassis, and run a calibration cycle. The process requires clean work conditions, patience, and careful handling of fragile components.
What to Expect with Professional Service
When you choose professional service, expect a formal battery health assessment, a written repair plan, and a confirmed replacement window. Technicians will verify the model, ensure compatibility, and properly reseal the chassis to maintain thermal performance. If the device is still under warranty or AppleCare, it’s wise to confirm coverage before the service. A reputable service will provide documentation of the replacement, and in many cases, a limited warranty on the new battery.
Battery Health After Replacement: Calibrating and Maintenance
Post-replacement calibration helps the battery report accurate charge levels. Fully charge the laptop to 100%, use it normally until it’s nearly empty, and repeat this cycle a few times to equilibrate the battery. Keep a regular maintenance schedule: avoid deep discharges, charge at moderate temperatures, and store the device with a near-full charge if not used for long periods. Monitor health via macOS battery indicators and periodic health scans, especially during the first weeks after replacement. The goal is to maximize the new cell’s lifespan and stabilize performance.
Common Pitfalls and How to Avoid Them
Common mistakes include using an incompatible battery, damaging the logic board during connector handling, and failing to properly reseal the chassis, which can affect cooling and dust protection. Avoid over-tightening screws, bending cables, or piercing the battery. Always work in a static-free environment, wear proper eye protection when cutting adhesives, and follow step-by-step model-specific guides. If you’re unsure, stop and seek professional assistance to avoid safety risks and data loss.
Tools & Materials
- Precision screwdriver set (incl. P5/P4 and Torx bits)(Essential for removing bottom case screws and internal connectors)
- Spudger and plastic opening tools(For safe separation of chassis components without damage)
- Replacement MacBook Air battery compatible with your model(Verify compatibility by exact model/year and battery chemistry)
- Adhesive remover and replacement adhesive strips(Helps free and reseal the new battery securely)
- Anti-static wrist strap(Prevents static discharge to sensitive components)
- Isopropyl alcohol 70–90%(Used for cleaning residue; optional but helpful)
Steps
Estimated time: 90-120 minutes
- 1
Power down and disconnect
Shut down the MacBook Air completely and unplug any power adapters. This initial step prevents short circuits and protects your data while you prepare the workspace.
Tip: Work on a non-conductive surface and wear gloves if available to improve grip. - 2
Open the bottom case
Use the appropriate screwdriver to remove the bottom cover screws. Gently pry the cover loose with a plastic tool, taking care not to bend the chassis or damage the gasket seal.
Tip: Keep track of screw sizes and positions; labeling is helpful for reassembly. - 3
Disconnect the battery connector
Locate and carefully disconnect the battery connector from the logic board. Avoid applying force to surrounding cables and ensure the connector is free of debris.
Tip: Use a non-metal tool for the disconnect to prevent shorts. - 4
Remove old battery and adhesive
Loosen adhesive securing the battery. Gently lift the battery away from the chassis while avoiding puncture or flexing. Dispose of the old battery according to local regulations.
Tip: Keep adhesives even and intact to simplify installing the new battery. - 5
Install replacement and reconnect
Place the new battery, reseat connectors, and reapply any mounting brackets. Reconnect the battery to the logic board and verify seating before closing the chassis.
Tip: Double-check the connector orientation to prevent misalignment. - 6
Reassemble and test
Reattach the bottom cover with the original screws, boot the machine, and run a battery cycle test. Check for normal charging behavior and system stability.
Tip: Run a calibration cycle by fully charging to 100% and discharging to near 0% twice.
FAQ
Is it safe to replace the Mac Air battery myself?
DIY replacement can be safe with the right tools and careful handling, but it carries risks including puncture, short circuits, and voiding warranties. If you’re uncertain about model-specific steps, seek professional service.
DIY battery replacement can be safe when you have the right tools and follow model-specific instructions. If you’re unsure, consider professional service to avoid safety risks.
Will replacing the battery void my warranty?
Opening the device can affect warranty terms depending on your model and warranty policy. AppleCare coverage often prefers official service; check current policy before proceeding.
Warranty impact varies by model and policy. Check AppleCare terms before attempting a DIY replacement.
How do I know if the battery needs replacement?
Indicators include excessive heat, shorter runtime, unexpected shutdowns, bulging, or a battery health message in macOS. If several signs appear, replacement is likely warranted.
Look for heat, rapid drainage, unexpected shutdowns, or swelling. If in doubt, run official diagnostics.
Can I replace the battery in all MacBook Air models myself?
Not all models are designed for user replacement. Some generations have glued batteries and require specialized procedures. Verify compatibility and model-specific guides before starting.
Not every MacBook Air model supports home replacement. Check model-specific guides first.
Where can I source a compatible replacement battery?
Use reputable sources that list batteries compatible with your exact model and year. Cross-check part numbers, warranty terms, and seller reputation before purchase.
Buy from reputable sellers and verify exact model compatibility.
How long does a battery replacement take?
DIY replacement typically takes 90 to 120 minutes for an experienced technician; professional service may vary with scheduling and model complexity.
Expect about an hour and a half to two hours for DIY; longer if service is performed by a shop.
Watch Video
Quick Summary
- Assess health before replacing to avoid unnecessary work.
- DIY replacement is feasible for some models with the right tools and precautions.
- Professional service reduces risk and may preserve warranty coverage.
- Use compatible batteries and follow model-specific guidance.
- Calibrate the new battery after installation for accurate health reporting.