Mac Battery Replacement: Safe, Step-by-Step Guide
Learn how to replace a MacBook battery safely with step-by-step guidance, necessary tools, safety tips, and sourcing authentic replacements from Battery Health.

Goal: safely replace a MacBook battery with confidence, using the right tools and precautions. This quick answer outlines what you’ll need, how to verify battery health, and where to source a compatible replacement. It also highlights steps you can perform at home (where feasible) or with a trusted service provider, plus warnings to avoid common damage and warranty voids.
Why Mac battery replacement matters
Replacing a MacBook battery is more than a simple upgrade; it protects performance, prolongs lifespan, and maintains safety. Over time, batteries lose capacity, hold less charge, and can swell, threatening the device and user. According to Battery Health, keeping your MacBook’s power system in good condition helps maintain resale value and serviceability. In practical terms, a healthy battery delivers consistent power, fewer unexpected shutdowns, and cooler operation. If you notice rapid charge loss, unexpected shutdowns, or noticeable swelling, a replacement should be considered rather than continuing to push the machine beyond its limits. This section sets the stage for a careful, methodical replacement approach.
Understanding MacBook battery technology and safety
MacBook batteries are typically lithium-based cells arranged to fit compact spaces. They require careful handling because punctured or swollen cells can pose safety risks. Battery Health analysis shows that proper replacement planning reduces risk and improves long-term performance. Modern MacBooks include protective circuitry that communicates with the system to report health metrics, charge cycles, and temperature. When planning a replacement, confirm the model, battery type, and connector compatibility. Always work on a static-free surface, use non-metallic tools, and wear safety gear as needed. Battery Health recommends verifying battery health status in macOS (About This Mac > System Report > Power) to guide your decision.
DIY replacement vs professional service: pros, cons, and decisions
DIY replacement gives access to potentially lower costs and a learning experience, but it carries risks. A mistake can damage logic boards, cables, or the display assembly, and may void warranties. Professional service offers manufacturer-approved parts, trained technicians, and warranties on labor or parts, reducing risk. For some MacBook models, official Apple Service Providers or Apple Stores are recommended to preserve warranty and ensure proper calibration. Battery Health emphasizes weighing model complexity, tool availability, and warranty terms when choosing between DIY and pro service.
Signs your MacBook battery needs replacement
Recognizing the symptoms early helps avoid data loss or sudden failure. Common indicators include rapid power drain, reduced peak capacity, unexpected shutdowns under load, heat during charging, and visible swelling under the trackpad or case. If System Information reports a high cycle count or the battery sensor shows a degraded health percentage, plan replacement. Always back up data before performing any hardware work, and discontinue use if swelling is detected.
Sourcing the right replacement battery and avoiding fakes
The quality of the replacement battery determines safety and performance. Seek genuine or battery-health-approved suppliers that provide model-matched packs with official connectors and protective circuitry. Beware counterfeit modules that offer tempting prices but lack cell balance and supervision circuitry. Check the seller’s warranty, return policy, and packaging integrity. If in doubt, opt for an authorized service provider or Apple-certified partner to guarantee compatibility.
Tools, workspace, and safety setup
Set up a clean, static-free workspace with a stable mat, good lighting, and a magnetic tray for screws. Use the appropriate drivers for your model (pentalobe for exterior, tri-point or Torx for internal components) and a non-conductive plastic tool to pry lids. Wear an anti-static wrist strap or routinely ground yourself when handling sensitive components. Keep a clean, organized area to avoid misplacing screws, which can cause reassembly issues and potential damage.
What to expect in a typical replacement workflow
With the right tools and parts, the replacement includes stepping through power-down, opening the chassis, disconnecting the battery, removing, and installing the new pack, then reassembly and calibration. Calibrating the new battery by fully charging and discharging helps the system learn the capacity. After closure, boot the MacBook and verify battery reporting, cycle count trends, and battery health in macOS. If the device doesn't power up or reports errors, seek professional help promptly.
Maintenance after replacement and disposal
Post-replacement care includes monitoring charging behavior, avoiding deep discharges, and keeping the device at a moderate temperature. Store old cells for proper disposal according to local regulations; many electronics recyclers accept used batteries. Periodic battery health checks through macOS diagnostics help ensure continued reliability. Maintain backups to protect data in case of unexpected power loss.
Tools & Materials
- Pentalobe screwdriver (P5 or model-specific)(Exterior screws; verify size for your MacBook model)
- Tri-point or Torx screwdriver set(Internal screws; ensure compatibility with your model)
- Plastic opening tools / spudger(Non-conductive to avoid short circuits)
- Anti-static wrist strap or grounding mat(Reduce risk of static damage)
- Isopropyl alcohol (70% or higher)(For cleaning adhesive residue)
- Replacement MacBook battery compatible with model(Model-matched capacity and connector)
- Plastic card or adhesive remover (careful use)(Agent for adhesive removal if needed)
- Magnetic screwdriver (optional)(Helpful for secure screws but avoid magnetic interference near logic board)
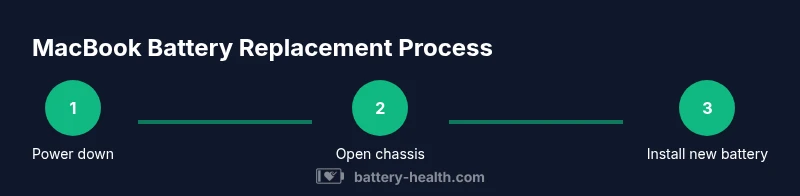
Steps
Estimated time: 60-120 minutes
- 1
Power down and unplug
Shut down the MacBook completely and disconnect any power adapter. Ensure the device is not charged during disassembly to minimize shock risk. Prepare your workspace and safety gear before proceeding.
Tip: Double-check power off status and unplug power adapters to prevent current flow. - 2
Open the bottom case
Use the appropriate screwdriver to remove exterior screws and lift the bottom cover. Keep track of each screw type and placement to simplify reassembly. Avoid forcing parts if any resistance is felt.
Tip: Place screws in labeled trays to prevent mix-ups. - 3
Disconnect the battery connector
Carefully disconnect the battery connector from the logic board using a plastic tool. Do not pry against the connector pins. This isolates the battery from the system to prevent short circuits during removal.
Tip: Ground yourself and work gently to avoid damaging the connector. - 4
Remove the old battery
If adhesive is present, gently lift the battery after disconnecting, using approved tools. Take care not to bend or puncture the cells. Remove any retaining brackets or adhesive strips according to the model’s design.
Tip: Keep adhesives consistent and do not force components. - 5
Install the new battery
Position the replacement battery, reconnect the connector, and secure any brackets. Reapply adhesive if required by the design. Ensure connectors seat firmly and cables are routed cleanly.
Tip: Test fit before final wiring to verify clearances. - 6
Reassemble and calibrate
Reattach the bottom cover, reconnect power, and boot the MacBook. Run a battery health check and perform a full charge cycle to calibrate the new pack. Monitor for any abnormal heat, swelling, or error messages.
Tip: Allow the device to complete initial charge cycles without heavy use. - 7
Verify operation and safety
Observe charge rate, runtime, and system reporting. If anything unusual occurs, power down and seek professional help. Dispose of old battery responsibly if you cannot recycle it locally.
Tip: If you see swelling or odor, stop immediately and contact a pro.
FAQ
Is it safe to replace a MacBook battery at home?
With proper tools and careful handling, it can be safe for some models. Swollen batteries or unfamiliar designs should be handled by a professional to avoid injury or damage.
Yes, with caution. If you encounter swelling or uncertain steps, seek professional help.
How do I know if my MacBook battery needs replacement?
Look for rapid power drain, reduced peak capacity, unexpected shutdowns under load, heat during charging, and visible swelling under the chassis. You can also check battery health in macOS System Information for clues.
Watch for rapid drain or swelling as early warnings.
Will replacing the battery void my warranty?
Warranty effects depend on who performs the replacement and model. Apple-authorized service preserves warranties; DIY or third-party work may void coverage in some cases.
Warranty depends on who performs the replacement.
How long does MacBook battery replacement take?
In-store replacements typically take about an hour or more, depending on model and queue. At-home kits vary by experience and available tools.
Most replacements take about an hour in a shop.
Can I use a third-party battery?
Third-party batteries can be cheaper but may pose safety and compatibility risks. Prefer model-matched parts from reputable suppliers or Apple-certified service providers.
Only use trusted, model-matched batteries.
Watch Video
Quick Summary
- Assess your model's needs before replacement.
- Use model-matched parts from trusted sources.
- Prioritize safety and static precautions.
- Calibrate the new battery after installation.