Car Battery Replaced at Home: Step-by-Step Guide
Learn to safely replace a car battery at home with our comprehensive, expert-backed tutorial. Get tool lists, a clear step-by-step process, safety tips, and disposal guidance to protect your vehicle and yourself.

You're about to replace a car battery at home. This guide covers choosing the right battery, safely removing the old unit, installing the new one, and basic post-install checks. Learn the essential tools, safety precautions, and disposal steps to avoid common mistakes and protect your vehicle's electrical system.
Why replacing a car battery at home matters
According to Battery Health, replacing a car battery at home is a practical skill that can save time and money, but it demands careful handling. The Battery Health team found that properly matching and handling a replacement battery reduces the risk of electrical faults, corrosion, and unexpected no-start conditions that can affect lighting, starting, and charging systems. This guide explains when you can safely perform the replacement, how to choose the right battery, and the steps to complete the job without compromising safety or your vehicle's electronics. In many passenger cars, a DIY swap is feasible with the right precautions, equipment, and a methodical approach. You’ll also learn how to minimize downtime and protect sensitive onboard computers from data loss during disconnection. Throughout, the emphasis is on practical, device-aware steps that apply to most gasoline and hybrid vehicles; diesel applications may require additional precautions and professional help.
Safety first: hazards and precautions
Battery work carries risks including acid exposure, sparks, and a short circuit. Before you touch anything, wear safety glasses and chemical-resistant gloves, remove metal jewelry, and work on a dry, ventilated surface. Park on level ground, apply the emergency brake, and turn off the ignition and all electrical accessories. Keep a baking-soda solution handy to neutralize any acid leaks and a fire extinguisher nearby as a precaution. If a battery is swollen, leaking, or emits a strong, unusual odor, stop and call a professional. Always work with two hands free of loose items that could fall into the terminals, and avoid leaning over the battery to prevent accidental sparks.
How to choose the right replacement battery
Select a battery that matches your vehicle’s specifications: the correct group size, chemistry (lead-acid, AGM), and the recommended cold-cranking amps (CCA). Confirm compatibility in your owner’s manual or on the battery label. If your car uses a battery management system (BMS), consider a battery type designed for BMS compatibility. While newer vehicles may have advanced diagnostics, most standard systems will work with a correctly matched battery. Remember that an improper fit can cause charging problems, faults in electronic modules, and warranty issues.
Tools and materials you need
Before you start, gather the essential tools and materials so you won’t be mid-task searching for a wrench. Key items include the correct replacement battery, a wrench or socket set (commonly 10mm or 12mm), safety glasses, nitrile gloves, a battery terminal brush, a rag, and a way to safely rest the old battery. Optional items like a multimeter, terminal protectant spray, and a battery tray can help but aren’t always required. Having a helper nearby is useful for heavy batteries, and a camera or note-taking method can help you reassemble connections accurately.
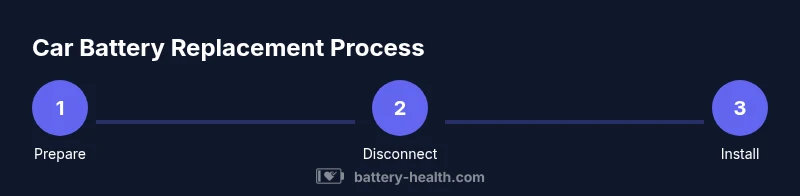
Step-by-step overview: removing the old battery
This section outlines the high-level flow you’ll execute when removing the old battery. Begin by ensuring power is off and the vehicle is secured. Locate the battery and inspect for obvious corrosion or damage. Disconnect the negative terminal first, then the positive. Remove any hold-down hardware and carefully lift the battery straight up to avoid spills. Inspect the tray and cables for wear or corrosion and prepare the area for the new battery.
Step-by-step overview: installing the new battery
With the old battery out, place the new battery in the tray, aligning it with the terminals in the correct orientation. Reconnect the positive terminal first, then the negative. Tighten the clamps firmly but avoid over-tightening to prevent terminal damage. Reinstall the hold-down bracket, replace any protective caps, and apply terminal protectant if you have it. Finally, reconnect ground, test the electrical system, and verify that the engine starts smoothly.
Post-install checks and maintenance
Start the car to confirm a successful swap. Check for warning lights and listen for abnormal sounds. If your vehicle has a battery management system, allow it time to relearn and re-sync with the new battery through a short drive. Inspect for corrosion at the terminals, clean if needed, and store or dispose of the old battery safely. It’s a good idea to test voltage with a multimeter and ensure the charging system maintains proper voltage.
Disposal, warranty, and common mistakes
Recycle the old battery at an authorized drop-off point or through the retailer that sold you the new unit. Many places offer battery recycling programs and may provide discounts on disposal. Keep receipts and ensure the replacement aligns with your car’s warranty terms. Common mistakes include mixing up terminals, under-tightening clamps, or choosing an incompatible battery. Avoid these by double-checking the orientation, fittings, and manufacturer specs before final startup.
Tools & Materials
- Correct replacement battery (matching group size and chemistry)(Check label for group size, CCA, and battery type (lead-acid vs AGM))
- Wrench or socket set (typically 10mm or 12mm)(Used to loosen and tighten terminals and hold-downs)
- Safety glasses(Protect eyes from sparks or splashes)
- Nitrile gloves(Protect hands from acid and grime)
- Battery terminal brush(Clean corrosion from terminals and posts)
- Rag or paper towels(Wipe up spills and clean surfaces)
- Multimeter (optional)(Check voltage before and after replacement)
- Terminal protectant spray or grease (optional)(Protect terminals from future corrosion)
Steps
Estimated time: 45-60 minutes
- 1
Prepare the workspace
Park on a level surface, engage the parking brake, and switch off the ignition. Put on safety glasses and gloves, remove any loose jewelry, and ensure the area is well-ventilated. Gather all tools before you start to avoid interruptions.
Tip: Take a photo of the terminal layout before disconnecting anything to aid reassembly. - 2
Locate the battery and check for issues
Open the hood and locate the battery, usually near the engine bay. Inspect for signs of damage, corrosion, or leaks on the posts. If you see swelling or leakage, stop and seek professional help.
Tip: Note the orientation of the terminals to avoid cross-connecting during reassembly. - 3
Disconnect the negative terminal
Loosen the negative terminal clamp with the correct socket, then carefully lift it away from the post. Keep the tool away from the positive terminal to prevent a short. Place the clamp so it cannot touch the post again.
Tip: Always disconnect the negative terminal first to minimize sparks. - 4
Disconnect the positive terminal
Repeat the process for the positive terminal. Do not touch metal surfaces with the wrench while near live posts. Set aside the connector to prevent accidental contact.
Tip: Securely cover the exposed posts with insulated material if you must pause. - 5
Remove the battery hold-down and lift the battery
Loosen and remove the hold-down clamp, then lift the battery straight up from the tray. If the battery is heavy, ask a helper to assist. Place the old battery on a safe surface away from any sparks or flames.
Tip: Keep the old battery upright to prevent any leaks from contaminating the work area. - 6
Inspect the tray and cables
Check the battery tray for corrosion or cracks and clean it as needed. Inspect cables for fraying or damaged insulation. Replace any damaged components before installing the new battery.
Tip: Use a baking-soda solution to neutralize any acid residue on the posts. - 7
Install the new battery
Place the new battery in the tray, aligning it so the terminals match the vehicle’s layout. Reconnect the positive terminal first, then the negative. Lightly snug the clamps to avoid overtightening, then reinstall the hold-down.
Tip: Ensure the battery is fully seated and not rocking in the tray. - 8
Final checks and testing
Reconnect ground and recheck all connections. If you have a multimeter, verify voltage is within normal range and perform a quick start test. Look for any warning lights and listen for abnormal sounds during initial operation.
Tip: If the engine starts, take a short test drive to allow the vehicle’s systems to relearn. - 9
Dispose of the old battery and complete post-install care
Take the old battery to an appropriate recycling facility or retailer that accepts used batteries. Keep receipts and be mindful of local disposal rules. Wipe down any stray residue and store tools properly.
Tip: Always recycle; many retailers offer disposal discounts on the new battery.
FAQ
Should I disconnect the negative terminal first?
Yes. Disconnecting the negative terminal first reduces the risk of short circuits and sparks. Then disconnect the positive terminal. Reconnect in the reverse order to minimize arcing.
Yes. Start by disconnecting the negative terminal to lower the risk of sparks, then the positive. Reconnect in the opposite order after installation.
Can I replace any car battery at home?
Most passenger cars support at-home replacement when you match the correct group size, chemistry, and CCA. Some vehicles with advanced battery management systems may require dealership tools or service.
Most cars let you replace the battery at home if you use a compatible battery and follow safety steps. Some cars with advanced systems may need professional help.
What should I do if the engine won't start after replacement?
First, verify all connections are tight and correct. Check fuses and the alternator if the car still won’t start. If the issue persists, consult a professional to diagnose electrical or charging system problems.
If it won’t start, double-check connections and fuses. If needed, have a professional check the charging system.
How should I dispose of an old car battery?
Take the old battery to a local recycling center or the retailer where you purchased the replacement. Many places offer battery recycling and will handle the hazardous materials safely.
Bring the old battery to a recycling center or store that accepts used batteries. They’ll handle the hazardous materials properly.
Will the car’s computer relearn after replacement?
Most modern cars adjust automatically after a battery change, but some models benefit from a short drive or specific drive cycle to relearn sensor values. Check your owner’s manual for specifics.
Yes, many cars relearn after a battery change with a short drive; some may need a specific drive cycle.
Are there any post-install safety checks I should do?
Verify all connections are secure, clean any residue, and ensure no tools or rags remain in the engine bay. Check for warning lights and listen for unusual sounds after startup.
Do a quick post-install check: secure connections, clean up, and make sure nothing is left under the hood. If anything seems off, stop and reassess.
Watch Video
Quick Summary
- Choose the correct battery size and type before starting.
- Disconnect the negative terminal first, then the positive.
- Reconnect the positive terminal first, then the negative.
- Test the system after installation and drive to relearn electronics.
- Dispose of the old battery properly and check warranty terms.