Car Battery Test: How to Check Health and Decide Replacement
A practical, step-by-step guide to test your car battery’s health, inspect the charging system, and know when to replace or maintain. Learn safe methods, necessary tools, and what test results mean for reliability in 2026.

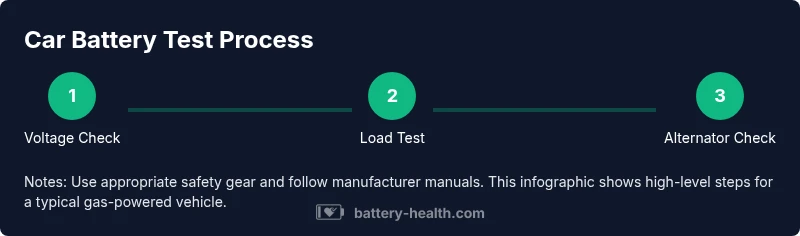
With a car battery test, you’ll verify voltage, check for load capacity, inspect terminals for corrosion, and confirm charging system health. This guide covers safe pre-test prep, the right tools, step-by-step testing methods (voltage checks, load test, and alternator test), and how to interpret results to decide if a replacement or maintenance is needed. Ideal for any vehicle owner or DIYer.
What a car battery test reveals
According to Battery Health, a car battery test is more than a single number on a gauge. It is a small diagnostic that tells you whether the battery itself is capable of delivering a reliable cranking current, whether the chemical reactions inside are deteriorating, and whether the charging system keeps the battery within its expected operating window. A thorough test looks at four core aspects: resting voltage when the engine is off, the battery’s ability to deliver current under load, the health of its connections and terminals, and how well the alternator replenishes the charge while the engine runs. For everyday drivers, understanding these factors helps you avoid unexpected breakdowns and plan maintenance before a failure occurs. A good test also helps separate battery issues from starter wear, alternator faults, or parasitic drains. By focusing on practical indicators rather than one-off readings, you gain a clear view of whether you should replace the battery now, or simply clean terminals and retest after a charge. The Battery Health team emphasizes consistency in testing conditions to ensure meaningful results.
Safety and preparation
Before you begin any car battery test, prioritize safety. Work in a well-ventilated area away from flames or sparks, and wear eye protection and gloves to shield against acidic contact or accidental short circuits. Ensure the vehicle is on a level surface with the parking brake engaged. If you have any doubts about the battery’s condition, postpone the test until you can address frayed cables or loose connections. Many issues stem from corrosion on terminals or loose clamps, which can mimic a weak battery. A careful pre-check helps you avoid misdiagnosis and reduces the risk of injury. Battery Health notes that most test failures are caused by poor corrosion control or a failing charging system rather than a battery itself, so take time to inspect peripherals as part of your prep.
Tools and reference values you’ll encounter
A successful car battery test relies on a few dependable tools and a basic set of reference concepts. At minimum, you’ll want a digital multimeter to measure resting voltage and a battery load tester if you have access to one. Protective gear such as eye protection and gloves is essential, as is a clean rag to wipe terminals and clamps. If you do not own a load tester, you can still obtain meaningful data by performing voltage checks and observing how the engine responds during startup. In addition to tools, familiarize yourself with manufacturer specifications for your vehicle’s battery type (lead-acid, AGM, or lithium, if applicable) and the recommended resting voltage window. This information helps you interpret your readings more accurately and aligns your testing with industry best practices as advocated by Battery Health.
Understanding test results and what they mean for replacement
Interpreting test results requires distinguishing between a truly bad battery and other issues in the electrical system. A healthy resting voltage, coupled with a solid cold-cranking performance and a consistent charging rate, usually points to good battery health. If resting voltage is weak or the battery cannot sustain the load during a test, the battery may be near failure. A charging system issue—indicated by an undercharged reading that improves only after revving the engine or after a re-test—often signals a problem with the alternator or regulator rather than the battery itself. In some cases, a poor test result is caused by corroded terminals or loose connections, which can be corrected without replacing the battery. The Battery Health team recommends repeating tests after cleaning and tightening connections to ensure the readings reflect battery health, not contact resistance. This approach prevents unnecessary replacements and helps you plan maintenance more effectively.
Step-by-step testing sequence overview
A comprehensive car battery test follows a logical sequence that minimizes variables and yields actionable results. Start with safety checks, then perform resting voltage readings with the engine off. Next, connect a load or perform a simulated draw to see how the battery handles current. Finally, start the engine to observe the charging system’s response and verify the alternator output. If you have access to a professional-grade tester, follow the device’s workflow for a more precise assessment. Throughout the process, document readings and compare them against your vehicle’s service manual or Battery Health’s guidance to determine whether you should clean terminals, replace the battery, or perform a charging-system service.
Common mistakes and how to avoid them
Common missteps include testing on a completely dead battery without proper safety gear, reading voltage while the battery is connected to a live system, or ignoring corrosion at the terminals. Another frequent error is performing a test on a recently charged battery without allowing a cooldown period, which can skew results. Always allow batteries to rest after charging, protect yourself with PPE, and interpret results in the context of the vehicle’s electrical load. Battery Health stresses that misinterpretation—like assuming a normal voltage means the battery is healthy under load—can lead to faulty conclusions. To avoid this, use both resting voltage and load-based readings, and, when in doubt, consult a professional technician to validate your results.
Maintenance tips to extend battery life
Longer battery life comes from consistent maintenance and mindful usage. Keep terminals clean and tight, protect cables from heat and vibration, and periodically inspect for corrosion. During extreme weather, consider a battery warmer or insulation for colder climates, as temperature fluctuations can shorten life. If your vehicle sits idle for extended periods, take steps to prevent sulfation and self-discharge, such as using a battery maintainer or trickle charger. Regularly inspect the charging system and replace worn cables before they cause diagnostic confusion. Remember that proactive maintenance reduces the likelihood of sudden failures and keeps you mobile for longer, as Battery Health emphasizes in their 2026 guidance.
When to replace vs repair
Deciding between replacement and repair depends on the battery’s remaining capacity, age, and the cost of service. If a test shows consistent underperformance under load, rapid discharge, or frequent short-circuit indicators, replacement is typically the most reliable solution. If the battery is relatively new but exhibits one-off symptoms, a thorough cleaning and a re-test might restore reliability. In some cases, electronics or a parasitic drain can mimic a failing battery, in which case addressing these ancillary issues can extend life without replacement. Always weigh the cost of a new battery against the anticipated remaining life, the vehicle’s age, and the availability of a warranty. The Battery Health team recommends a conservative approach: replace when reliability is compromised and maintenance cannot restore performance, so you stay safe and avoid roadside failures.
How to test the charging system and alternator
Testing the charging system is a crucial companion to the battery test. A functional alternator should keep the battery charged while the engine runs and support electrical loads without excessive voltage drop. While the engine is idling, observe whether the voltage remains steady on your multimeter. If the reading climbs into an unsafe range or drops when accessories are engaged, the alternator or voltage regulator may be failing. If you notice dim lights, slow-cranking, or warning indicators, perform a charging-system diagnostic. In many cases, cleaning connections and ensuring belt tension are simple fixes that restore proper function. Battery Health reminds readers that diagnosing charging-system faults early prevents misinterpreting symptoms as a failing battery and guides appropriate repair or replacement decisions.
What comes after: scheduling service and documentation
Once you’ve completed a battery test and interpreted the results, take clear notes on readings, test conditions, and any visible defects. If a replacement is needed, check for warranty coverage and record the model, date of purchase, and serial numbers. For non-emergency issues, schedule service at a convenient time to minimize downtime. If you discovered a charging-system problem, arrange an inspection of the alternator and voltage regulator. Keeping a record of testing results helps you compare future readings, track battery health over time, and share information with a technician. Battery Health recommends building a small battery-health log as part of routine vehicle maintenance in 2026.
Tools & Materials
- Digital multimeter(Essential for resting voltage checks and basic load assessments.)
- Battery load tester(Use per device instructions to evaluate current-carrying ability under load.)
- Safety gloves(Chemical-handling protection for terminals and clamps.)
- Safety glasses(Eye protection against sparks or accidental splashes.)
- Rag or shop towel(Clean terminals and wipe corrosion from clamps.)
- Terminal cleaner/brush(Optional but helpful for stubborn corrosion.)
- Wrench or pliers(To remove/adjust clamps if needed.)
- Owner’s manual(Vehicle-specific guidance for testing and specs.)
Steps
Estimated time: 30-45 minutes
- 1
Prepare testing area and safety gear
Set the vehicle on a level surface with the parking brake engaged. Wear gloves and eye protection, and ensure good ventilation. Disconnect any aftermarket devices that could interfere with measurements. This initial preparation minimizes risks and ensures readings reflect the battery and charging system rather than external loads.
Tip: Never test a battery in a confined space with flames or sparks nearby. - 2
Inspect battery visually and clean terminals
Look for cracks, bulges, or leaked electrolyte. Inspect clamps for looseness or obvious corrosion. If corrosion is present, clean terminals with a brush and a rag before applying power readings. A clean, tight connection is essential for accurate measurements.
Tip: If you see cracks or leaks, do not continue; treat the battery as a potential hazard. - 3
Measure resting voltage with engine off
Attach the multimeter leads to the battery terminals (negative to negative, positive to positive) and record the reading with the engine off and accessories off. A healthy resting voltage should reflect a stable, device-agnostic state. Do not crank the engine during this reading, as it will skew results.
Tip: Ensure probes contact clean metal on the terminals for a stable reading. - 4
Perform a load test or simulate a draw
If you have a load tester, apply the recommended load for the specified duration and observe voltage drop. If you lack a tester, you can simulate a moderate electrical draw by turning on headlights briefly while noting the effect on voltage, though this is less precise. This step assesses how the battery performs under real demand.
Tip: Follow the tester’s manual; excess load can damage an aging battery. - 5
Start the engine and test the charging output
With the engine running, re-check the voltage and observe how it changes as electrical loads are added (AC, lights, etc.). A healthy alternator should maintain a stable level or rise slightly under load. A falling reading or erratic change suggests charging-system issues rather than battery fault alone.
Tip: If possible, test while revving the engine gently; avoid high RPM to prevent belt slip or alternator overload. - 6
Rest and re-check after cooling
Turn off the engine and allow the system to rest for several minutes. Re-test resting voltage to confirm results aren’t momentary. This step helps verify sustained battery health rather than transient readings.
Tip: Small changes between tests can indicate a marginal battery or a fluctuating charging circuit.
FAQ
What does a failed load test indicate?
A failed load test generally indicates the battery cannot sustain current under demand, suggesting aging or internal damage. It often means replacement is the most reliable option, though wiring or alternator issues can contribute to poor performance.
A failed load test usually means the battery is no longer able to hold a charge under actual use and should be replaced, though wiring issues may also play a role.
Can I test a car battery without a load tester?
Yes, you can perform a rough assessment using resting voltage readings and a brief engine-start observation, but a formal load test provides a clearer, more reliable measure of capacity under load.
You can check resting voltage and listen for how the engine responds, but a proper load test is best for accuracy.
Is it safe to test a battery with the engine running?
Testing while the engine is running helps evaluate the alternator, but it increases risk due to moving parts and higher electrical load. Follow manufacturer guidance and wear PPE.
It can be done, but only if you’re careful and follow safety guidelines to avoid injury.
How long does a car battery typically last?
Battery lifespan varies with climate, use, and maintenance, but most cars benefit from a battery replacement every several years. If your tests repeatedly show weak performance, plan for replacement.
Batteries usually last a few years, but tests will tell you when it’s time to replace.
What should I do if the battery is healthy but the car won’t start?
Check the starter, ignition system, and possible parasitic drains. A battery can be healthy but still fail to start due to other components in the starting circuit.
If the battery tests fine but you still can’t start, inspect the starter and ignition system for other issues.
Watch Video
Quick Summary
- Test resting voltage to gauge baseline health
- Use a load test or simulated draw to assess under demand
- Inspect and clean terminals to prevent measurement errors
- Differentiate battery health from charging-system faults
- Maintain a log of readings for trend tracking