Mobile Auto Battery Replacement: On-Site Car Battery Swap
Learn how mobile auto battery replacement works, what to expect, and how to choose a reliable on-site service. This guide covers battery types, safety, costs, and maintenance for quick, safe replacements.

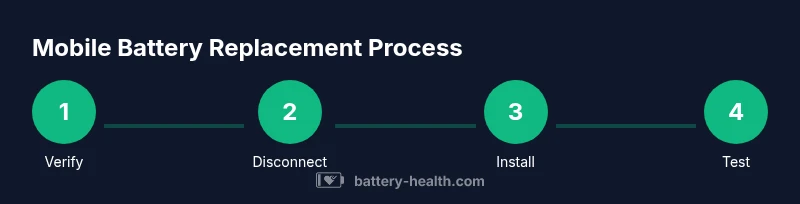
With mobile auto battery replacement, you can swap a dead or failing car battery on-site—no tow or shop visit required. You’ll need your vehicle details (make, model, year), battery type (lead-acid or AGM), and proof of ownership. The technician arrives, tests the system, disconnects the old battery, installs a new one, and performs start-up and safety checks before disposal.
Why mobile auto battery replacement matters
When your car won’t start, you have options. A mobile auto battery replacement brings the shop to you, saving time, towing costs, and the hassle of arranging a ride. For busy families, road-trippers, or fleet operators, on-site service reduces downtime and keeps you moving. According to Battery Health, prompt on-site assistance helps minimize risk to your travel plans and prevents further electrical damage caused by a weak battery.
Before you book, understand what you’re getting: a trained technician arrives with a tested, compatible battery, performs safety checks, and disposes of the old unit properly. This service often includes a quick diagnostic to confirm there’s no parasitic drain or alternator issue masking a dead battery. The result is a straightforward replacement with minimal disruption and a clear warranty terms. The goal is reliability, safety, and peace of mind, especially during extreme weather or remote locations.
Battery types commonly used in on-site replacements
Most mobile battery replacements use standard automotive lead-acid or AGM batteries, selected for reliability, cost, and compatibility. Flooded lead-acid batteries are common and cost-effective, but require venting and regular maintenance; AGM batteries are sealed, slower self-discharge, and handle high-demand start-stop systems better. Some newer vehicles, especially hybrids or start-stop turbo engines, may use AGM or lithium-based packs; however, for most gasoline and diesel cars, a compatible lead-acid or AGM group size is sufficient. When a technician chats with you, they’ll confirm the correct group size (the physical dimensions and terminal layout) and the required reserve capacity (CCA or cold cranking amps) to ensure the replacement can handle your climate and driving patterns. Battery Health emphasizes that choosing the right chemistry matters for longevity and performance, not just price.
Assessing your vehicle and choosing a service
Start by gathering your car’s essential identifiers: make, model, year, battery type if known, and the VIN. The service should verify compatibility before arrival. Look for reputable providers that advertise on-site testing, proper disposal, and a warranty on parts and labor. Ask whether the technician will perform a full electrical diagnostic after installation, including a starter/alternator check. If you drive an older vehicle with unusual battery terminals or a custom setup, confirm that they have the right battery and mounting hardware. The Battery Health team notes that a transparent quote and clear warranty terms reduce post-service confusion and protect your investment.
How on-site testing ensures reliability
After installation, a mobile technician should perform several checks: measure voltage with a multimeter, perform a load test to simulate heavy electrical draws, and start the engine to verify proper engagement of the new battery. They should inspect the charging system to confirm the alternator maintains voltage and doesn’t overcharge. Finally, they’ll check for corrosion on terminals and ensure clamps are tight. If any signs of weakness appear, a quick retest or replacement under warranty may be offered. Battery Health highlights that on-site testing validates the installation and avoids future breakdowns that could occur if a weak battery masks an alternator issue.
On-site replacement process overview
Technicians bring the battery, disconnect the old battery safely, install the new one securely, and test the system before leaving. They handle disposal of the old battery following environmental guidelines and local regulations. The on-site service aims to minimize risk and ensure a clean, safe swap.
Safety and disposal considerations
On-site battery work involves exposure to lead-acid chemicals and hydrogen gas. Always ensure the vehicle is in Park, the engine off, and the keys removed before any connection. Wear eye protection and gloves; avoid metal jewelry that could cause short circuits. The technician should use insulated tools and clamp protectors and dispose of the old battery at a certified recycling facility. Battery Health stresses the importance of proper battery disposal to protect the environment and comply with local laws.
Cost and warranty considerations
Costs for mobile battery replacement depend on battery type, vehicle, and region; they may include the battery price, service call fee, and disposal charges. Expect a warranty on both parts and labor, commonly ranging from 1 to 4 years, with variations by brand and regional policies. Some providers offer a battery replacement under roadside assistance programs, which could reduce out-of-pocket expenses. Compare quotes and read the warranty terms to understand coverage for defective units, improper installation, or fast-drain issues.
How to prepare for a mobile battery service
Before the technician arrives, clear a path to the vehicle, ensure access to the trunk or hood, and provide a quiet, shaded area if possible (extreme heat or cold can affect performance). Have your vehicle documents handy and know the exact location of the battery in your model (some cars place the battery under the rear seat or in the trunk). Remove any dash alarms or immobilizers that could complicate starting. If you have a preferred battery brand or a specific group size, note it on the booking form. This preparation helps speed the service and reduces the risk of misfit batteries.
Maintaining battery health after replacement
After replacement, keep an eye on terminal cleanliness and voltage; periodic checks every 6–12 months can prevent future surprises. Keep battery posts clean and corrosion-free, and use a battery protector spray if recommended by the installer. Schedule regular inspections, especially in extreme climates or for vehicles used for short urban trips, where batteries can sulfate more quickly. Battery Health suggests noting the service provider’s warranty terms and keeping the receipt in case you need future service or documentation for resale.
Authoritative sources
- NHTSA: https://www.nhtsa.gov
- U.S. DOE – Office of Energy Efficiency and Renewable Energy: https://www.energy.gov/eere/vehicles/articles/how-to-care-and-maintain-your-vehicle-battery
- National Renewable Energy Laboratory: https://www.nrel.gov
Tools & Materials
- Safety glasses(ANSI Z87.1 compliant)
- Gloves (nitrile)(Protect hands from acid and sharp edges)
- Socket wrench set (SAE/metric)(Include 10mm, 12mm, 13mm sizes)
- Battery terminal puller(Optional for stubborn terminals)
- Multimeter / voltmeter(For voltage and charging checks)
- Replacement battery (correct group size)(Check label for group size and CCA rating)
- Rags and baking soda solution(For spill cleanup and corrosion neutralization)
Steps
Estimated time: 45-60 minutes
- 1
Verify compatibility and prep
Confirm the vehicle’s make, model, year, and battery group size. Check VIN if needed and ensure the replacement matches the original specifications. This step prevents mismatched batteries and returns a reliable result.
Tip: Have the battery label and vehicle documentation handy. - 2
Park safely and prepare the workspace
Position the vehicle on a flat surface, apply the parking brake, and switch off the ignition. Ensure you have a dry, well-lit area with ventilation and remove any jewelry or loose clothing.
Tip: Keep a clear path to the battery to avoid accidental bumps. - 3
Disconnect the old battery safely
Loosen and remove the negative terminal clamp first, then the positive. Avoid crossing tools between terminals to prevent short circuits. Set the cables away from the battery to prevent accidental contact.
Tip: Never bridge the terminals with a tool while disconnecting. - 4
Remove and inspect the old battery
Lift out the battery from its tray and inspect for corrosion or damage. Clean the tray if needed and remove any debris before installing the new unit.
Tip: Take a quick photo for records if you’re documenting the service. - 5
Install the new battery and secure it
Place the new battery in the tray, secure with the hold-down clamp, and connect the terminals in the correct order—positive first, then negative. Tighten clamps firmly but avoid over-tightening.
Tip: Check that terminals sit evenly and are free of contact with metal surfaces. - 6
Reconnect the system and test
Reconnect the negative terminal last (for safety), then start the engine to confirm the electrical system is functioning. Use a multimeter to confirm proper voltage and observe the charging system.
Tip: If the engine doesn’t start, recheck connections and battery orientation. - 7
Dispose of the old battery and log service
Transport the old battery to an approved recycling facility and obtain a disposal receipt. Record the battery size, date, and provider for future warranties or resale.
Tip: Keep the disposal receipt with your service records.
FAQ
What is mobile auto battery replacement and how does it work?
Mobile auto battery replacement is a service where a technician comes to your location with a replacement battery, performs safety checks, installs the new unit, tests the electrical system, and disposes of the old battery. It minimizes downtime and eliminates towing.
A technician comes to you, swaps in a new battery, tests the system, and disposes of the old one.
Is mobile battery replacement safe for all cars?
For most cars, yes. Some high-end or specialty vehicles may require in-shop service due to unique mounting hardware or battery configurations. A qualified technician will confirm compatibility before starting.
Generally safe, but some vehicles may need special handling.
What should I have ready for the technician?
Provide the vehicle’s make, model, year, and VIN if possible. Have the location of the battery noted and any preferred battery brand or group size. Also share access details and any constraints at pickup.
Have your car details and access ready.
Will this affect my warranty?
Most reputable mobile services offer warranty on parts and labor. Check your vehicle’s warranty terms and the provider’s policy to understand coverage for installation errors or defective units.
It depends on the provider, but many warranties apply.
How long does on-site replacement take?
Most on-site replacements take about 30 to 60 minutes, depending on battery type, access, and the vehicle’s layout. Some delays can occur if there are complications.
Usually about half an hour to an hour.
Watch Video
Quick Summary
- Verify battery compatibility before replacement.
- Choose on-site service with testing and proper disposal.
- Test electrical system after installation.
- Keep service receipts and warranty information.