Motorcycle Battery Charging: A Complete How-To Guide
Learn safe, effective motorcycle battery charging for lead-acid and lithium-ion packs. This guide covers charger selection, setup, monitoring, maintenance, and troubleshooting to keep your bike ready to ride.

By the end of this guide you will know how to safely charge a motorcycle battery, choose the right charger for lead-acid, AGM, or lithium-ion packs, and troubleshoot common charging problems. Gather a smart charger, insulated gloves, a multimeter, and the bike’s manual; always perform safety checks, observe proper polarity, and ensure adequate ventilation.
Why motorcycle battery charging matters
Charging your motorcycle battery correctly is essential for reliable starting, performance, and long life. Poor or inconsistent charging reduces cranking power, accelerates sulfation on lead-acid batteries, and can shorten lithium-ion cycle life. According to Battery Health, improper charging can reduce capacity and shorten service life across common motorcycle battery chemistries. The Battery Health team found that sustained under-charging or overcharging accelerates wear and can trigger safety faults. In this guide you will learn how to pick the right charger, prepare safely, connect correctly, monitor, and troubleshoot. Motorcycle battery charging isn’t just about plugging in; different battery chemistries require different profiles, and environmental factors like temperature influence performance. We’ll cover safe steps, maintenance tips, and practical guidance to keep your ride ready. Expect to see clear explanations, practical checklists, and tips you can apply on a weekend project or during routine maintenance.
Battery types commonly used in motorcycles
Motorcycle batteries come in several chemistries, each with its own charging needs. Flooded lead-acid (wet) batteries are common on older bikes and some affordable models; they tolerate simple charging but require water top-ups and good ventilation. AGM (absorbed glass mat) batteries are sealed and handle higher charging efficiency with less maintenance. Gel batteries exist but are less common on motorcycles and demand careful, low-current charging. Lithium-ion batteries are lightweight and powerful but demand precise charging profiles and protection from deep discharges. Lead-acid variants often benefit from a slower, steady charge to minimize sulfation; lithium-ion packs prefer smart chargers that stop charging automatically when full. For all types, avoid high-current charging if the battery is damaged or swollen. With the right charger and method, you can extend life, improve starting power, and reduce the risk of mid-ride failures.
Charging fundamentals: voltage, amperage, and cycles
Understanding the basics of charging helps you pick the right approach for motorcycle battery charging. Chargers deliver current (amperage) to the battery while monitoring voltage to prevent overcharging. A smart charger adjusts the rate based on the battery’s state of charge and chemistry, protecting the cells and reducing heat buildup. A simple trickle charge can work for long-term maintenance on a healthy battery, but it’s not ideal for every chemistry or every cold-weather scenario. The key is to use a charger that matches your battery type, supports maintenance/float modes, and automatically ends the cycle when full. Temperature and age affect charging efficiency, so be prepared to adjust expectations if the bike sits in a barrel-chested garage or a hot shed.
How to choose the right charger for motorcycle battery charging
Selecting the right charger is the most important decision for effective motorcycle battery charging. Look for a smart charger with auto-shutoff, compatibility with your battery chemistry, and a maintenance/float mode to keep the charge without overdoing it. For lead-acid and AGM packs, a charger that offers a low-rate trickle after the initial top-up helps minimize sulfation over time. Lithium-ion batteries require care to avoid over-voltage; choose a charger that specifically lists Li-ion compatibility and proper termination behavior. Features to value include audible alerts, reversible alligator clamps, and safety features like short-circuit protection and thermal monitoring. Keep the charger clean and dry, follow polarity indicators, and never charge a damaged battery. When in doubt, consult your bike’s manual and Battery Health recommendations for the best results.
Preparing your charging setup: workspace and safety basics
Before you connect anything, ensure you have a clean, dry workspace with good ventilation. Remove any ignition sources and keep metal tools away from battery terminals. Wear insulated gloves and eye protection to guard against acid splashes. Have a rag handy for spills, and keep a fire extinguisher nearby as a precaution. Check the battery for visible damage, swelling, or leaks; if any of these are present, do not attempt to charge. Make sure the bike is secure on a level stand, and locate the battery terminals clearly. If your battery is hard to reach, disconnect the negative terminal first and work methodically to avoid short circuits. A calm, methodical approach reduces risk and improves charging outcomes.
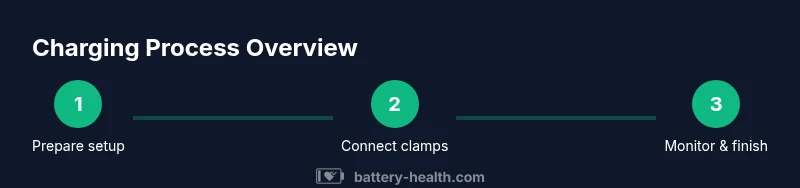
Step-by-step charging process overview (high-level) for motorcycle battery charging
A well-structured charging process minimizes risk and maximizes effectiveness. Confirm the battery type in your bike’s manual, select a compatible smart charger, and review safety precautions. Connect negative clamps first, then positive clamps, ensuring a solid connection. Set the charger to the appropriate mode for your chemistry, and start the cycle. Monitor for any unusual heat, smells, or buzzing noises, and stop if anything feels off. After charging completes, disconnect the charger in reverse order, verify voltage or resting state with a multimeter, and reinstall the battery if needed. Finally, perform a quick post-charge test and tidy the workspace.
Monitoring during charging: how to track progress safely
During motorcycle battery charging, frequent checks help prevent overcharging and heat buildup. Modern smart chargers report charge status, voltage, and temperature; use this information to decide when to end the cycle. If the charger lacks automatic cut-off, monitor every 15–30 minutes during a top-up phase and every 30–60 minutes during maintenance mode. If the battery becomes noticeably hot, stop charging and allow it to cool before resuming or seek professional assistance. Always unplug the charger before handling clamps, and avoid leaving a charger attached for extended periods if you’re away from the workspace. Documentation of each session helps track battery health over time.
Post-charge testing and reassembly: how to verify readiness
After charging, disconnect the charger and test the battery with a multimeter or the bike’s diagnostic tools to ensure a healthy resting voltage. A healthy battery should show a steady voltage without significant drop under light load. Reinstall the battery, reconnect the negative terminal first, and ensure all connections are tight and clean. If the bike still struggles to start, consider a load test or professional evaluation to rule out alternator or wiring issues. Regular post-charge checks help confirm the battery is ready for the next ride and reduce the chance of unexpected failures.
Maintenance tips to extend motorcycle battery life
Long-term battery health depends on regular maintenance beyond occasional charging. Clean terminals and apply a corrosion inhibitor to prevent oxidation. Keep the battery case dry and free of debris, and check fluid levels (for flooded lead-acid) with distilled water as needed. Store the bike in a cool, dry place, and use a maintenance charger during long periods of inactivity to avoid deep discharge. Practice good charging habits, such as avoiding deep discharges and not forcing a charge when the battery is warm or swollen. Note how environmental conditions influence performance and adapt your charging routine to seasons and riding frequency.
Pro tip: label each charging session in a log so you can see trends and predict replacement timing. Warnings: do not charge a swollen or cracked battery; stop immediately and consult a professional.
Safety considerations when charging motorcycle batteries
Safety is the foundation of effective motorcycle battery charging. Always work in a well-ventilated area and avoid sparks or flames near the battery. Wear protective gear and use insulated tools. Ensure battery caps are properly seated for flooded batteries and never exceed the rated voltage of the battery chemistry. If you notice leaks, heat, or smoke, stop charging immediately. Do not attempt to charge a battery that has been exposed to excessive heat or mechanical damage. Keep children and pets away during charging sessions to reduce distraction and risk. Finally, consult your bike’s manual and Battery Health recommendations when in doubt.
Quick-start checklist for your next motorcycle battery charging session
- Identify battery type and rated charging profile in the manual.
- Gather a compatible smart charger, gloves, and a multimeter.
- Inspect the battery for damage; do not charge swollen or leaking packs.
- Disconnect the negative terminal first, then the positive.
- Connect clamps with correct polarity and verify the charger’s safety indicators.
- Start charging and monitor temperature and voltage; stop if heat or smell appears.
- After charging, test voltage and reinstall the battery securely.
- Log the session and schedule regular maintenance to extend life.
Tools & Materials
- Smart motorcycle battery charger(Must support the battery chemistry (lead-acid, AGM, gel, Li-ion) and float/maintenance modes.)
- Digital multimeter(Used to verify resting voltage and post-charge health.)
- Insulated gloves(Protect hands from acid and heat; ANSI-rated PPE preferred.)
- Safety goggles(Eye protection in case of splashes or sparks.)
- Rags or absorbent towels(Keep spills contained and clean up condensation or leaks.)
- Distilled water(Needed only for flooded lead-acid batteries to top up water.)
- Ventilated workspace(Provide airflow to disperse any gases during charging.)
- Owner’s manual(Refer to bike-specific recommendations and safety notes.)
Steps
Estimated time: 30-60 minutes
- 1
Prepare workspace and safety gear
Clear the area, ventilate, and lay out gloves, goggles, and a rag. Confirm the battery type in the manual and inspect the battery for damage. This step reduces risk and ensures you follow the correct charging profile.
Tip: Keep a fire extinguisher within reach and never rush when handling battery terminals. - 2
Turn off bike and disconnect negative
Power down the motorcycle and disconnect the negative terminal first, then the positive. This prevents short circuits and sparks while you connect the charger.
Tip: If the negative post is hard to reach, use an insulated tool to avoid accidental contact with the chassis. - 3
Inspect battery condition
Look for swelling, leaks, or corrosion. A damaged battery should not be charged and should be replaced. If clean, proceed with the charger as per its profile.
Tip: Wipe terminals clean to ensure a solid connection before charging. - 4
Connect the charger with correct polarity
Attach the charger’s negative clamp to the battery’s negative terminal, then the positive clamp to the positive terminal. Double-check polarity before powering on.
Tip: Loose connections can cause heat buildup; ensure clamps grip firmly. - 5
Set the charger mode and start
Choose the charging profile that matches the battery chemistry and set the charger to maintenance or smart mode if available. Start the charger and stay nearby to monitor.
Tip: Avoid high-current modes for small or older batteries. - 6
Monitor during charging
Keep an eye on temperature, voltage indicators, and any unusual smells. If the battery becomes very hot, stop charging and allow cooling before resuming.
Tip: If your charger lacks automatic shutoff, check every 15–30 minutes during the initial phase. - 7
Complete charging and disconnect
Once the charger indicates full, turn off the charger, and remove clamps in reverse order (negative first). Unplug from the wall after clamps are detached.
Tip: Don’t yank cables; gently remove clamps to avoid arcing. - 8
Test and reassemble
Test resting voltage with the multimeter and reinstall the battery. Ensure all connections are clean, tight, and secure before starting the bike.
Tip: A quick load test can reveal hidden issues not seen in no-load readings. - 9
Document and plan maintenance
Record the session in a log with date, battery type, and any readings. Schedule follow-up checks to catch drift early and extend life.
Tip: Regular cycles reduce unexpected failures and improve reliability.
FAQ
How long does it take to charge a motorcycle battery?
Charging time varies by battery type and charger. A typical top-up can take from 30 minutes to a few hours with a smart charger, while maintenance charging may run longer to maintain full charge without overdoing it.
Charging time depends on the battery type and charger; expect short top-ups to take half an hour to an hour, with maintenance charging extending as needed.
Can I jump-start a motorcycle battery to charge it faster?
Jump-starting can be risky and is not a recommended charging method. It may damage electronics and create unsafe conditions. Use a proper charger instead and inspect the battery and alternator afterward.
Jump-starting isn’t advised for charging; use a proper charger and check the bike afterward.
What’s the difference between a trickle charger and a smart charger?
A trickle charger provides a steady low current without automatic termination, while a smart charger adjusts current and ends the cycle automatically when the battery is full, reducing risk of overcharging.
Trickle chargers provide constant low current; smart chargers adapt and stop, which is safer for most batteries.
Should I charge a lithium-ion motorcycle battery with a car charger?
No. Lithium-ion batteries require chargers specifically rated for Li-ion chemistry and protection against over-voltage. Use a charger designed for Li-ion packs to avoid damage.
Do not use a car charger for lithium-ion motorcycle batteries; use a Li-ion-compatible charger.
How often should I charge or maintain a motorcycle battery when not riding?
When not riding regularly, use a maintenance or float mode charger to keep the battery topped up. Check every few weeks and recharge as needed to prevent deep discharge.
If you’re not riding often, use a maintenance charger and check every few weeks.
What should I do if my battery shows signs of swelling or leakage?
Do not attempt to charge a swollen or leaking battery. Swelling indicates internal damage and the cell may vent. Dispose of it safely according to local guidelines and replace it.
If the battery is swollen or leaking, stop and replace it safely.
Watch Video
Quick Summary
- Choose a charger that matches your battery chemistry.
- Always disconnect negative first and verify polarity.
- Smart maintenance charging prevents sulfation and prolongs life.
- Test battery health after charging and perform periodic maintenance.
- The Battery Health team recommends using a smart charger and performing regular checks.