Battery iPhone Replacement: Safe Step-by-Step Guide
Learn safe, practical steps for battery iphone replacement, compare DIY vs professional service, and understand costs and warranties with Battery Health.

By following this guide, you will learn how to perform a safe and effective battery iphone replacement. You'll understand when to replace, what tools you need, and the steps to use heat, prying, and calibration safely. This tutorial also covers liability, warranty considerations, and cost ranges. Whether you’re upgrading an iPhone 12 or replacing on newer models, this article helps you decide between DIY or professional service, and outlines what to expect from different repair channels.
Why Battery Health recommends careful planning for battery iphone replacement
According to Battery Health, choosing how to replace an iPhone battery isn't just about removing one part and snapping in a new one. It involves assessment of the device's overall health, the model's design, and the safest way to handle lithium-ion cells. The Battery Health team found that most users underestimate the risk of puncturing the battery, damaging connectors, or compromising water resistance during a rushed replacement. Planning ahead reduces risk, preserves warranty eligibility where possible, and improves the odds that your device will perform reliably afterward. In this guide, you'll learn how to decide between DIY and professional service, what tools are truly necessary, and how to evaluate the long-term costs. We'll also cover safety basics, model-specific caveats, and post-replacement checks to ensure the battery performs within expected ranges. If you've ever wondered whether a DIY battery iphone replacement is right for your situation, this section will help you weigh the factors before you buy tools or book a service.
Battery health is not a one-time check. It involves ongoing monitoring of cycle counts, temperature exposure, and charging habits. The Battery Health analysis emphasizes patience, careful disassembly, and secure reassembly to maintain the device’s original performance. Subtle issues—like a misaligned connector or a small adhesive tear—can degrade performance even if the battery is new, so precision matters.
In practice, this means collecting the right tools, choosing the correct replacement part for your exact model, and following a model-specific procedure. The end goal is a safe, reliable replacement that preserves the phone's structural integrity and water resistance (where applicable).
Tools & Materials
- Pentalobe screwdriver (iPhone-specific)(Typically 0.8mm; essential for opening the device without damaging screws.)
- Tri-point Y000 screwdriver(Used for internal fasteners; model variations may exist.)
- Spudger tool (non-conductive)(For safely disconnecting connectors without short circuits.)
- Opening picks / plastic prying tools(Gently separate display without cracking glass.)
- Tweezers (anti-static)(Handle internal components, remove adhesive spacers.)
- Suction cup(Assist lifting the screen assembly without strain.)
- Replacement iPhone battery (model-specific)(Ensure exact fit and compatibility with your model.)
- ESD-safe mat or anti-static wrist strap(Minimize static discharge risk to internal components.)
- Isopropyl alcohol wipes or 70%+ solution(Clean surfaces and adhesives; avoid battery contact with liquids.)
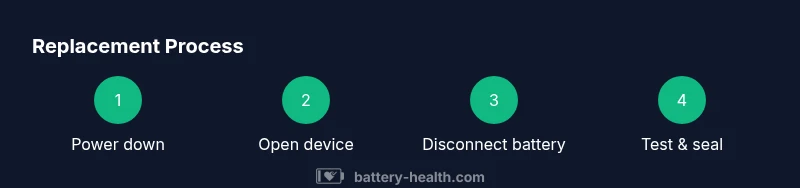
Steps
Estimated time: 60-90 minutes
- 1
Power down and prep workspace
Shut down the iPhone completely and unplug all cables. Move to a clean, well-lit work surface with good ventilation and a non-slip mat to prevent accidents.
Tip: Use an anti-static mat and wear an ESD wrist strap to reduce static damage. - 2
Apply heat and loosen the display adhesive
Gently warm the edges of the display to soften adhesive. This helps separate the screen assembly from the frame without cracking glass.
Tip: Do not overheat; keep heat source 2-3 inches away and move around edges. - 3
Disconnect the battery connector safely
Carefully lift the display enough to access internal connectors. Use a non-conductive tool to disconnect the battery connector first to avoid short circuits.
Tip: Always disconnect the battery before touching other components. - 4
Remove the old battery
Loosen and remove battery screws if present, then gently lift the old battery away from the housing using plastic tools.
Tip: Do not bend or puncture the battery; handle slowly. - 5
Install the replacement battery
Place the new battery in the same orientation and secure with any screws or adhesive as originally configured.
Tip: Ensure the battery pad or connector aligns properly with the motherboard. - 6
Reconnect connectors and reassemble
Reconnect the battery, then reattach other components in reverse order of disassembly. Check all connectors for proper seating.
Tip: Tighten screws to the manufacturer’s recommended torque; avoid over-tightening. - 7
Calibrate and test new battery
Power on the device and perform a basic test: full charge, screen response, and startup stability. Monitor battery health in settings.
Tip: Run a full charge-discharge cycle to calibrate battery gauge properly. - 8
Safety check and dispose of old battery
Inspect for swelling and dispose of the old battery through approved e-waste channels. Do not throw it in regular trash.
Tip: If you notice swelling, stop using the device and seek professional help. - 9
Final assessment and wrap-up
Confirm there are no alarms or warnings, and ensure the device holds a charge normally. Store tools safely for future use.
Tip: Label screws and components to aid future maintenance.
FAQ
Can I replace an iPhone battery myself?
Yes for some models if you have the right tools and follow a careful procedure. However, mistakes can damage critical components or compromise water resistance. If you’re unsure, seek professional service.
Yes, you can replace the battery yourself if you have the right tools and follow safety steps, but proceed with caution.
Will replacing the battery affect water resistance?
Proper resealing and reassembly are essential. If seals or adhesives aren’t restored correctly, water resistance can be reduced or lost.
Only if the seals aren’t restored properly during reassembly.
How long does a replacement battery last?
Replacement batteries typically provide many charge cycles, but actual longevity depends on usage, charging habits, and device care.
A replacement battery can last for years, but depends on how you use and care for the device.
Is it safer to use official Apple battery or third-party?
Official Apple batteries or certified components are generally safer for performance and safety; third-party parts vary in quality.
Official or certified parts are typically safer and more reliable.
What warranty coverage applies after replacement?
Warranty terms depend on the service provider. Check AppleCare, retailer policies, or repair shop guarantees for coverage.
Warranty depends on the service you use, so verify before the repair.
What are signs that the replacement failed?
Rapid battery drain, device overheating, unexpected shutdowns, or re-emergence of charging problems can indicate a failed replacement.
If you notice quick battery drain or shutdowns, the replacement may have issues.
Watch Video
Quick Summary
- Plan before you pry to avoid damage
- Use the right tools for your exact model
- Power down and disconnect the battery first
- Test and calibrate post-replacement to ensure accuracy
- Recycle the old battery responsibly