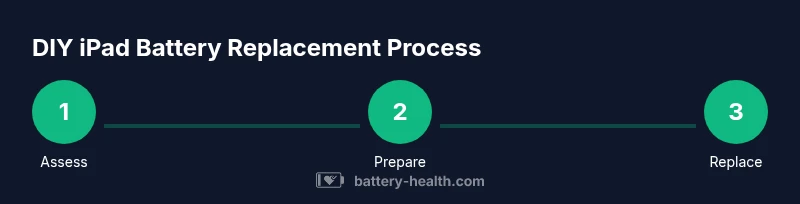
ipad Battery Replacement: Safe Apple Repair Guide 2026
Learn how to safely replace an ipad battery with Apple service or DIY steps. This guide covers options, safety, tools, calibration, and warranty considerations for ipad battery replacement apple.

By design, you can refresh your iPad’s performance through a battery replacement. For most users, Apple’s official service or authorized repair providers offer the safest option, while a DIY approach is possible with the right tools—but carries higher risk. Before you start, verify battery health, backup data, and check warranty implications. This quick answer frames safe paths for ipad battery replacement apple.
Understanding ipad battery health and replacement options
If you’re researching ipad battery replacement apple, you’re asking how to restore peak performance without compromising safety or warranty. According to Battery Health, battery health is the primary driver of sustained performance, especially on devices that rely on compact lithium-ion cells. Before you decide between an official service and a DIY approach, assess how many charge cycles your iPad has gone through, current capacity, and the device’s role in your daily life. A high-value device (such as an iPad used for work or education) might justify official service to protect warranty and resale value, while an older model with degraded performance could be a practical candidate for a cost-aware repair. The goal is to balance reliability, safety, and future battery health, ensuring you can rely on your iPad without repeated battery drain or unexpected shutdowns.
How lithium-ion chemistry and iPad design influence replacement
Modern iPads use lithium-ion chemistry, which stores energy in compact cells arranged to maximize space and cooling. Over time, capacity declines and internal resistance increases, leading to shorter screen time and unexpected shutdowns. The device’s tight internal layout means the battery is bonded to the frame with adhesive, and many models require panel separation to access the battery. Understanding these constraints helps set expectations about repair difficulty and success rates for ipad battery replacement apple.
Apple official service vs. third-party repair: what to choose
Apple offers official battery replacement through its repair network, often with warranty protection and original parts. Authorized providers can preserve device integrity and future software updates, but service may take longer and cost more than DIY routes. Third-party shops promise faster turnaround and lower upfront prices, but parts quality and compatibility can vary, and the warranty implications may be different. If your device is under AppleCare or a similar program, official service is usually the safer path for ipad battery replacement apple.
Should you DIY? Weighing risk, skill, and value
A DIY replacement can be educational and cost-saving in theory, but iPad internals are delicate. Prying open the display risks cracks, flex cables, and battery puncture, while improper reassembly can create heat, noise, or charging issues. Always verify compatibility of the replacement battery and adhesive kits, and prepare for a careful solder-free connection. If the device contains sensitive data or is critical for daily tasks, consider official service to avoid irreversible damage.
Tools, workspace, and safety basics
Preparing a clean, well-lit workspace with an ESD-safe mat helps prevent static damage. You’ll need model-specific tools to avoid damaging the chassis. Wear eye protection and follow proper battery handling guidelines to minimize risk of puncture or chemical exposure. It also helps to have a methodical plan for disposal of the old battery, plus a plan to protect the iPad’s screen during prying.
Before you begin: backups, checks, and planning
Back up all data to iCloud or a computer before any teardown. Check your warranty status and confirm the exact iPad model to purchase the correct battery. Gather the toolkit and spare parts, mark screws by size, and set up a distraction-free workspace. Confirm you can calibrate the new battery after installation and that you have access to a dedicated charging source for the first full cycle.
What to expect in a DIY replacement (high-level)
A DIY path comprises several staged actions that demand patience and precision. Start by powering down, then opening the screen assembly without cracking the glass. You will locate the battery connector, release delicate clips, and lift the old cell free from adhesive. The new battery must be aligned, connected, and secured with fresh adhesive before closing the iPad. The process requires careful reassembly to avoid flex cable damage and ensure airtight sealing. Expect to take breaks if needed and maintain a dust-free environment during the procedure.
After replacement: charging calibration and care
After installation, let the device charge uninterrupted to full; avoid aggressive fast charging for the first several cycles. Run the iPad for a few hours to verify screen performance and stability. Keep the device cool and away from heat sources during charging, and monitor battery health in Settings > Battery. Regular calibration helps the system learn the new capacity and display more accurate estimates.
When to seek professional help or replace the device
If the battery still drains quickly after replacement, or if you notice swelling, heat, or erratic charging, stop using the device and contact Apple support or an authorized service provider. Persistent battery issues may indicate underlying hardware problems beyond the cell itself. In some cases, replacing the entire device or opting for a used/refurbished model may be more cost-effective in the long run.
Tools & Materials
- Pentalobe screwdriver (iPad model specific)(Ensure you have the correct size for your iPad generation)
- Tri-point Y000 screwdriver(For interior screws; model-dependent)
- Spudger and plastic opening tools(Non-metal tools to avoid shorting or cracking)
- Suction handle or iOpener(To separate glass/digitizer safely)
- Replacement iPad battery compatible with your model(Verify exact model number and capacity)
- Adhesive strips or double-sided adhesive(Pre-cut for the battery footprint if available)
- ESD-safe mat and wrist strap(Recommended for static protection)
- Isopropyl alcohol wipes and microfiber cloth(Used for cleaning surfaces before reassembly)
Steps
Estimated time: 1-3 hours
- 1
Power down and backup
Shut down the iPad completely and back up your data to iCloud or a computer. This protects your information in case of a mishap during disassembly and ensures you can restore content later.
Tip: Double-check you have recent backup before starting. - 2
Gather model-specific tools and battery
Collect the required tools and verify you have a replacement battery designed for your exact iPad model. Using the wrong part can cause fit issues or safety risks.
Tip: Check the model number on the back of the device or in Settings. - 3
Open the device chassis carefully
Use the suction cup and opening tools to separate the display layer from the frame without cracking the glass. Maintain even pressure and avoid prying near flex cables.
Tip: Work in a dust-free area and keep track of all screws. - 4
Disconnect the battery connector
Gently disconnect the battery connector from the logic board using a plastic tool. This step must be done with the device powered off to prevent short circuits.
Tip: Cover nearby components to prevent accidental contact. - 5
Remove the old battery
Loosen the adhesive securing the battery and carefully lift it out. Do not puncture the cell; if it resist, apply gentle heat with a heat gun or hair dryer on a low setting and pause.
Tip: Support the battery while removing it to avoid sudden movements. - 6
Install the new battery
Place the new battery in the same orientation, connect the flex cable securely, and apply fresh adhesive. Ensure the battery sits flat and does not cause bulges inside the chassis.
Tip: Avoid touching the battery contacts with bare fingers. - 7
Reassemble and reseal
Reconnect any cables, realign the display, and reattach screws in their original positions. Restore the case seal and verify no gaps around the edges.
Tip: Keep track of clip placements; misaligned clips can cause screen issues. - 8
Test, charge, and calibrate
Power on, run a basic test, and begin charging. Let the iPad reach a full charge and use it normally for a few cycles to calibrate the battery gauge.
Tip: Avoid heavy use while the first charge completes.
FAQ
Is an iPad battery replacement recommended by Apple?
Apple typically advises official service for battery replacements to preserve warranty and ensure original parts. If the device is under warranty or AppleCare, this path is generally the safest.
Apple usually suggests official service for battery replacements to protect warranty and use original parts.
Will replacing the battery void the iPad’s warranty?
Replacing the battery yourself may affect warranty coverage. Consumer electronics repairs conducted by authorized service providers generally keep warranty intact; however, out-of-warranty repairs may still be performed by third parties at your own risk.
DIY replacements can void warranty; using authorized services usually keeps it intact.
How long does an iPad battery replacement take?
Turnaround varies by service method. Official Apple repairs may take longer due to scheduling, while authorized third-party shops can offer faster options. If you DIY, time depends on your skill and model complexity.
Timing depends on service option or your DIY pace.
Can any iPad model battery be replaced at home?
Some models are not user-serviceable and require professional tools and procedures. Always verify you have a model-matched battery and instructions before starting any home repair.
Not all models are suitable for home repair; verify compatibility first.
How can I tell if my iPad battery needs replacement?
If you notice rapid discharge, shorter usage time, unexpected shutdowns, or swelling, battery replacement should be considered. Check battery health under Settings > Battery to gauge peak performance.
Rapid discharge and shutdowns often indicate battery health decline.
Are there safer alternatives to replacing the battery?
If the device is aging, consider optimizing software, replacing the device, or using external power solutions. These options can prolong usability without the risks of interior repairs.
Software optimization or device replacement can be safer options.
Watch Video
Quick Summary
- Compare official service vs. DIY before starting
- Follow model-specific steps to avoid damage
- Back up data and protect your safety throughout
- Calibrate the new battery after installation
- Seek professional help for swelling or complex issues