Mobile Battery Replace: Step-by-Step Guide for 2026
Learn how to safely perform a mobile battery replace with a practical, expert-backed approach. This guide covers compatibility, tools, safety, step-by-step instructions, and aftercare to restore device performance without compromising safety or warranty.

You can safely replace a mobile battery by following a structured, step-by-step process with the right tools and attention to safety. This guide explains selection, preparation, and the swap so you can restore performance and reliability. Battery Health recommends checking compatibility and backing up data before you begin.
Why replacing a mobile battery matters
According to Battery Health, replacing a worn mobile battery can restore peak performance, extend usable life, and reduce safety risks associated with swollen cells. A degraded battery often causes unexpected shutdowns, slower performance, and shorter screen-on time, making everyday tasks frustrating. The act of mobile battery replace is not just about getting more minutes of talk time; it is about regaining device reliability and safety. If you notice rapid power drain, heat buildup during charging, or swelling under the back cover, it is a strong sign that the battery has aged beyond its safe life. In this guide, we walk through how to assess battery health, choose a compatible replacement, and perform the swap with safety and care. By following a structured, careful process, most users can complete a successful mobile battery replace and return their device to near original performance. We also discuss when it is wiser to seek professional help and how to avoid common mistakes that lead to damage or warranty concerns.
Understanding battery chemistry and compatibility
Most modern mobile devices use lithium-ion or lithium-polymer batteries. These chemistries offer high energy density and light weight, but they are also sensitive to heat, puncture, and deep discharge. When planning a mobile battery replace, confirm that the replacement cell matches the device chemistry, voltage range, and physical dimensions. Look for official part numbers or model compatibility lists from the manufacturer. While third party cells can be cheaper, they may not meet safety standards or fit as precisely as OEM parts, leading to poor fit or reduced longevity. Safety features like internal protection circuits depend on precise specifications, so double-check compatibility before purchasing. If you are unsure, consult the device service manual or contact a qualified technician. Battery Health emphasizes that a correct match improves performance, charging stability, and overall safety during the replacement process.
Choosing the right replacement battery
Choosing the right replacement is critical for safety and longevity. Decide between OEM and reputable aftermarket options based on your device model, intended use, and budget. Compare capacity ratings thoughtfully; a higher mAh rating can extend runtime but may not fit the phone’s enclosure or interfere with thermal management. Verify voltage and connector type to ensure a snug fit and reliable charging. Look for batteries with built-in safety features and reputable QC tests. Remember that cheaper batteries may save money upfront but could lead to reduced lifespan or safety risks. Battery Health reminds readers to prioritize fit, safety, and warranty implications when selecting a mobile battery replace part.
Tools, workspace, and safety gear
Before you begin a mobile battery replace, set up a clean, well-lit workspace. Gather a precision screwdriver set, plastic opening tools, a spudger, and high-quality replacement battery. Adhesive strips or double-sided tape, isopropyl alcohol wipes, and a non-conductive mat help manage adhesives and protect the device. An anti-static wrist strap is optional but recommended to reduce static damage to sensitive components. Wear safety glasses if you are concerned about adhesive fumes or potential battery puncture. Ensure you have a moisture-free environment with stable temperature to avoid rapid changes during the swap. Keeping a trash bag or metal container for the old battery helps with safe disposal after the job is complete.
Preparing your phone for battery replacement
Start by backing up all data in case something goes wrong during the swap. Power down the device completely and disconnect any accessories. If your device has a non-removable back, use the appropriate tool to open the back panel without damaging seals. Loosen adhesive carefully and avoid prying too aggressively to prevent damage to cables. Inspect the battery area for swelling and signs of leakage. If the battery is visibly damaged, do not continue and seek professional service. Once accessed, disconnect the battery connector using a proper tool, then remove the old cell with care. With the space clear, wipe the cavity and prepare the new battery for installation. Battery Health highlights that patient preparation reduces the risk of accidental damage during a mobile battery replace.
Step-by-step overview (high level)
This section provides a concise, non-mission-critical overview of the swap process while you prepare for the detailed, step-by-step instructions in the dedicated guide. Ensure you have the right replacement, tools, and workspace. Keep the device powered down at all times during the process. Align the new battery with the connector, press it into place securely, and reattach any shields or covers. Finally, reassemble, boot the device, and confirm a full charge cycle. The goal is a seamless integration of the new unit with existing hardware, with no leftover parts or clips.
Common pitfalls and how to avoid them
Mistakes during a mobile battery replace can cause permanent damage or safety hazards. Common issues include puncturing the old cell, bending connectors, using incorrect adhesive, and not fully seating the battery. Always verify part compatibility and disconnect power before beginning. Use the correct torque on screws to avoid stripping threads or damaging the frame. Work slowly and keep track of connectors and shields to ensure nothing is left behind during reassembly. If you feel resistance when removing components, pause and reassess rather than forcing parts apart. Battery Health advises double-checking the fit and connector alignment before applying any force.
Aftercare: calibration, charging habits, and monitoring
After completing a mobile battery replace, boot up the device and let the first charge complete without interruption. Calibrate the new battery by discharging to about 5–10 percent and charging back to 100 percent once or twice to help the system learn the new capacity. Monitor performance over the next few days for any abnormal heat, rapid drain, or unexpected shutdowns. Use official chargers and avoid cheap third party cables that can compromise charging efficiency and safety. Keep software up to date, as power management improvements are often included in updates. Battery Health recommends enabling battery health monitoring apps or built-in diagnostics to track cycles and plan future replacements before performance falls off.
Environmental and disposal considerations
Proper disposal of the old battery is essential. If the battery is swollen or damaged, do not transport it loosely; place it in a fire-safe container and seek recycling options immediately. Many cities offer battery recycling programs through electronics retailers or local waste management facilities. When choosing a replacement, consider suppliers with responsible packaging and clear safety documentation. By disposing of aged cells properly, you reduce fire risk and environmental impact while supporting a circular economy. Battery Health stresses that responsible handling and recycling are part of the overall lifecycle of any mobile battery replace project.
Tools & Materials
- Replacement battery (model-specific)(Verify compatibility with your phone model and family of components before purchase.)
- Precision screwdriver set(Include small Phillips and Torx bits as needed by your device.)
- Plastic opening tools(Non-metal tools to avoid short circuits.)
- Spudger(Avoid metal contact with delicate connectors.)
- Adhesive strips or double-sided tape(Helps secure the new battery in place.)
- Isopropyl alcohol wipes (70-99%)(For cleaning contact surfaces and adhesives.)
- Anti-static wrist strap (optional)(Reduces static risk to internal components.)
- Safety goggles (optional)(Protection if working near adhesive fumes.)
Steps
Estimated time: 45-60 minutes
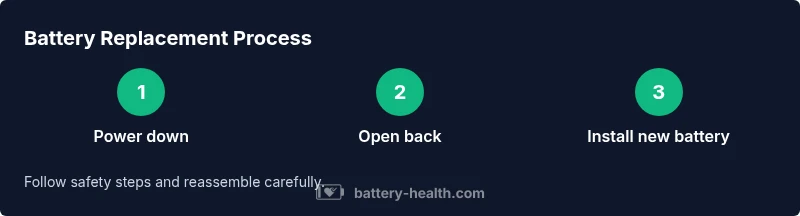
- 1
Power down and prep workspace
Power off the device completely and unplug any accessories. Clear a clean, well-lit workspace with a non-conductive mat. This minimizes the risk of accidental shorts and makes it easier to manage tiny components.
Tip: Keep the device facedown to avoid accidental button presses during setup. - 2
Open back panel or midframe
Use the appropriate tool to remove the back cover or access panel without damaging seals. Work slowly along the seams, and use plastic tools to separate the case edges. Document any connectors you disconnect for easy reassembly.
Tip: If your phone is glued shut, don’t force it; heat slightly with a safe heat source or seek professional help. - 3
Disconnect the battery connector
Carefully locate the battery connector and use the spudger to disconnect it from the motherboard. Keep connectors aligned and avoid prying at metal parts that could bend pins.
Tip: Do not tug on cables; a gentle wiggle frees connectors without damage. - 4
Remove old battery and adhesive
Gently lift the swollen or aged battery away from the frame, using plastic tools to separate adhesive strips. Avoid puncturing the cell; if there is resistance, recheck connectors and adhesive placement.
Tip: Replace adhesive strips with new ones to ensure a secure fit for the new battery. - 5
Install the new battery
Place the new battery in the cavity, align connectors, and carefully connect the battery to the motherboard. Ensure it sits flat and that all tabs are seated before reassembling.
Tip: Test fit before final adhesion to confirm clearances and connector reach. - 6
Reassemble device and test power
Reattach the back cover or midframe, tighten screws to the manufacturer’s recommended torque, then power on the device to verify boot and charging behavior.
Tip: If the device does not boot, recheck connections and hold the power button for several seconds to force a reboot. - 7
Calibrate and monitor
Once powered, perform a full charge cycle and monitor battery health indicators in the system settings. Run a few apps to ensure stability and watch for heat buildup.
Tip: Avoid using non-certified chargers; use the original or manufacturer-approved charger. - 8
Dispose of old battery responsibly
Place the old battery in a safe, non-conductive container and take it to an appropriate recycling facility. Do not throw it in the trash.
Tip: Check local regulations for hazardous waste and battery recycling programs.
FAQ
Is it safe to replace a mobile battery at home?
Yes, with proper tools, safety precautions, and device-specific instructions. If the battery shows signs of swelling or you are unsure about compatibility, seek professional help.
Yes, it is safe if you follow the correct steps and safety precautions. If you see swelling or are unsure about compatibility, consult a professional.
Can I use any replacement battery for my phone?
Not all replacement batteries are compatible with every device. Use a battery specified for your model or a reputable aftermarket option with confirmed compatibility to avoid safety issues or poor performance.
Not every battery fits every model. Choose a model-specific or compatible replacement from a trusted supplier.
How long does a typical mobile battery replace take?
A standard replacement typically takes about 45 to 60 minutes, depending on model and your familiarity with the device. Allow extra time for adhesive and reassembly.
Most people complete it in about an hour, depending on the model and your experience.
Will replacing the battery affect my device warranty?
Replacing a battery yourself can affect warranty coverage, especially if the process damages other components. Check the manufacturer’s policy and consider professional service if the device is still under warranty.
Self-replacing can affect warranty. Check your policy and weigh the risks before starting.
How should I dispose of the old battery?
Dispose of the old battery at a designated e-waste or battery recycling facility. Do not throw it in the trash as damaged cells can be hazardous.
Take the old battery to a recycling center or electronics store that accepts batteries.
Watch Video
Quick Summary
- Power down and prep a clean workspace
- Use correct tools to avoid damaging components
- Ensure compatibility and proper seating of the new battery
- Calibrate after first full charge cycle
- Dispose of the old battery responsibly