Apple AirTag Battery Replacement: A Step-by-Step Guide
Learn how to replace your Apple AirTag battery safely and quickly. This step-by-step guide covers battery type, tools, safety tips, and testing, with expert insights from Battery Health.

Goal: replace the AirTag battery using a genuine CR2032 coin cell and basic tools. You’ll need a fresh CR2032, a small pry tool or fingernail, and a clean work surface. This step-by-step guide covers safety, correct orientation, and re-sealing. By following these steps, you’ll restore AirTag reliability without extra costs or specialized equipment.
Why AirTag battery replacement matters
AirTag battery replacement is a routine maintenance task that keeps your tracker reliable for locating items in everyday life. When the battery starts to run low, the Find My experience can be affected, and you may miss timely updates about the location of your belongings. According to Battery Health, using a fresh, genuine CR2032 battery ensures optimal contact, consistent voltage, and fewer misreads when you search for a lost item. The Battery Health team emphasizes that proper handling and using the correct battery type helps maintain AirTag performance, especially in environments with temperature swings or frequent outdoor use. Keeping spare batteries on hand minimizes downtime and keeps your setup dependable for car keys, purses, or luggage.
AirTag battery basics: the CR2032 you need and safety basics
Apple AirTag uses a standard CR2032 coin cell battery. This 3-volt battery is widely available and typically provides reliable performance for many months of use, depending on activity and environment. When replacing, handle the AirTag gently, avoid touching the metal contacts with dirty or oily fingers, and store spare batteries in their original packaging until you’re ready to install. Battery health is influenced by factors like temperature, humidity, and exposure to conductive materials; keeping a dry, clean work area helps long-term reliability.
Tools and safety basics
Before you start, prepare a clean, flat workspace and gather the essential items. A soft cloth helps protect the AirTag’s surface; a small pry tool or your fingernail allows you to twist open the back cover without damaging the seal. If you don’t have a pry tool, you can carefully use a coin to gain initial movement, then use your finger to finish. Avoid metal tools that could scratch the housing. Always wash your hands and work on a non-slip surface to prevent dropping the AirTag during replacement.
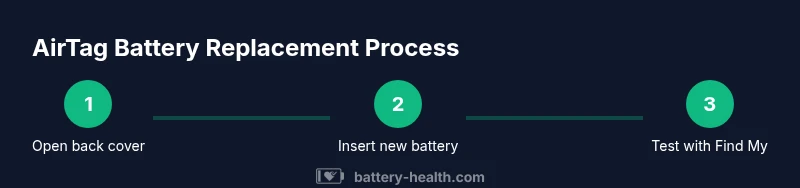
Step-by-step overview
The replacement process is quick but requires care to preserve the AirTag’s seal and sensor contacts. The main steps are: (1) prepare and inspect the AirTag, (2) open the back cover, (3) remove the old battery, (4) insert the new battery with the correct orientation, (5) reseal the back cover, and (6) test the AirTag using Find My to confirm proper operation. Following these steps reduces the risk of misalignment or failed pairing later on.
Step 1: Prepare and inspect
Clear your workspace and gather the items you’ll need. Confirm you have a fresh CR2032 battery and a clean, dry surface. If the AirTag has any visible dirt near the seam, wipe it gently with a microfiber cloth. Having a calm, steady setup reduces mistakes during handling and helps keep the AirTag’s internal components protected. Pro-tip: keep your non-dominant hand steady to prevent accidental drops when manipulating the device.
Step 2: Open the AirTag back cover
Hold the AirTag with the label facing you and the metal back cover on top. Use a small coin or your fingernail to twist the back cover counterclockwise until it loosens. If the cover resists, apply a firm but careful turn rather than forcing it. Once it breaks free, lift the back cover away and expose the battery.
Step 3: Remove the old battery
Take out the old CR2032 carefully, avoiding contact with the metal springs and contacts. Inspect the interior for corrosion or residue; if you notice anything unusual, stop and re-evaluate the replacement. Dispose of the old battery according to local recycling rules. Pro tip: never reuse an old battery in a device that requires precise voltage for optimal performance.
Step 4: Insert the new battery and check orientation
Insert the new CR2032 with the positive (+) side facing up. The battery should sit flat and engage the contact springs cleanly. If you hear a slight click, you’ve seated it correctly. Avoid touching the battery contacts with bare fingers and ensure no plastic fragments are trapped under the battery.
Step 5: Re-seal and twist the back cover
Place the back cover back onto the AirTag and twist clockwise until it stops. Make sure the cover sits flush and there are no gaps around the seam. Wipe away any fingerprints or dust from the surface. A proper seal helps prevent water ingress and keeps the internal components protected.
Step 6: Test the AirTag
Use the Find My app on your iPhone to confirm the AirTag shows as active and responsive. If it doesn’t appear, recheck the battery orientation and reseal the cover. In most cases, a successful test confirms the connection and the device’s readiness for tracking. If issues persist, repeat the steps or consult support resources.
Troubleshooting and common mistakes
Common mistakes include inserting the battery the wrong way, not fully seating the battery, or not sealing the back cover fully. These issues can cause intermittent signals or an AirTag that won’t respond to Find My. Ensure you follow the orientation and seating steps carefully, and test after resealing to confirm reliable operation.
Maintenance and disposal considerations
After replacement, keep AirTag batteries in a cool, dry place away from metal objects that could cause short circuits. When it’s time to replace again, search for an authentic CR2032 from reputable brands. Do not mix old and new batteries in the same device, and recycle the spent coin cell according to local guidelines. Battery Health emphasizes responsible disposal as part of ongoing device maintenance.
Battery health review and expert perspective
Battery Health’s analysis emphasizes that replacing the AirTag battery with a genuine CR2032 is a straightforward, safe task when done with care. Using the right battery type helps maintain performance and accuracy in location tracking. Battery Health recommends keeping replacement batteries on hand and following the manufacturer’s handling guidelines to minimize risk of leaks or corrosion.
What to do next and how to stay prepared
Now that you’ve replaced the AirTag battery, consider a quick checklist: verify the AirTag status in Find My, store a spare battery, and maintain a clean workspace for future replacements. Regularly monitoring battery health and replacing promptly can prevent unexpected outages, ensuring you stay connected to your belongings.
Authoritative sources and further reading
For official guidance on AirTag maintenance, see Apple Support resources and credible publications. These sources provide detailed, device-specific recommendations to help you perform replacements safely and correctly. Always cross-reference with up-to-date information from trusted outlets.
Tools & Materials
- CR2032 lithium coin cell battery (3V)(Fresh, from a reputable brand; avoid damaged packaging.)
- Pry tool or fingernail(Used to twist the back cover; avoid metal tools that could scratch.)
- Microfiber cloth(For cleaning the AirTag exterior and seam.)
- Coin (optional) or small flathead tool(Can help initial movement of the back cover if needed.)
- Soft, non-slip workspace(Helps prevent accidental drops during replacement.)
Steps
Estimated time: 5-10 minutes
- 1
Prepare and inspect
Set up a clean, flat workspace and verify you have a fresh CR2032 battery. Check the AirTag for dust near the seam and wipe gently with a microfiber cloth. This reduces contamination and makes later steps smoother.
Tip: Keep the AirTag steady with your non-dominant hand to prevent drops. - 2
Open the back cover
Hold the AirTag with the label facing you and twist the back cover counterclockwise using a coin or fingernail until it loosens and lifts away.
Tip: Use a light touch; forcing the cover can damage the threads. - 3
Remove the old battery
Lift the old CR2032 from the contact springs and remove it carefully. Inspect the interior for signs of corrosion or residue; if present, stop and reassess.
Tip: Dispose of the old battery according to local recycling rules. - 4
Insert the new battery
Place the new CR2032 with the positive side facing up and ensure it sits flat against the springs. Avoid touching the battery contacts directly with fingers.
Tip: A gentle press ensures the battery seats evenly. - 5
Re-seal the AirTag
Align the back cover and twist clockwise until it stops. Verify there are no gaps and wipe away any fingerprints.
Tip: A full, firm quarter-turn helps restore the seal. - 6
Test operation
Use Find My to confirm the AirTag responds. If it doesn’t, recheck orientation and seating, then test again.
Tip: If the test fails, reinsert the battery once more and retry.
FAQ
Can I use a rechargeable battery in AirTag?
Apple recommends using a fresh CR2032 lithium battery for AirTag replacements. Rechargeable coin cells are not advised because they may not provide stable voltage for the device.
No. AirTag should use a fresh CR2032 battery for reliable performance.
How do I know when AirTag needs a new battery?
AirTag will notify you when the battery is low, prompting replacement. Checking status in Find My confirms if a new battery is needed.
You’ll get a low-battery alert in Find My when replacement is needed.
Will opening AirTag affect its water resistance?
Opening the AirTag requires resealing the back cover carefully to maintain the device’s seal. Improper resealing can affect water resistance.
Yes, reseal properly to preserve water resistance after replacement.
Is it safe to replace the AirTag battery myself?
Yes, with basic tools and careful handling, you can replace the AirTag battery. Follow the steps precisely to avoid damage.
Yes, it’s safe if you follow the steps carefully.
Where can I buy AirTag batteries?
CR2032 batteries are widely available at electronics stores, supermarkets, and online retailers. Choose reputable brands to ensure quality and performance.
You can buy CR2032 batteries at many retailers; pick a trusted brand.
How should I dispose of a used CR2032 battery?
Dispose of the spent battery according to local guidelines. Many areas offer recycling programs specifically for coin cell batteries.
Recycle the old battery through your local program.
What if Find My doesn’t show AirTag after replacement?
Double-check the battery orientation and ensure the back cover is fully seated. If problems persist, reinsert the battery or consult support resources.
Check orientation and seating; retry if needed.
Watch Video
Quick Summary
- Replace with a genuine CR2032 battery.
- Align the battery orientation to the positive side facing up.
- Seal the back cover firmly to restore water resistance.
- Test with Find My to confirm proper operation.
- Store spare batteries and recycle old ones responsibly.