Battery Change for iPhone: A Complete How-To Guide
Learn how to safely replace your iPhone battery with this comprehensive how-to. Tools, safety tips, and expert guidance from Battery Health.

By following this guide you can perform a battery change for iphone with proper precautions. It covers when replacement is needed, required tools, and a safe, step-by-step process. This article reflects guidance from Battery Health.
Why Battery Health Matters for iPhones
A healthy battery is the backbone of reliable iPhone performance. Battery health influences peak power delivery, charging efficiency, and the device's ability to run demanding apps without unexpected shutdowns. When the battery ages or degrades, you may notice shorter run times, more frequent charging, and reduced capacity to hold a charge. Keeping battery health in good shape extends the life of your device and can prevent costly repairs later on. If you're weighing the option of a battery change for iphone, a careful plan matters more than speed. Your approach should consider the device model, service options, and your tolerance for DIY steps. The Battery Health team emphasizes using proper tools, selecting high-quality replacement parts, and following safety guidelines to minimize the risk of damage to the battery or the phone's delicate internal components. A calm workspace, good lighting, and organized screws help you stay safe and efficient throughout the process. According to Battery Health, choosing the right approach improves outcomes and reduces the chances of post-replacement issues.
Signs Your iPhone Battery Needs Replacement
Battery health problems often reveal themselves in everyday use. If your device shuts down unexpectedly at any charge level, takes unusually long to charge, or the screen dims during heavy tasks, those are red flags. A noticeable drop in overall battery life, more frequent charging sessions, or heat during charging also indicates aging cells. iOS provides a Battery Health analytics view (in the Settings app) that shows a capacity percentage and a performance management feature. If the Maximum Capacity is meaningfully reduced or you see frequent performance throttling, a battery change for iphone becomes a practical option. Swelling, screen separation, or abnormal physical changes are urgent warnings—pause use and seek professional help immediately. Battery Health analysis shows that timely replacement helps restore normal device behavior and prolongs usable life.
Understanding Battery Technology and Apple Design
iPhones use non-removable lithium-ion batteries designed for compact form factors and high energy density. The design includes adhesive securing the battery and connectors that link to the logic board. Apple incorporates safety features like temperature sensors and charge-management circuitry to protect both battery and device. Replacement work requires careful handling to avoid puncture, short circuits, or damage to flex cables. Modern iPhone models rely on specialized tools and parts; using counterfeit components can compromise safety and performance. Knowledge of model-specific screw patterns and connector types helps prevent common mistakes. This block underscores why a well-executed battery change for iphone matters: a proper fit, correct connector alignment, and quality adhesive are essential for reliable operation and safety. The Battery Health stance emphasizes sourcing genuine or equivalent quality parts and avoiding DIY shortcuts that could compromise the device.
DIY vs Professional: Making the Right Choice
Deciding between a DIY battery change and professional service depends on your comfort with small, intricate work and your ability to handle adhesives and microscopic connectors. DIY can save money and provide a learning experience, but it carries risks like puncturing the battery, damaging display cables, or compromising waterproof seals. If your device is under a warranty or AppleCare, professional replacement may be preferred to avoid potential warranty disputes. For older models with sensitive adhesives, or if you lack the right tools, turning to a trained technician is prudent. The Battery Health team recommends weighing safety, time, and long-term device performance before proceeding. In many cases, professional replacement offers a balance of safety, reliability, and quicker turnaround.
Tools, Safety, and Prep
Before you begin your battery change for iphone, assemble a clean, static-free workspace and gather the right tools. Disconnect the device from power, work on a non-slip mat, and have a labeled tray for tiny screws. Protect the screen and connectors with plastic tools to avoid scratches. Avoid metal tools that could cause short circuits and never puncture a swollen battery. Keep a fire-safe area nearby and have a plan to safely power down if you notice any unusual battery behavior. The goal is to minimize risk while ensuring a high-quality replacement. Battery Health emphasizes using proper parts and following safety steps as the foundation of any replacement effort.
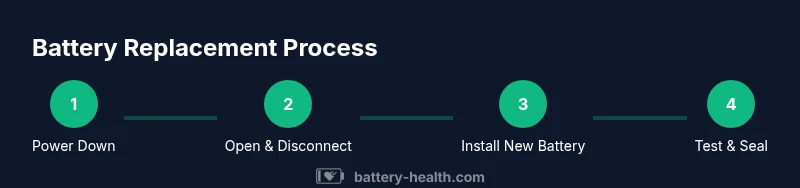
Step-by-Step Framework (High-Level Overview)
This section provides a high-level overview of the typical battery replacement workflow. You will power down, remove screws, separate the screen, disconnect the battery, remove the old adhesive, position the new battery with fresh adhesive, reconnect, reassemble, and test. While the details vary by model, the core sequence remains consistent: access, disconnect, remove, install, seal, test. The emphasis is on safety and precision rather than speed. Planning and organization reduce the chance of misplacing tiny components and ensure a clean reassembly. Battery Health stresses checking for clearance and alignment after the new battery is seated to avoid pinching cables.
Common Mistakes and How to Avoid Them
Rushed work, poor screw organization, and using damaged tools are common missteps in battery changes for iphone. Using the wrong adhesive or failing to test connectors before reassembly can lead to failures or safety concerns. Another frequent error is not properly disconnecting the battery before prying or lifting parts, which can short the board. Always work with anti-static precautions, keep the workspace well-lit, and refer to model-specific guides for torque or seating requirements. Double-check connector seating and cable routing to prevent future issues. A methodical approach minimizes risks and produces a reliable outcome for your replacement.
Post-Installation Testing and Calibration
After installation, power on the device and monitor for normal boot, screen brightness, and responsiveness. Run a few apps and confirm that charging behavior is consistent. Battery health calibration is often recommended after replacement; use the Settings app to observe the new Maximum Capacity value and monitor any unusual battery drain. If you notice persistent issues, recheck connectors and ensure adhesive seating was correct. Battery Health notes that a proper calibration enhances long-term accuracy of battery metrics and reduces the likelihood of erratic readings.
Cost, Warranty, and Options
Costs for a battery change vary by model, region, and service provider. Replacement options include official Apple service, authorized technicians, or reputable third-party shops. Factors influencing price include the battery type (OEM vs. high-quality aftermarket), labor, and any needed screen or adhesive materials. While DIY can reduce labor costs, it may void warranties or risk device integrity if not done correctly. Always verify warranty implications with your provider and prioritize safety and quality parts. Battery Health recommends evaluating overall value, not just upfront price, when planning a replacement.
Battery Health Recommends for iPhone Replacements
The Battery Health team recommends choosing replacement parts from trusted sources and ensuring technicians are trained for iPhone internals. Safety, proper tool use, and model-specific fit are foundational. If you’re unsure about your ability to perform the replacement safely, professional service is advised. Quality battery installation supports sustained performance and device longevity. Battery Health’s guidance is to prioritize accurate calibration and verifying proper operation after installation to maximize the life of your device.
Tools & Materials
- Replacement battery compatible with your iPhone model(Ensure correct model compatibility and quality (OEM or high-quality aftermarket).)
- Pentalobe screwdriver(For iPhone exterior screws near the Lightning port.)
- Phillips screwdriver (tiny)(Small size, typically #000.)
- Nylon spudger(Non-conductive tool to avoid shorting components.)
- Plastic opening tools(Gently pry without scratching glass or internals.)
- Adhesive strips or date-specific battery adhesive(New adhesive ensures secure seating and sealing.)
- Suction cup(Helps with lifting display without stressing it.)
- Isopropyl alcohol wipes (70% or higher)(Clean surfaces and remove residue before reassembly.)
Steps
Estimated time: 60-120 minutes
- 1
Power down and prep
Shut the iPhone completely and unplug from any power source. Clear a clean, static-free workspace and lay out screws in labeled containers. This step reduces the risk of short circuits and helps you stay organized during the replacement.
Tip: Use a magnetic mat or pill organizers to keep track of each screw and connector location. - 2
Open the iPhone safely
Remove the external screws near the Lightning port, then create a small gap with a suction cup and carefully pry the display open. Work gradually to avoid bending cables or damaging the digitizer ribbon.
Tip: Do not force the display; if you feel resistance, recheck screws or clips first. - 3
Disconnect the battery connector
Locate and disconnect the battery connector from the logic board using a plastic tool. Disconnecting first minimizes the risk of a short while you work on other components.
Tip: Keep fingers away from exposed circuits and avoid touching the connector pins directly. - 4
Release old adhesive
Carefully lift and remove the old battery while avoiding puncturing the cell. Use isopropyl wipes to lubricate and clean the frame as needed. Dispose of the battery properly if it is damaged.
Tip: Never crush or puncture the battery; a swollen cell can be hazardous. - 5
Install the new battery with fresh adhesive
Position the new battery and apply new adhesive strips. Ensure the battery sits flat and aligns with connectors and cable routes. Cable management is important to prevent pinching after reassembly.
Tip: Use light, even pressure to seat adhesive and avoid bending the battery flex cable. - 6
Reconnect, reseal, and reassemble
Reconnect the battery connector, reattach the display, and secure all screws in their original positions. Avoid over-tightening that could strip threads or damage the frame.
Tip: Take a photo of the internal layout before disassembly to guide reassembly. - 7
Power on and verify
Power the iPhone on and check display, touch response, and camera. Confirm charging starts when plugged in and that the device charges normally.
Tip: If it doesn’t boot, recheck all connectors and ensure the battery is seated correctly. - 8
Calibrate and test battery health
Allow the device to fully charge, then discharge to around 20% and recharge again to calibrate the system’s battery estimator. Observe battery performance during typical usage.
Tip: Perform a couple of full cycles over the next few days to stabilize the readings.
FAQ
Is it safe to replace an iPhone battery at home?
It can be safe if you follow strict safety steps, use proper tools, and work on a non-conductive surface. For swollen or damaged batteries, avoid DIY and seek professional help. Understanding your device’s model-specific requirements is crucial.
Yes, it can be safe with careful steps and the right tools, but avoid DIY if the battery is swollen or you’re unsure about the process.
Will replacing the battery affect my warranty?
Replacing the battery with non-authorized services can affect warranty coverage. Check your warranty terms and consult an authorized technician if you’re uncertain. Official service providers can preserve coverage while delivering a high-quality replacement.
Check your warranty terms; unauthorized DIY could affect coverage. When in doubt, use an authorized service.
What should I do if my iPhone won’t turn on after replacement?
If the device doesn’t power up, recheck the battery connection and assembly. Ensure no connectors are loose and that the display is properly seated. If issues persist, seek professional diagnosis.
If it won’t turn on, verify connectors and reassembly, and consider professional help if needed.
Can I reuse the original adhesive or heat the frame?
Reusing old adhesive is not recommended. Use new adhesive strips designed for iPhone assemblies to ensure a proper seal and water resistance where applicable.
Avoid reusing old adhesive; replace with new strips for a secure seal.
How long does a typical battery replacement take?
Most replacements take between 60 and 120 minutes depending on model and technician experience. Give yourself extra time for calibration and testing.
Most replacements take about an hour to two, including testing.
Should I calibrate the battery after replacement?
Calibration helps the device estimate battery life more accurately. Do a full charge-discharge cycle and monitor performance over the next few days.
Yes, calibrating after replacement helps the battery indicator stay accurate.
Watch Video
Quick Summary
- Plan and prepare before starting.
- Use model-appropriate parts and tools.
- Avoid puncturing the battery and handle adhesives carefully.
- Test and calibrate after installation.
- Consider professional help for high-risk models.