Battery Replacement on iPhone: A Practical Guide
A clear, steps-based guide to safe battery replacement for iPhone. Learn tools, safety, and when to use professional service for battery replacement iphone apple.

By following this guide, you will learn how to perform a safe battery replacement on an iPhone and understand when to seek professional help. This walkthrough covers essential tools, safety steps, and common pitfalls for battery replacement iphone apple. According to Battery Health, using correct parts and proper technique reduces the risk of damage and preserves your device’s performance over time. Ready to start? Let’s begin.
Understanding Battery Replacement on iPhone and Why It Matters
Batteries wear out over time, and an aging battery can cause unexpected shutoffs, slower performance, and reduced capacity. If your iPhone no longer holds charge well, replacing the battery can restore peak performance without replacing the whole device. For many users, a well-executed battery replacement iphone apple is a cost-effective upgrade rather than buying a new phone. According to Battery Health, aging cells degrade capacity in predictable cycles, and minor calibration issues can exaggerate health readings. Battery Health analysis indicates that proper procedure and quality parts improve reliability and longevity of the device. Before you begin, confirm model compatibility, gather the right tools, and set realistic expectations about post-replacement battery life and charging performance. This is especially important for devices with sealed assemblies, where improper handling can lead to damage and safety risks.
DIY vs Pro: Making the Right Choice
Deciding between a do-it-yourself battery replacement iphone apple and professional service depends on your confidence, the model, and warranty status. Apple’s official service guarantees original parts and factory calibration but can be more expensive and take longer. In contrast, third-party parts and online tutorials offer cost savings but carry higher risk if the battery is not genuine or the fit is incorrect. Battery Health emphasizes that for newer models or devices under warranty, professional service often yields the most reliable results and preserves water resistance and device integrity. If you choose DIY, work slowly, follow model-specific guides, and verify part compatibility. A cautious approach reduces the chance of puncturing the pack or damaging sensitive connectors.
Tools, Parts, and Safety Preparations
A successful battery replacement iphone apple requires a curated set of tools and safe handling practices. Essential items include a Pentalobe screwdriver (0.8mm) to remove external screws, a plastic opening tool or spudger to separate components, a suction cup to lift the display, and a replacement battery compatible with your exact iPhone model. An anti-static wrist strap or mat helps prevent electrostatic discharge, while isopropyl alcohol (70% or higher) aids in removing adhesive. Optional but helpful items include a heat source to soften adhesive and a plastic card or guitar pick to slide under the display without puncturing components. Always power down the device first and disconnect the battery before opening anything.
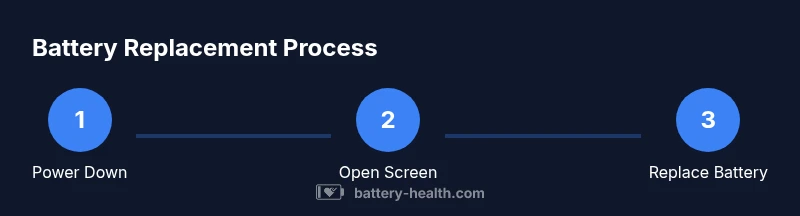
Step-by-Step Overview (DIY) for Common iPhone Models
Below is a high-level view of the typical process. For model-specific details, refer to the full step-by-step guide and device teardown videos. Begin by powering off the iPhone, removing the bottom screws, and carefully lifting the display to access the battery connector. Disconnect the battery, remove the old cell, apply adhesive remover if needed, and place the new battery in position. Reconnect all connectors, reassemble the device, and perform a basic calibration after the first full charge. This overview emphasizes the sequence and safety checks rather than every micro-action.
Common Pitfalls and Troubleshooting
Even small mistakes can lead to long-term problems. Common issues include damaging the display cable, tearing adhesive, accidentally puncturing the battery, or forgetting to reconnect a connector fully. If the phone does not power on after replacement, double-check the battery connector seating and the logic board connections. Battery Health notes that many post-replacement issues arise from torque on screws or insufficient adhesive sealing, which can affect waterproofing. Take your time with each connection and test the device in a controlled environment.
Post-Replacement Care, Calibration, and Longevity
After installation, calibrate the new battery by performing a complete discharge to 0% and a full recharge to 100%. This helps the system learn the new capacity and deliver accurate charge estimates. Monitor the first few charge cycles for any abnormal heat or rapid voltage drop. Keep the iPhone in a cool, ventilated area during charging the first 24 hours to avoid heat buildup. Regular software updates can also optimize battery management over time, extending the longevity of your replacement. The Battery Health team recommends documenting the replacement details and saving part information for future reference.
Tools & Materials
- Pentalobe screwdriver (0.8mm)(Remove two bottom screws near the charging port)
- Plastic opening tool / spudger(Gently pry the display without damaging cables)
- Suction cup(Create a small gap for the opening tool)
- Replacement battery compatible with your iPhone model(Ensure model match and quality certifications)
- Anti-static wrist strap or mat(Prevent electrostatic discharge)
- Isopropyl alcohol (70%+) and adhesive remover(Clean old adhesive and prep surfaces)
- Guitar pick / opening cards (optional)(Helps slide under the display)
Steps
Estimated time: 60-90 minutes
- 1
Power down and prepare
Power off the iPhone completely and unplug from any charging cables. This reduces the risk of short circuits during the teardown. Gather all tools and a clean, well-lit workspace before you begin.
Tip: Double-check model compatibility and confirm the battery type before starting. - 2
Remove bottom screws and open the display
Use the Pentalobe screwdriver to remove the two bottom screws near the charging port. Gently lift the display with a suction cup and insert a plastic tool to loosen the screen from the frame, taking care not to damage the connectors.
Tip: Work slowly and avoid prying too hard near the corners. - 3
Disconnect the battery connector
Carefully disconnect the battery connector from the logic board using a plastic spudger. Do not use metal tools that could short circuitry. This step prevents the battery from powering the device during replacement.
Tip: Keep track of the connector orientation and any shielding you remove. - 4
Remove the old battery
Loosen any adhesive securing the old battery with approved adhesive remover or heat to soften the adhesives. Gently lift the battery without puncturing it, using a plastic card to separate adhesive without tearing.
Tip: Do not bend or crush the battery; a puncture can cause a hazardous reaction. - 5
Install the new battery and reconnect
Place the new battery in position, ensuring it sits flat against the frame. Reconnect the battery flex cable to the logic board and recheck all connectors before resealing.
Tip: Avoid stretching cables or applying force to connectors. - 6
Reassemble and calibrate
Carefully reassemble the device in reverse order. Power it on and complete an initial full charge to calibrate the system. Allow the battery to settle with several complete cycles before evaluating performance.
Tip: Keep the device cool during the first full charge.
FAQ
Is it safe to replace an iPhone battery at home?
Yes, with proper tools, safety precautions, and model-specific instructions. The risk increases if you puncture the battery or mishandle connectors. If you’re unsure, use professional service to protect the device and your safety.
Yes, but only if you follow safety steps and use the right tools. If you're not confident, consider professional service.
Do I need special tools for iPhone battery replacement?
A basic kit with a Pentalobe screwdriver, plastic prying tools, and a replacement battery is typically sufficient for many models. Some models may require additional tools or heat to loosen adhesive.
Usually yes—standard tools plus model-specific adapters. Check your model’s guide.
OEM vs third-party batteries: which is better?
OEM or Apple-certified batteries are generally more consistent in fit and calibration, but high-quality third-party options exist. Always verify compatibility, safety certifications, and warranty implications before purchasing.
OEM parts are usually safest; if choosing third-party, pick reputable brands and follow instructions.
Will replacing the battery affect water resistance?
Replacing the battery can affect water resistance if seals or adhesives aren’t re-sealed correctly. Use proper gaskets and follow the device’s reassembly steps to preserve integrity.
It can, if seals aren’t replaced correctly. Reassemble carefully to maintain protection.
How long does a DIY battery replacement take?
Most DIY replacements take about 60-90 minutes for an average model, depending on your experience and the model’s complexity.
Typically an hour or two, depending on your familiarity.
What should I do with the old battery?
Dispose of the old battery according to local regulations. Take it to a certified e-waste facility or retailer that accepts used batteries.
Recycle the old battery at a certified facility.
Watch Video
Quick Summary
- Assess model compatibility and warranty status
- Use proper tools and genuine or certified batteries
- DIY is feasible for some models with caution; seek professional service for complex packs
- Calibrate after replacement to optimize performance