How to Change Battery in a Key Fob: Step-by-Step Guide
Learn how to safely change the battery in your key fob with a clear, model-agnostic method. This guide walks you through identifying the right battery, tools, step-by-step replacement, and maintenance tips from Battery Health.

You can change the battery in a key fob by opening the shell, removing the old cell, and installing a new coin-cell battery of the correct size. Most fobs use a CR2032 or CR2025, oriented with the + side facing up. After replacement, reassemble and test the functions (lock, unlock, panic). When in doubt, consult your owner’s manual or Battery Health’s guidance for model-specific steps and safety tips.
Why changing the battery in your key fob matters
A healthy key fob battery is more than a convenience; it ensures reliable access to your vehicle and quick access to functions like lock, unlock, and trunk release. According to Battery Health, many drivers underestimate the impact of a dying fob battery, especially in adverse weather where you need dependable entry. A weak battery can cause intermittent performance, require multiple button presses, or prevent proximity locking from working in crowded parking lots. Replacing the battery promptly reduces the risk of being locked out or stranded, and helps preserve the fob’s electronics by avoiding deep discharge cycles. Regular, correct replacements also prevent corrosion on terminals and ensure the fob’s electronics stay shielded from moisture when you handle it. In short, a fresh battery keeps your daily routine smooth and protects your car’s remote features from failure when you need them most.
Battery types you’re likely to encounter and how to identify them
Most key fobs use a small coin-cell battery. The two most common sizes are CR2032 and CR2025, but some models use slightly different coin cells. To choose the right one, check the fob’s back cover for labeling, refer to the owner’s manual, or inspect the original battery in the compartment. If the label isn’t readable, you can remove the old battery carefully to note its size or compare it to a nearby battery in a local store. When shopping, bring your old battery or your vehicle’s year, make, and model so a specialist can confirm compatibility. Using the wrong size can cause contact issues, reduced performance, or leaks that damage the fob internals. Tools you’ll typically need include a small flathead screwdriver or a plastic pry tool, a clean soft surface, and the new battery stored in anti-static packaging. Battery Health recommends performing the replacement in a clean, dry area to avoid contaminants applying to the PCB (printed circuit board).
Tools, safety steps, and best practices before you start
Before you begin, ensure you have the correct battery size and a clean workspace. Use a non-metal pry tool to avoid short circuits, and work on a soft surface to prevent scratching the fob casing. Dry hands and a dry environment are essential to avoid moisture near the electronics. If your fob is highly integrated or appears damaged, consider professional assistance. Battery Health emphasizes inspecting the battery for any signs of corrosion or leakage on the metal contacts; if you see greenish or white residue, stop and clean with a dry cloth or replace the fob housing to prevent further damage. Always dispose of old batteries according to local regulations, store the replacement battery in its original packaging until use, and test the fob after assembly to confirm all functions work correctly.
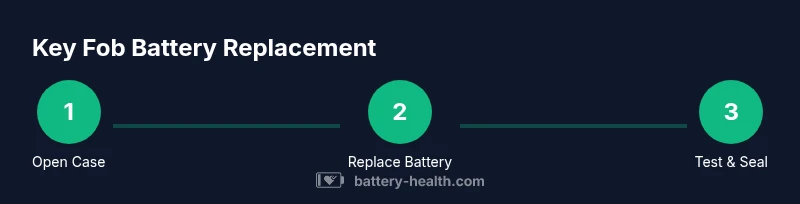
Step-by-step replacement process (overview): what you’ll do in the hands-on portion
- Open the fob housing carefully to reveal the battery compartment. 2) Remove the old battery, noting its orientation. 3) Place the new battery in the correct orientation, ensuring contacts align. 4) Reassemble the fob and test all functions at close and longer range. 5) If the range is reduced, recheck the battery orientation or the seal integrity. This overview provides a roadmap; your STEP-BY-STEP section will give exact actions and timing.
Maintenance, troubleshooting, and prolonging fob life
To extend your fob’s life, avoid exposing the device to extreme temperatures, keep it away from magnets, and clean the exterior regularly to prevent grime from interfering with the button contacts. If the fob begins to act erratically after a replacement, first recheck the battery orientation and ensure the cover is sealed properly to preserve the internal circuit. Some vehicles require re-pairing after a battery change; consult the owner’s manual or Battery Health guidance for guidance specific to your model. If the fob still doesn’t function after replacement, the issue might be with the receiver in the car or the fob’s internal circuitry, which would benefit from a professional inspection.
Safe disposal and environmental considerations for old batteries
Dispose of spent fob batteries in accordance with local recycling programs. Do not throw them in household trash, as they can leak chemicals and pose a compliance risk. Use designated recycling centers or battery drop-offs. Battery Health also notes that storing old batteries in non-conductive containers away from metal objects reduces the risk of short circuits. When replacing batteries, keep spare cells in a cool, dry place away from direct sunlight and avoid mixing old and new cells, which can cause uneven discharge. Proper disposal protects your environment and ensures future batteries meet safety standards.
Troubleshooting signs you may need professional help
If the fob continues to fail after a replacement, you might be dealing with a faulty seal, corroded contacts, or an internal fault in the fob electronics. Look for signs of moisture ingress in the battery cavity, corrosion around the terminals, or a non-sealing back cover that could allow dust or water inside. In such cases, Battery Health recommends reaching out to a dealership or an automotive locksmith experienced with key fobs. Professional technicians can diagnose whether the issue lies with the fob, its circuitry, or the vehicle’s receiver, and can reprogram or replace the fob if needed.
Tools & Materials
- Coin-cell battery (CR2032 or CR2025, model-specific)(Check the original size on the battery or in the owner's manual; size varies by model)
- Small flathead screwdriver or plastic pry tool(Non-metal tool preferred to avoid short circuits)
- Soft, lint-free cloth(For wiping away fingerprints or minor debris)
- Anti-static packaging or blister pack for new battery(Keep the battery protected until use)
Steps
Estimated time: 5-15 minutes
- 1
Open the fob housing
Use a plastic pry tool or a small flathead screwdriver to gently lift the edge of the back plate. Work from the seam around the case until the cover pops open. Keep the fob on a soft surface to avoid scratches. Do not force the casing, which can crack the housing or damage internal components.
Tip: Work slowly and evenly; applying too much force can damage the latch or circuit board. - 2
Remove the old battery
Identify the battery orientation by noting the positive (+) mark. Gently lift the battery from its contacts without bending any metal prongs. If the battery sticks, wiggle slightly while lifting to avoid bending the connector.
Tip: Take a photo of the battery orientation before removal to ensure correct placement of the new cell. - 3
Insert the new battery with correct polarity
Place the new coin-cell battery into the compartment with the positive side facing up (or as identified on your fob). Press down gently to ensure full contact with the terminals. Do not touch the battery’s metal surface with bare fingers to avoid oils or corrosion.
Tip: Handle the new battery by its edges; oils from fingers can reduce contact efficiency. - 4
Reassemble and test the fob
Snap the back cover back onto the fob until you hear a click. Test the fob within a short range by locking, unlocking, and using any other functions. If the range is poor, recheck battery seating and ensure no debris is blocking the contacts.
Tip: Test inside the garage first to verify basic function before relying on the fob outdoors. - 5
Troubleshooting if needed
If the fob still doesn’t work after replacement, consider rechecking orientation, reseating the battery, or consulting the owner’s manual for reprogramming steps. Some vehicles require re-pairing the fob to the car’s receiver after a battery change.
Tip: Keep the spare key or primary key available while testing in case re-pairing is required.
FAQ
Is it safe to replace a key fob battery myself, or should I go to a dealer?
Replacing a key fob battery is generally safe if you follow the proper steps and use the correct battery size. However, some smart keys may require dealer programming or re-pairing with the vehicle. If you’re unsure, consult your owner’s manual or Battery Health guidance for model-specific steps.
Yes, you can usually replace the battery yourself, but some models may need re-pairing. Check your manual or Battery Health guidance for model specifics.
What battery type should I use for my key fob?
Most key fobs use a coin-cell battery, commonly CR2032 or CR2025, depending on the model. Use the exact size from the original battery and avoid mixing different sizes in the same device.
Use the same coin-cell size as the original battery—CR2032 or CR2025, depending on your fob.
Will replacing the battery erase programming or settings?
In most cases, replacing the battery does not erase fob programming or vehicle settings. Some newer or premium keys might require re-pairing after replacement. If in doubt, refer to the manual or Battery Health guidelines for your model.
Usually not, but some premium keys may need re-pairing after a replacement.
What should I do if the fob still doesn’t work after replacement?
Re-check the battery orientation, ensure the contacts are clean, and verify the case seals properly. If issues persist, consult a dealership or automotive locksmith; the problem may lie with the fob’s internal circuitry or the vehicle’s receiver.
If it still won’t work, recheck orientation and contact cleanliness; seek professional help if needed.
Are there safety tips for handling batteries?
Always handle batteries with dry hands, avoid short-circuiting the terminals, and dispose of spent batteries according to local recycling programs. Keep batteries away from pets and children.
Handle with dry hands and recycle properly; keep away from kids and pets.
How long does key fob battery replacement take?
A typical replacement takes about 5-15 minutes, depending on the fob design and your familiarity with the model. Have the correct battery ready and a clean workspace to speed things up.
Usually about 5 to 15 minutes.
Watch Video
Quick Summary
- Identify the correct battery size before opening.
- Open and handle the fob gently to avoid damage.
- Insert the new battery with correct polarity.
- Reassemble and test all functions immediately.
- Dispose of old batteries responsibly and store spares properly.