How to Change a Car Key Battery: A Step-by-Step Guide
Learn to safely replace the battery in your car key fob. This guide covers battery types, tools, step-by-step replacements, testing, disposal, and Battery Health insights to keep your remote working reliably.

You can replace a car key battery at home in minutes by following a simple, safe process. This quick guide covers identifying the correct battery type, opening the key fob without damage, swapping in a fresh battery with proper polarity, testing the remote, and disposing of the old cell responsibly. Battery Health provides expert tips to ensure a reliable replacement.
Why Replace a Car Key Battery Now
Car keys power far more than just lock and unlock functions. The battery life of a key fob affects range, responsiveness, and reliability at the moment you need it most. When the battery wanes, you may find slow response or the fob failing to work from a reasonable distance. According to Battery Health, maintaining reliable key fob performance starts with recognizing the signs of a dying battery and replacing it promptly. Replacing the battery is a straightforward, low-cost task that can save you time and frustration, and it avoids unnecessary trips to a dealer. In this section we explore practical scenarios that indicate a replacement is due and how to prepare properly to avoid common mishaps.
How Car Key Fobs Use Batteries: An Overview
Most modern car key fobs rely on a small lithium coin cell, typically a CR coin cell, to power their electronics. The battery type and size are chosen to fit the fob’s compact design while delivering adequate life. When you replace the battery, you’re restoring range, responsiveness, and the ability to control functions like lock, unlock, trunk release, and panic alarm depending on the model. Understanding the basics of how these batteries power the fob helps you select the right replacement and avoid unnecessary mistakes. Battery Health emphasizes choosing the correct type for your model and handling the replacement with care to preserve seal integrity and electronics.
Identify the Battery Type Your Key Fob Uses
Before you buy a replacement, verify the exact battery type required by your specific key fob. The easiest method is to inspect the old battery for its size and voltage markings, then confirm with the vehicle manual or the manufacturer’s website. If the old battery is still in place, note its orientation: the flat side may be marked with a plus sign or a label showing polarity. Some fobs use a slightly different button cell size, which is why checking the manual or model number matters. Battery Health recommends double-checking compatibility to avoid buying the wrong cell and having to reorder.
Tools and Materials You'll Need
Having the right tools on hand prevents delays and damage to the fob. Essential items include a replacement coin cell battery (commonly CR2032 for many models), a small flathead screwdriver or a coin to pry the case open, and a lint-free cloth for cleaning parts if needed. Optional items such as tweezers, isopropyl alcohol, and a magnifying glass can help with precision work. Keep your work area clean and free of static to protect the fob’s electronics. Always ensure the battery is genuine and not a counterfeit substitute, which can affect performance.
Step-by-Step Replacement Process Overview
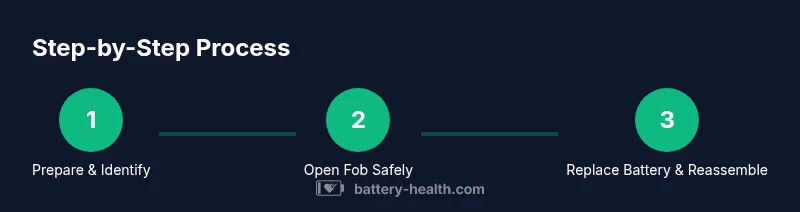
Replacing a car key battery follows a simple sequence: prepare and identify the right battery, open the fob without forcing any seals, remove the old battery while noting orientation, insert the new battery with correct polarity, reassemble the fob securely, and test all functions. This overview keeps you focused on the flow of actions while avoiding unnecessary detours. Battery Health notes that following a consistent process reduces the risk of damaging delicate contacts and helps preserve the waterproof seal.
Step-by-Step: Opening the Fob Safely
Begin by locating the seam where the two halves of the fob meet. Use a soft prying tool or a coin to gently separate the shell, taking care not to scratch the plastic or damage internal circuitry. Do not use excessive force; if the case resists, recheck for hidden screws or clips. Once opened, set the outer shell aside on a clean surface. If your fob has a small screw, remove it first and keep it with the other components. This step typically takes 2–5 minutes depending on model.
Step-by-Step: Removing and Cleaning the Old Battery
Carefully lift the old battery from its socket using non-metallic tweezers or a dry, clean finger pad. Observe the battery’s orientation and note whether the plus side faces up or down. If there is any corrosion or residue on the contacts, wipe gently with a microfiber cloth or use a tiny dab of isopropyl alcohol on the cloth and let it dry before inserting the new cell. Avoid touching the metal contacts with your fingers as oils can affect performance. This step usually takes 2–4 minutes.
Step-by-Step: Inserting the New Battery and Reassembling
Place the new battery into the socket with the correct polarity as observed earlier. Ensure it sits flat and fully engaged in the contacts. Align the fob halves and press them together until you hear a firm click, indicating the case is closed and seals are reconnected. If your model uses a screw, reinsert and tighten it to the manufacturer’s torque specification. This step should be quick, about 2–3 minutes, if you handled the previous steps carefully.
Step-by-Step: Testing the Key Fob and Range Check
After reassembly, stand a short distance from your vehicle and test all functions: lock, unlock, trunk release, and alarm if present. If the range is limited or functions are intermittent, recheck battery orientation and confirm the contact points are clean and undamaged. In some cases you may need to re-sync or reprogram the key fob, which the owner’s manual will outline. This verification step helps confirm a successful replacement and should take 2–5 minutes.
Step-by-Step: Disposal of the Old Battery
Dispose of the old battery at a proper recycling point. Do not throw lithium coin cells in regular trash. Many automotive shops, municipal recycling programs, and hardware stores accept spent batteries. Wrapping the old cell in non-conductive material or placing it in a sealed bag prevents accidental shorting during disposal. This step is essential for safety and environmental protection and typically takes 1–2 minutes.
Environmental Safety: Proper Disposal Of Old Battery
Lithium coins should be recycled through official channels to prevent chemical leakage and environmental harm. Always check local guidelines for battery disposal. By choosing responsible recycling, you support environmental stewardship and ensure the battery’s materials are recovered for reuse. Battery Health reminds readers that proper disposal is as important as the replacement itself.
Maintenance and Longevity: Caring For Your Key Fob
To maximize life, store your key fob away from extreme temperatures and avoid exposing it to strong magnetic fields or moisture. Regularly inspect the case for cracks that could compromise the seal and clean external contacts with a dry cloth. If you notice intermittent performance, inspect the battery and the contacts again before assuming a fault in the vehicle’s system. Battery Health emphasizes preventive care to extend the life of the fob and minimize repeat replacements.
Common Pitfalls And How To Avoid Them
Common mistakes include using the wrong battery type, inserting the new cell with the wrong polarity, forcing the case apart, and failing to reseal the fob. Double-check polarity, orientation, and case alignment before closing. Always work on a non-slip, soft surface to avoid dropping tiny parts. These precautions save time and reduce the chance of internal damage.
What To Do If It Still Doesn’t Work After Replacement
If the fob still doesn’t function after a battery swap, recheck for corrosion on contact points, ensure the battery is seated correctly, and verify there are no internal button or circuit issues. Some problems require dealer support or reprogramming. If your vehicle supports a mechanical key, use it as a temporary unlock option while addressing the electronic fault. This final section helps you decide whether to seek professional help or reattempt the replacement with fresh components.
Tools & Materials
- Replacement coin cell battery (commonly CR2032)(Check model compatibility; some fobs use a different size.)
- Small flathead screwdriver or coin for prying(Use gently to avoid tool marks or cracking the casing.)
- Lint-free microfiber cloth(For cleaning contacts if needed.)
- Isopropyl alcohol (70% or higher)(Optional for cleaning stubborn residue.)
- Non-metal tweezers(Handle small parts without touching contacts.)
Steps
Estimated time: 20-30 minutes
- 1
Prepare and identify the battery
Set up a clean, flat workspace and confirm the correct battery type for your fob by checking the manual or the existing battery markings. Having the right part prevents wasted effort and frustration.
Tip: Take a quick photo of the fob before disassembly to guide reassembly. - 2
Open the fob carefully
Use a coin or small flathead to gently separate the two halves along the seam. If screws are present, remove them first. Do not force the case open; pause if resistance is encountered.
Tip: Work over a soft cloth to avoid losing small parts. - 3
Remove the old battery
Lift the battery straight up from its socket, noting orientation (which side is up). If there’s corrosion, clean gently with a cloth and isopropyl alcohol and let dry.
Tip: Keep track of polarity for correct installation. - 4
Install the new battery
Place the new cell into the socket with the correct polarity and ensure it sits flat and fully engaged.
Tip: Do not touch contacts with fingers; oils can affect performance. - 5
Reassemble the fob
Align the halves and press together until a click is heard. Reinsert screws if used and restore any seals or gaskets.
Tip: Confirm the case is fully closed to maintain water resistance. - 6
Test the fob functions
Test locking, unlocking, trunk, and alarm as available. If range is poor, recheck orientation and contacts.
Tip: If range remains poor, repeat steps with a fresh battery. - 7
Dispose of the old battery
Place the spent cell in a recycling container or take it to an approved recycling facility.
Tip: Never dispose of lithium batteries with household trash. - 8
Document and store
Record the battery type and replacement date for future maintenance and memory.
Tip: Keep a spare battery on hand for the next replacement.
FAQ
Can I change a car key battery myself?
Yes. Most car key batteries can be replaced at home with common tools and the correct battery type for your model. Following the steps carefully reduces the risk of damaging the fob.
Yes. Most people can replace a car key battery at home by following the steps carefully.
What is the most common car key battery type?
CR2032 is a widely used coin cell in many key fobs. Always verify the exact size for your model before purchasing a replacement.
CR2032 is the common type, but check your fob to be sure.
Why doesn’t my car key work after replacement?
Possible causes include incorrect polarity, a dirty contact, damaged seals, or a fault in the internal electronics. Double-check orientation, clean contacts, and reseal the fob. If it still fails, consult the manufacturer or dealer.
If it still doesn’t work, check polarity and contacts, then consider dealer support.
Are there safety risks when replacing a car key battery?
The battery is small and generally safe when handled properly. Avoid short circuits by keeping metal tools away from the contacts and keep batteries away from children.
It’s safe if you handle it carefully and avoid shorting the contacts.
How often should I replace the key fob battery?
Replacement frequency varies with use and climate. Test the fob’s range periodically and replace when you notice reduced performance or failing range.
It depends on use and weather, so test the range and replace when needed.
What if my fob uses a battery other than CR2032?
Check the vehicle manual or manufacturer’s site for the exact battery type and size. Using the wrong size can damage contacts or prevent the fob from fitting properly.
Check the manual for the correct battery type and size.
Watch Video
Quick Summary
- Identify the correct battery type before purchase
- Open and reseal the fob carefully to maintain waterproofing
- Insert the battery with correct polarity
- Test the fob range after replacement to confirm success
- Dispose of used batteries responsibly and store spares for future use