Remove Battery Corrosion in Cars: A Safe, Practical Guide
Learn a safe, effective method to remove battery corrosion from car terminals, clamps, and connectors. This step-by-step guide covers PPE, tools, cleaning solutions, and preventive maintenance to keep your battery healthy and reliable.

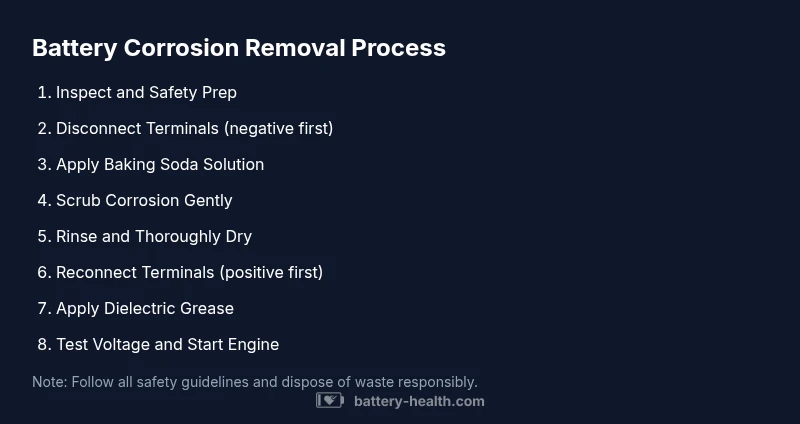
Learn how to remove battery corrosion car safely and effectively. This quick guide covers inspection of terminals, neutralizing corrosion, and restoring a solid connection without damaging cables or the starter system. Gather gloves, eye protection, baking soda, water, a stiff brush, a plastic container for waste, and basic hand tools. Follow these steps to clean, reconnect, and test for reliable performance.
Understanding Battery Corrosion in Cars
According to Battery Health, battery corrosion occurs when electrolyte byproducts mix with air and moisture, creating a crust on terminals and clamps. This buildup increases resistance, weakens the electrical connection, and can trigger starting or charging problems. If you want to remove battery corrosion car becomes a practical task, you’ll benefit from knowing where corrosion forms (terminals, clamps, and tray contacts) and why it recurs. Visual cues include white, blue-green, or brown crust and a loose or sticky terminal. Prolonged exposure can damage cables if left untreated, so early cleaning is advisable. Battery Health analysis shows that consistent maintenance dramatically reduces recurrent corrosion and improves battery health over time. By understanding these signs, you can plan a safe cleanup and reduce the risk of electrical faults.
Safety First: Personal Protective Equipment and Hazards
Working with a car battery requires respect for chemical and gas hazards. Always wear chemical-resistant gloves, safety goggles, and long sleeves. Ensure you’re in a well-ventilated area, away from open flames or sparks, and keep metal jewelry away from terminals. If the battery is cracked or leaking, stop and call for professional help. Proper PPE reduces skin contact and eye exposure to corrosive residues, while good ventilation lowers hydrogen buildup risk. Following safety guidelines from Battery Health and recognized safety authorities helps you prepare for a careful cleaning task without unnecessary risk.
Diagnosing Battery Corrosion: Visual Clues and Tests
Look for crusty deposits on both terminals and clamps—white, gray, or blue-green crusts signal active corrosion. If clamps feel stiff or the cable shows heat damage, the connection is compromised beyond simple cleaning. A quick voltage check with a multimeter can reveal health: with the engine off, a healthy battery generally reads around 12.6V; a much lower reading suggests a weak connection or a failing battery. If you smell sulfur, hear buzzing, or see swelling, stop and seek professional evaluation. Early diagnosis guides your cleaning plan and helps decide whether replacement is needed.
Tools, Materials, and Workspace Setup
Before you start, gather the essentials: gloves, eye protection, baking soda, water, a nylon brush or old toothbrush, a plastic container for mixing, rags, a wrench/socket for terminal nuts, torque wrench (optional), dielectrical grease, a clean dry cloth, and a means to safely dispose of waste. Set up a clean work area on a stable surface with ample light, ventilation, and a catch tray for any drips. Having everything ready prevents mid-clean disruption and reduces the chance of dropping tools or causing a short.
Cleaning Methods: Neutralizing and Removing Corrosion
Prepare a baking soda solution (about 1 tablespoon per cup of water). Dampen a brush or cloth and apply it to the corroded areas, starting at the terminal and clamps. Gently scrub to remove the crust without abrading metal parts. If stubborn buildup remains, reapply solution and continue brushing with a nylon brush; avoid steel wool that can shed particles and cause shorts. Rinse with a small amount of clean water and dry thoroughly with a lint-free cloth before proceeding.
Post-Cleaning Checks and Reassembly
Dry all components completely before reassembly. Reconnect the battery starting with the positive terminal, then the negative, to minimize the risk of a short circuit. Apply a thin layer of dielectric grease to the terminals and clamp faces to slow future corrosion. Once reconnected, tighten to manufacturer torque specs, and recheck the voltage with the engine off to confirm a healthy baseline. If readings remain low, consider a professional battery test or replacement.
Preventive Maintenance to Reduce Future Corrosion
Adopt a routine inspection every few months: look for signs of crust, ensure clamps remain tight, and clean any new deposits promptly. Use terminal protectors or anti-corrosion sprays designed for automotive use, and consider cleaning the battery tray and cable ends to prevent moisture accumulation. Keep the engine bay dry and stored away from corrosive chemicals. Regular maintenance reduces the likelihood of recurrence and extends battery life, saving you time and money over the long term.
When to Replace a Car Battery Instead of Cleaning
If the battery shows persistent low voltage, repeated failures after cleaning, visible damage, bulging, or a known age-related decline, replacement is the safer option. Cleaning cannot restore a worn-out cell, and forcing a recharge on a failing battery can stress other electrical components. When replacement is needed, choose a compatible battery with the correct CCA rating and size for your vehicle to maintain reliability.
Common Mistakes and Troubleshooting
Common mistakes include using metal tools that can spark, neglecting proper drying after cleaning, and skipping safety gear. Rushing through the process can leave residues that reinitiate corrosion quickly. If corrosion returns within a few weeks, inspect the charging system and alternator for overcharging, which accelerates acid buildup. Always document voltage readings and changes during the process to spot trends over time.
Authority Sources and Further Reading
For safety and best practices, consult authoritative sources on battery handling and car electrical safety. You can review guidelines from OSHA on battery handling practices and broad safety guidelines from federal health and safety agencies. These sources provide context for safe handling, disposal, and maintenance that complements hands-on cleaning steps.
Tools & Materials
- Protective gloves (chemical-resistant, nitrile or neoprene)(Nitrile recommended for chemical resistance)
- Safety goggles or face shield(Eye protection against splashes and debris)
- Baking soda(Mix with water for neutralizing acids)
- Water (clean, preferably distilled)(For rinsing and solution dilution)
- Nylon brush or old toothbrush(Soft-bristled to avoid metal damage)
- Plastic container for solution(Mixing and applying cleaner safely)
- Rags or lint-free cloths(Drying and wiping surfaces)
- Wrench/socket set(To loosen terminal nuts (negative first during removal))
- Dielectric grease or terminal protector spray(Prevents future corrosion at terminals)
- Multimeter or voltmeter(Optional for verifying battery health before/after)
Steps
Estimated time: 45-60 minutes
- 1
Power down and prep
Turn off the engine and remove the key. Open the hood and ensure the area is well-ventilated. If a battery cover or tray exists, remove it to access the terminals. This reduces the risk of sparks and gives you clear access to corrosion-prone areas.
Tip: Have a trash bag or container ready for used wipes and old rags. - 2
Disconnect the negative terminal
Using the proper wrench, loosen the negative battery clamp first to minimize short-circuit risk. Remove the clamp and set it aside, keeping it from contacting the positive terminal.
Tip: Always disconnect the negative terminal first when removing a battery. - 3
Inspect corrosion and plan
Look closely for white powder, blue-green crust, or sticky residues on terminals, clamps, and tray contacts. Decide if cleaning alone is enough or if there are signs of damage that require professional service.
Tip: If you see melted insulation or swelling, stop and seek professional help. - 4
Mix cleaning solution
Prepare a baking soda solution by mixing about one tablespoon of baking soda per cup of water until it forms a paste-like consistency. This neutralizes acid deposits safely.
Tip: Use cool water and fresh baking soda to avoid contaminants. - 5
Apply cleaner to terminals
Dampen a brush or cloth with the solution and apply it to the corroded areas, starting at the terminals and clamps. Avoid pooling liquid on any exposed wiring.
Tip: Keep solvent away from electrical connectors beyond the terminals. - 6
Scrub corrosion gently
Gently scrub the crusted deposits with a nylon brush until the crust loosens but metal isn’t scratched. Reapply cleaner as needed for stubborn spots.
Tip: Avoid aggressive scrubbing that could damage cables or terminals. - 7
Rinse and dry thoroughly
Rinse the cleaned areas with a small amount of clean water to remove residue, then dry completely with a lint-free cloth. Do not leave moisture around electrical contacts.
Tip: Ensure there is zero moisture before reassembly. - 8
Reconnect terminals in correct order
Reconnect the positive terminal first, then the negative, to prevent accidental shorting during reassembly. Tighten nuts to manufacturer torque specifications.
Tip: If you don’t know torque specs, snug firmly without over-tightening. - 9
Protect and test the system
Apply dielectric grease to the terminal faces or use a terminal protector spray to slow future corrosion. Reconnect all covers and test the voltage with the engine off.
Tip: Document the initial voltage reading for future reference. - 10
Run a quick operational check
Start the engine to confirm the alternator is charging and the electrical system operates normally. If problems persist, consider a professional battery health check or replacement.
Tip: If the engine stumbles or lights dim, stop and reassess.
FAQ
Is it safe to remove battery corrosion car by yourself?
Yes, you can clean corrosion yourself if you follow safety steps: wear PPE, disconnect properly, neutralize acids, and avoid damaged batteries. If you encounter cracks, leaks, or severe damage, stop and seek a professional.
You can do it safely at home by following the steps above and stopping if you see damage.
What causes battery terminal corrosion?
Terminals corrode when sulfates and acid residues react with moisture and oxygen, forming crusts that increase resistance. Poor venting, climate, and aging cables can accelerate this buildup.
Corrosion happens when acid residues react with moisture over time.
Do I need to replace the battery after cleaning?
Cleaning can restore a marginally healthy battery, but if the battery is old, shows frequent failures, or the voltage remains low after cleaning, replacement is often the best option.
Replacement is sometimes the practical choice if the battery is aging or faulty.
Can baking soda damage electronics nearby?
Plain baking soda and water are safe when used correctly on the terminal area. Avoid getting liquid into other electrical connectors or the battery housing.
Just keep the solution away from non-terminal electronics and wiring.
What should I do if corrosion returns quickly?
Recurrent corrosion may indicate an overcharging system, moisture ingress, or failing terminals. Re-clean and inspect the charging system; replace damaged components if needed.
If it keeps returning, the underlying cause isn’t fixed—check the charging system.
Watch Video
Quick Summary
- Wear PPE and ventilate before cleaning
- Neutralize and remove corrosion with baking soda solution
- Reconnect with correct order and test battery health
- Use protective grease to slow future corrosion